Loading ...
Loading ...
Loading ...
15
4. Mount the range hood onto the mounting screws. When the hood has been
leveled, secure unit by tightening screws.
a
b
b
a Mounting Screws
b Mounting Slots
NOTE: The vent cover needs to be placed on some styles of range hoods before
you tighten the screws completely to secure the lips of the vent cover.
5. Attach 6" metal vent duct to the hood duct connector. Ensure that the damper
aps are free to open. Seal all seams.
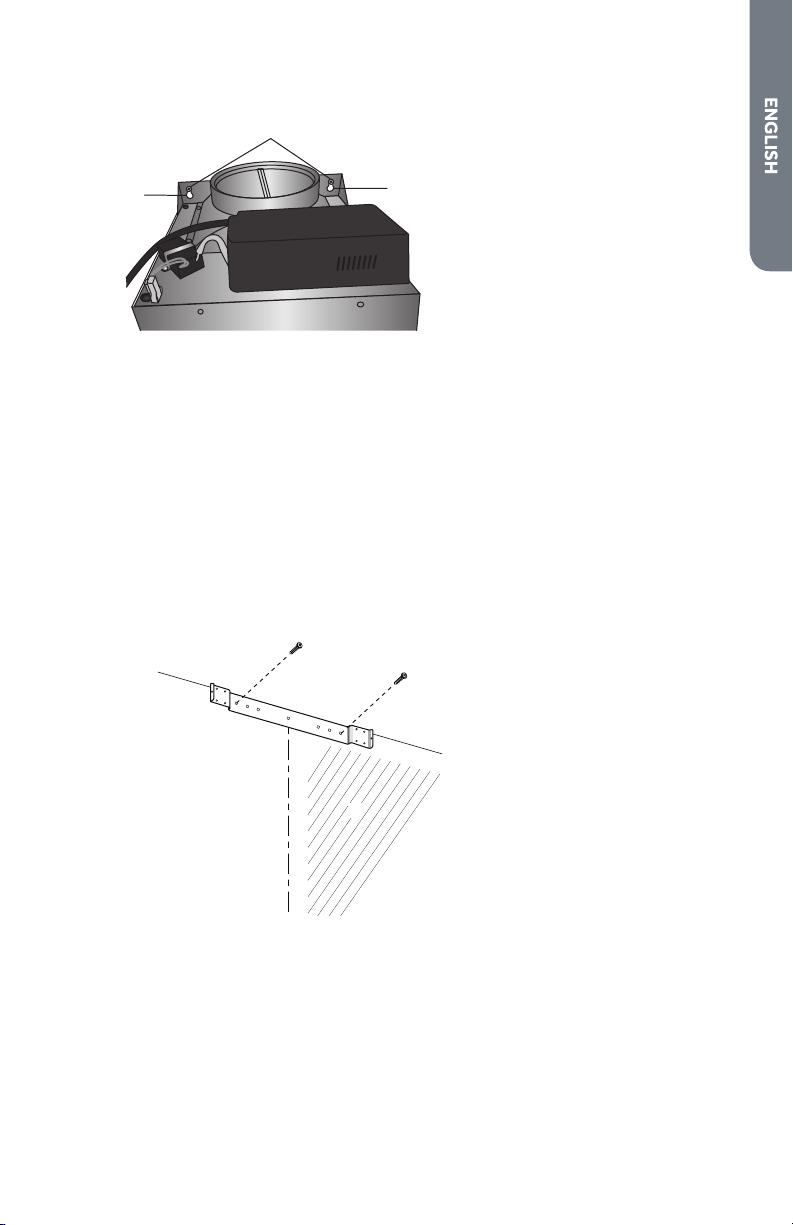
STEP 7 - INSTALL VENT COVERS
IMPORTANT: For Non-Vented (recirculating) installations, skip steps 1 and 2.
1. Center the mounting bracket on the plumb line, at the edge of the ceiling.
2. Using screws appropriate to the wall material, attach the bracket to the wall.
NOTE: If your ceiling is not even, mount the wall bracket at the lowest level
point.
a
b
c
a Ceiling
b Wall
c Plumb Line
3. Carefully loosen but do not separate the upper and lower sections of the vent
cover. The inside piece is the upper section and attaches to the wall at the
ceiling. The outside piece is the bottom section that rests on the range hood.
NOTE: Remove the white lm from the vent covers, as needed, prior to
assembly and installation. Handle the vent covers gently to avoid scratching the
nish.
Loading ...
Loading ...
Loading ...