Loading ...
Loading ...
Loading ...
13
5. Install vent between the transition and the deector.
NOTE: To make vent installation easier, temporarily remove the deector from
the mounting bracket and replace after vent section is in place.
6. Seal all connections with vent clamps.
NOTE: After installing the range hood, complete the non-vented (recirculating)
installation by installing charcoal lters (not provided). See the “Charcoal Filters”
section for instructions.
STEP 4 - INSTALL CROSS BRACES
It is recommended that you install cross braces behind the drywall, between two wall
studs, at the level of the range hood mounting screws.
1. Measure the distance from the bottom of the range hood to the top of the
mounting holes. Mark this distance by drawing a horizontal line (Mounting
Height) across the plumb line.
2. Measure the distance between the two mounting holes, on the back of the range
hood. Center this measurement on the height line so that half the measurement
is on each side of the plumb line, and then mark the two locations for the range
hood mounting holes.
3. Behind the drywall and any backsplash material, install cross braces between the
wall studs at the level of the mounting screw holes.
a
d
b
c
a Wall Studs
b Cross Braces
c Drywall
d Mounting Holes
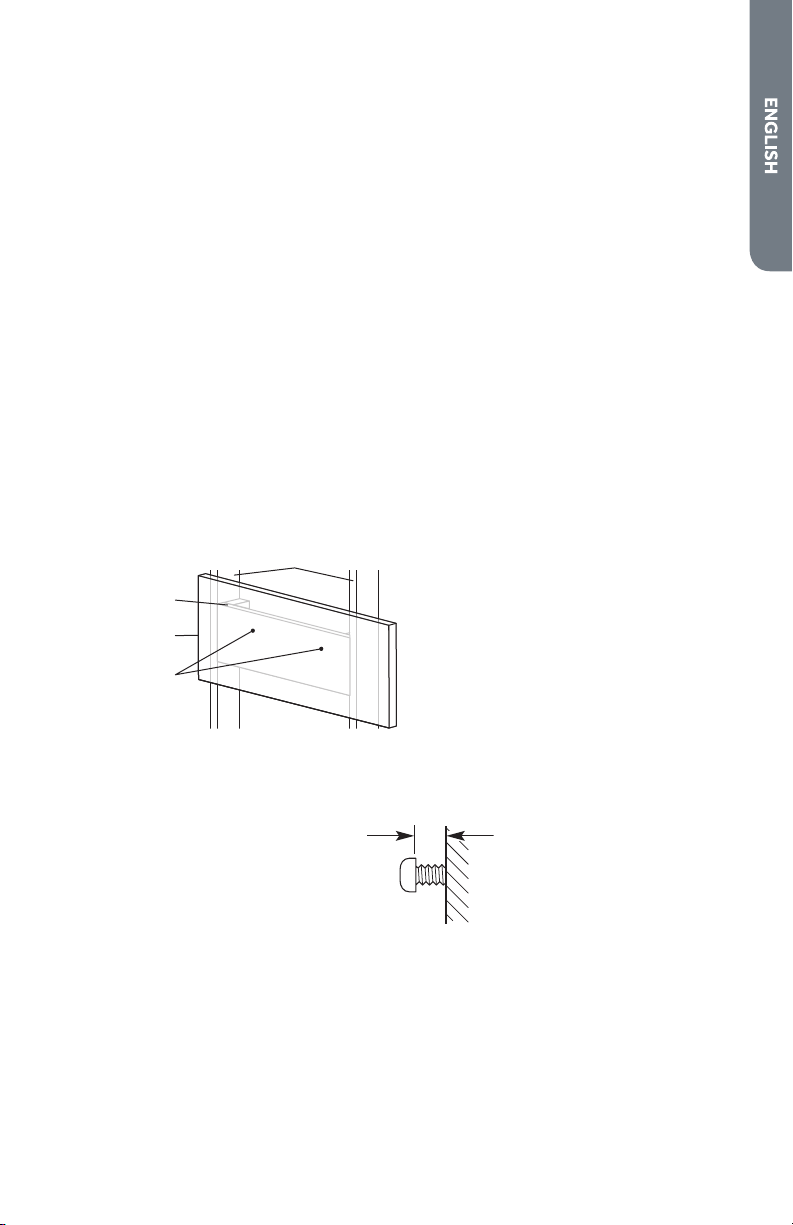
4. Insert the mounting screws through the marked mounting holes, leaving about
¼" (6.4 mm) of the thread exposed. Ensure you use the appropriate type of
screws for your wall/cross braces.
¼"
(6.4 mm)
NOTE: Some wall/screw types will require pre-drilling a pilot hole before
inserting the screw.
STEP 5 - INSTALL ELECTRICAL CONNECTION
1. Install a grounded 3 prong 110/120V receptacle on the wall within the
dimensions of the vent cover.
NOTE: All electrical wiring must be done by a qualied electrician and in
accordance with all applicable codes and standards. This range hood must
be properly grounded. Removing the plug from the power cord will void the
warranty of the range hood.
Loading ...
Loading ...
Loading ...