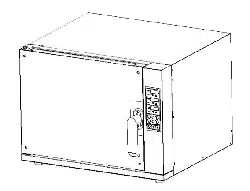
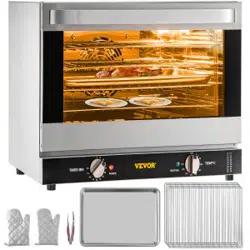
Lighting switch is for controlling the internal light.
Power switch is for starting the digital board.
Steam switch is for controlling the magnetic value to draw water in for steaming.
The baking program can preset 6 different programs of temperature and timing for different food.
can adjust the parameter of the temperature or timing.
Timing switch is for controlling the timer.
Time display board is for showing the time.
Temperature display board is for showing the temperature of the grill or the convection.
Convection switch is for controlling the convection system.
Grill switch is for controlling the grill element.
Function
Circulation heating, and the temperature is in the form of convection motion when cooking, which make the food get heated more evenly.
99 minutes timer.
Surface heating function is optional.
Spray function is applicable.
Machine illustration diagram
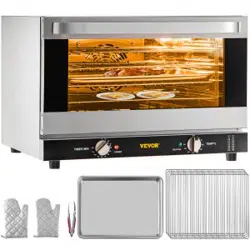
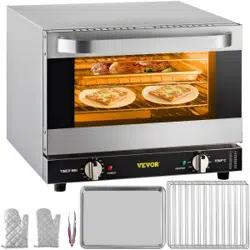
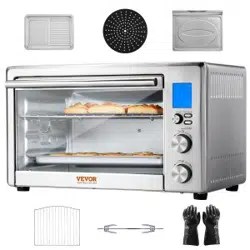
Product outline:
Installation instruction
1. All the electrical power unit and circuit connection must be installed by qualified electrician with safety standard
2. Connection must be based on requirement.
3. Make sure the rubber feet have been installed securely.
4. Product should be placed in a well ventilated room on solid platform, and we suggest to leave at least 10cm space between the product and the wall or barriers. Also place the product away from the combustible materials and equipped with a fire extinguisher.
5. Remove the packaging film off the surface.
6. The power wire should be connected in accordance with electrical safety standards. Make sure the voltage and frequency conform to the parameter. And please install a double pole switch before connection. When the product working, the voltage error should be under ±10% (PS: the product must be connected to ground.)
7. Connect the cable to the power supply fixed by using a screwdriver according to the connection diagram, then loosen the screw inside the power point and plug the cable in, make sure the sheet copper compress the power line tightly. If the connection is incorrect, it may cause joint heating and burning off the power cord.
8. Connect the water inlet behind the case to the water pipe with the configured bellows, and add a strainer on the water pipe joint in case of magnetic value block. Also there is an exhaust pipe behind the case for needless steam to exhaust.
Operation instruction
1. Time control operation (When using the timing function, the timer will also act as power supply, to control the thermostats and heating elements to work, so please make sure you have turn the power switch to “OFF” before using the timer.)
1.1.The baking time can be controlled within 0~120 minutes. The indicator light on when the oven starts working.
1.2.Turn the timer clockwise to the desired time.
1.3.After setting, the timer will count backwards to zero, then the power supply automatically off with a “chink” alarm, also the indicator light off at the same time.
1.4.Cooking time depends on the amount of food, the more the food are, the longer the time required.
2. Top heating operation.
2.1.The top heating element is controlled by the corresponding thermostat and timer.
2.2.Turn the timer knob clockwise to set the needed time.
2.3.Turn the thermostat knob clockwise to set the needed temperature, meanwhile, the indicator light of the top heating element on(temperature range between0~350℃)
2.4.When the temperature reach the set temperature, the indicator light off, and the heating element stop heating, when the temperature is lower than the set temperature of a certain value, the indicator light on, and the heating element starts heating. All this process is working in an automatic cycle
3. Heated air convection operation.
3.1.The function of air convection is controlled by thermostat and timer at the same time.
3.2.Turn the timer clockwise to your desired time between 0~90min.
3.3.Turn the thermostat clockwise to your desired temperature between 0~350℃, and the indicator light on at the same time.
3.4.When the temperature reaches the set temperature, the indicator light off and the heating element stop heating. If the temperature is below the set temperature, the heating element will be automatically reheated and the indicator light on.
4. Spray function operation.
4.1.Spray function can only be used when using the air convection function, which can turn the spray into steam in the hot chamber.
4.2.When using the spray function, the temperature in the oven must reach 120℃at least.
4.3.Press the button of the spray function, the water would be sprayed over the heating element through the fan blade, and produce steam in the chamber.
4.4.The capacity of the steam is depend on how long you pressing the spray function button, but please be careful don’t pressing the button over 5 seconds.
4.5.The required amount of spray is decided by the cook according to what he cooks
Attention: The spray function can only be used while the timer and thermostat of the air convection are in operation.
Warning
1. If you want to clean,repair or move the machine, please pull out the plug first.
2. Please don’t touch the switch or plug with wet hand.
3. The machine can’t be flushed directly, and please be careful don’t let the water flow into the switch when cleaning.
4. Keep the children from touching or using the machine.
5. The ground wire must be connected, all the connection must be reinstated after maintenance.
Maintenance
1. Please pull out the plug first before maintenance, and clean it after cooling down the machine.
2. For daily cleaning, you can use a dry cloth to wipe off the grease on the chamber, don’t flush the chamber directly. For the baking stone cleaning, please take out the stone, use a fur blush to clean its surface, and rinse it with water and dry it. (Don’t use any cleanser essence to clean the baking stone, because the stone can strongly absorb water, so that the cleanser would be absorbed at the same time, it may affect the flavor of the food.)
3. We suggest maintain the machine by qualified electrician once in a month.
4. User need to know
4.1.When doing maintenance please first pull out the plug.
4.2.Before cleaning, please first cool down the chamber, and please don’t use acid cleanser for cleaning.
4.3.Only qualified staff can use the machine.
4.4.Operator should read this manual to learn the function and operating of the oven before using.
4.5.Please keep this manual for further reference.
4.6.This machine can be only used for roasting and baking food, and it isn’t applicable for any other using. And the thermostat can adjust the temperature between 20~350℃.
5. The oven is applicable for baking fresh or freeze flour products or meat.
6. Each baking plate should have 4cm space between during cooking, and please don’t place too much food on it to keep the hot air circulating.
Troubleshooting
Stoppage
Solution
Not heating up
1.Please check whether the connection is loose.
2.Rotate the thermostat to your needed temperature
3.Please check whether the power switch match up with the parameters
4.Contact the service center for repair suggestion.
Short circuit
Contact the service center for repair suggestion
Internal light not work
Pull out the plug, cool down the chamber, then replace a new bulb.
Scorching smell appear
Contact the service center to check whether the connection short out.
Baking unevenly
Readjust the thermostats for each heating elements to see how they work, if they don’t work well, please contact the service center to check whether the heating element needs to change.
No steaming
1. Please check whether the water pipe joint is blocked or disconnected.
2. Please check the water faucet is blocked or disconnected.
3. Please check if the magnetic value works well, if it doesn’t, please replace it with a new one.