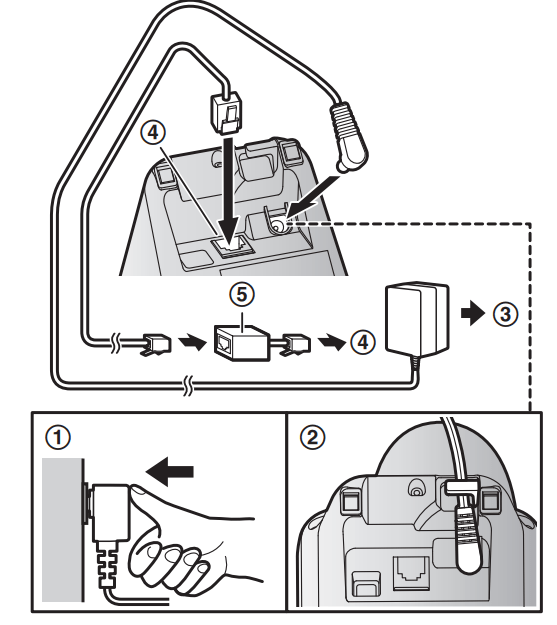
Connect the AC adaptor to the unit by pressing the plug firmly.
Fasten the cord by hooking it.
Connect the AC adaptor to the power outlet.
Connect the telephone line cord to the unit, then to the single-line telephone jack (RJ11C) until you hear a click.
A DSL/ADSL filter (not supplied) is required if you have a DSL/ADSL service
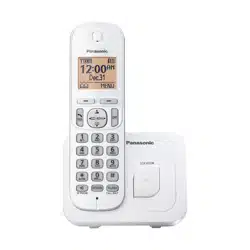
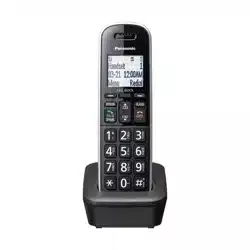
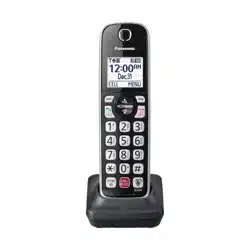
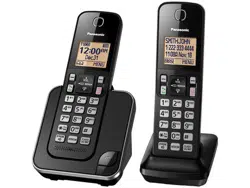
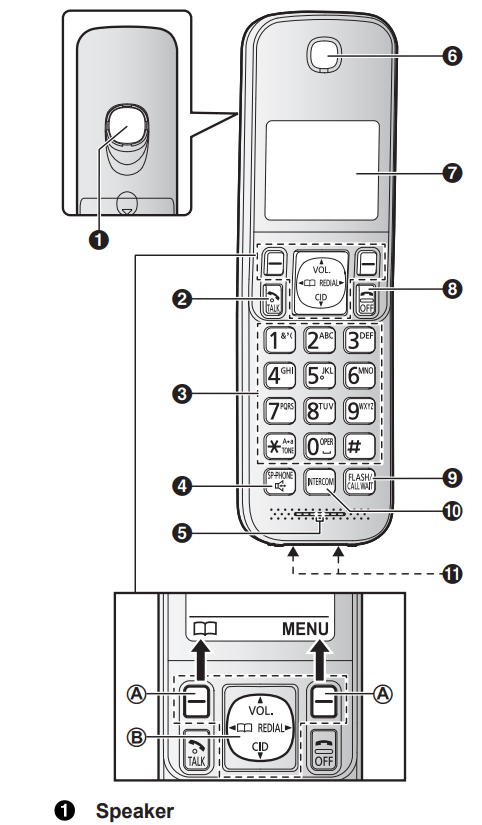
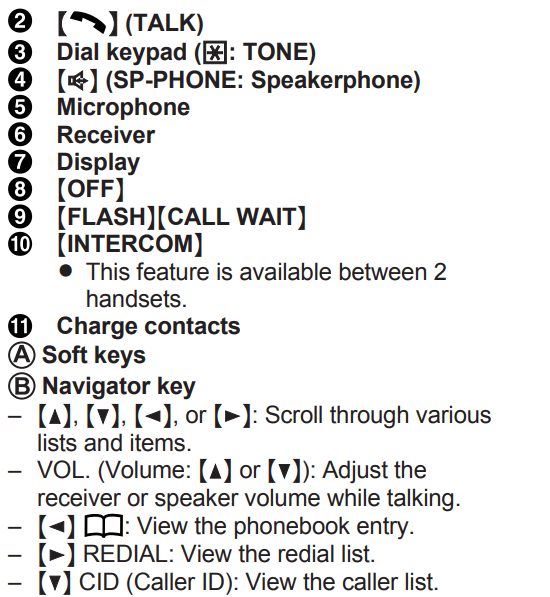
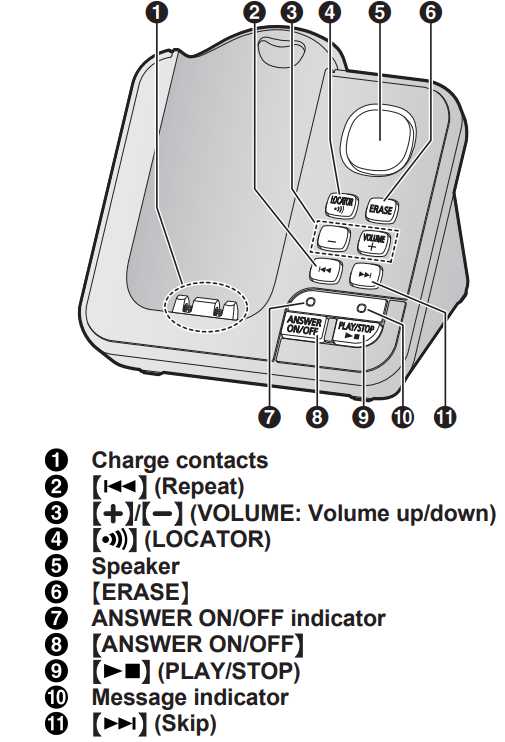
Controls
Handset
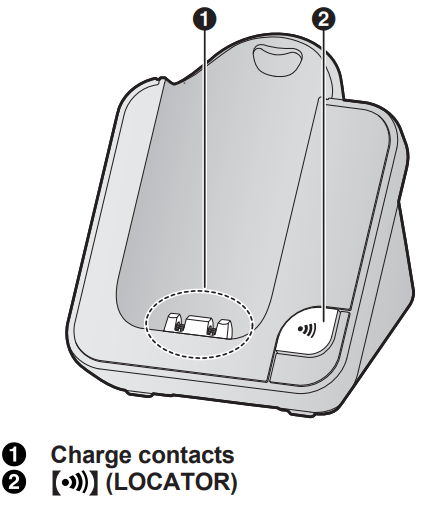
Base unit
KX-TGC350 series
KX-TGC360 series
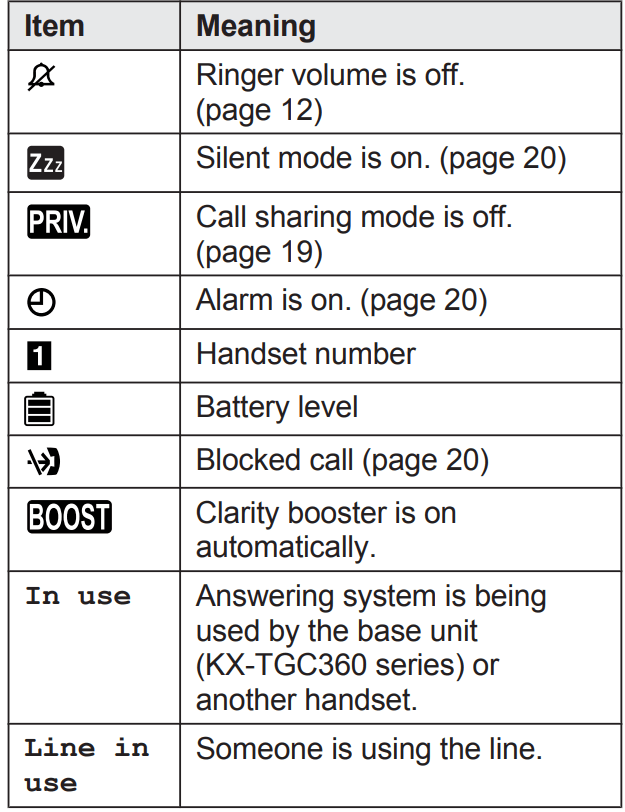
Display icons
Handset display items
Language settings
Display language
: Select the desired setting. →
Voice guidance language (KX-TGC360 series)
: Select the desired setting. →
Date and time
Enter the current month, date, and year by selecting 2 digits for each. Example: July 15, 2016
Enter the current hour and minute (12-hour clock format) by selecting 2 digits for each. Example: 9:30 09 30
*: Select “AM” or “PM”.
Recording your greeting message (KX-TGC360 series)
You can record your own greeting message instead of using a pre-recorded greeting message. See page 24 for details.
: “Yes” → [SELECTN]
Record a greeting message. → →
Other settings
Dialing mode
: Select the desired setting. →
Making/Answering Calls
Making calls
Lift the handset and dial the phone number.
To correct a digit, press .
or . To adjust the receiver or speaker volume, press or repeatedly. 3 When you finish talking, press
Making a call using the redial list
The last 5 phone numbers dialed are stored in the redial list.
REDIAL
: Select the desired entry. →
Pause (for PBX/long distance service users)
A pause is sometimes required when making calls using a PBX or long distance service. When storing a calling card access number and/or PIN in the phonebook, a pause is also needed (page 15).
Example: If you need to dial the line access number “9” when making outside calls with a PBX:
→ (Pause)
Dial the phone number. →
Answering calls
Lift the handset and press or when the unit rings.
When you finish talking, press
Auto talk: You can answer calls simply by lifting the handset (page 19).
Temporary handset ringer off: Press .
Useful features during a call
Hold
Press during an outside call.
: “Hold” →
To release hold, press
Mute
Press during a call.
To return to the call, press .
Flash
allows you to use the special features of your host PBX.
Phonebook
You can add 50 names (16 characters max.) and phone numbers (24 digits max.) to the phonebook.
Adding phonebook entries
or →
: “Add new entry" →
Enter the party’s name. →
Enter the party’s phone number. →
: Select the desired group 2 times →
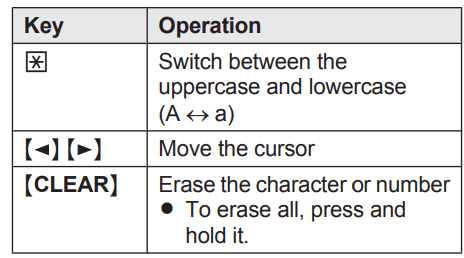
Entering characters
Press the dial key that corresponds to the desired character. Press repeatedly to scroll through the available characters.
The following operations are also available
Storing a redial list number to the phonebook
REDIAL
: Select the desired entry. →
To store the name, continue from step 3, “Editing entries”, page 15.
Groups
You can assign your phone entries to groups for each searching. You can assign a ringtone to each group to help identify incoming calls (Caller ID required).
Changing group names/setting ringer ID
or →
: “Group” →
: Select the desired group →
To change group names
: “Group name” → → Edit the name →
: Select the current setting of the group ringer tone. → → : Select the desired ringer tone. →
Finding and calling from a phonebook entry
or
: Select the desired entry.
Useful Information
Voicemail service
In addition to your unit’s answering system you may also have voicemail service from your phone service provider. Voicemail is an answering service that may be offered by your phone service provider. This service can also record calls when you are unavailable to answer the phone or when your line is busy. Messages are recorded on the phone company system and not on the unit’s answering system.
To use the voicemail service rather than the unit’s answering system, turn off the answering system (page 24).
If you have unit’s answering system set to on and also the voicemail enabled, the system with least amount of rings will record the message first.
Example: If the unit’s answering system is set to 4 rings (page 26) and the voicemail answering system provided by your phone company is set to 6 rings (call your service provider), the unit’s answering system will record the incoming call first.
Storing the voicemail (VM) access number
You can store the phone number used to access your voicemail service.
Enter your access number. → →
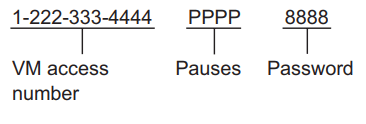
Note: When storing your voicemail access number and your mailbox password, press (Pause) to add pauses (page 12) between the access number and the password as necessary. Contact your phone service provider for the required pause time.
Example:
To erase the voicemail access number
Press and hold until all digits are erased. → →
Voicemail (VM) tone detection
Your voicemail service provider sends special signals to the unit to let you know that you have new voicemail messages. If you hear a series of dial tones followed by a continuous dial tone after you press , you have new voicemail messages.
The unit can detect these signals automatically. Turn this feature off in the following situations.
You do not subscribe to voicemail service.
Your phone is connected to a PBX.
Turning VM tone detection on/off
: Select the desired entry. → →
Listening to voicemail messages
The speakerphone turns on
Follow the pre-recorded instructions.
When finished, press
Note:
You can also use the [VM] soft key, if displayed, to play new voicemail messages.
If the handset still indicate there are new messages even after you have listened to all new messages, turn it off by pressing and holding # until the handset beeps.
Error messages
Display message
Cause/solution
Base no power or
No link. Re-connect base
AC adaptor.
The handset has lost communication with the base unit. Move closer to the base unit and try again.
Unplug the base unit’s AC adaptor to reset the unit.Reconnect the adaptor and try again.
The handset’s registration may have been canceled. Re-register the handset (page 22).
Busy
Other units are in use and the system is busy. Try again later.
Call phone company for your access #
You have not stored the voicemail access number. Store the number (page 28).
Check tel line
The supplied telephone line cord has not been connected yet or not connected properly. Check the connections (page 8).
Error!!
Recording was too short. Try again.
Invalid
There is no handset registered to the base unit matching the handset number you entered.
The handset is not registered to the base unit.
Register the handset (page 22).
Use rechargeable battery.
A wrong type of battery such as alkaline or manganese was inserted. Use only the rechargeable Ni-MH batteries noted on page 4, 6.
Troubleshooting
If you still have difficulties after following the instructions in this section, disconnect the base unit’s AC adaptor, then reconnect the base unit’s AC adaptor. Remove the batteries from the handset, and then insert the batteries into the handset again.
General use
Problem
Cause/solution
The handset does not turn on even after installing charged batteries.
Place the handset on the base unit or charger to turn on the handset.
The unit does not work.
Make sure the batteries are installed correctly (page 8).
Fully charge the batteries (page 8).
Check the connections (page 8).
Unplug the base unit’s AC adaptor to reset the unit. Reconnect the adaptor and try again.
The handset has not been registered to the base unit. Register the handset (page 22).
Useful Information
Problem
Cause/solution
I cannot hear a dial tone.
The base unit’s AC adaptor or telephone line cord is not connected. Check the connections.
Time on the unit has shifted.
Incorrect time information from incoming Caller ID changes the time. Set the time adjustment to “Manual” (off) (page 18).
Battery recharge
Problem
Cause/solution
I fully charged the batteries, but
still flashes,
is displayed, or
the operating time seems to be shorter.
Clean the battery ends (, ) and the charge contacts with a dry cloth and charge again.
It is time to replace the batteries (page 8).
Making/answering calls, intercom
Problem
Cause/solution
is displayed.
The handset is too far from the base unit. Move closer.
The base unit’s AC adaptor is not properly connected. Reconnect AC adaptor to the base unit.
The handset is not registered to the base unit. Register it (page 22).
Noise is heard, sound cuts in and out.
You are using the handset or base unit in an area with high electrical interference. Re-position the base unit and use the handset away from sources of interference.
Move closer to the base unit.
If you use a DSL/ADSL service, we recommend connecting a DSL/ADSL filter between the base unit and the telephone line jack. Contact your DSL/ADSL provider for details.
The handset does not ring.
The ringer volume is turned off. Adjust the ringer volume (page 12, 18).
Silent mode is turned on. Turn it off (page 20).
I cannot make a call.
The dialing mode may be set incorrectly. Change the setting (page 11).
Caller ID
Problem
Cause/solution
Caller information is not displayed.
You must subscribe to Caller ID service. Contact your phone service provider for details.
If your unit is connected to any additional telephone equipment such as a Caller ID box or cordless telephone line jack, plug the unit directly into the wall jack.
If you use a DSL/ADSL service, we recommend connecting a DSL/ADSL filter between the base unit and the telephone line jack. Contact your DSL/ADSL provider for details.
The name display service may not be available in some areas. Contact your phone service provider for details.
Caller information is displayed late.
Depending on your phone service provider, the unit may display the caller’s information at the 2nd ring or later.
Answering system
Problem
Cause/solution
The unit does not record new messages.
The answering system is turned off. Turn it on (page 24).
The message memory is full. Erase unnecessary messages (page 24).
The recording time is set to “Greeting only”. Change the setting (page 27).
Your phone service provider’s voicemail service may be answering your calls before the unit’s answering system can answer your calls. Change the unit’s number of rings setting (page 26) to a lower value, or contact your phone service provider.
Voicemail
Problem
Cause/solution
“New Voice Mail” is shown on the handset display. How do I remove this message from the display?
Listen your new voicemail messages (page 28). Depending on your voicemail service provider, you may need to erase all messages in your voice mailbox in order to remove this message.
You can remove this message manually by pressing and holding # until the unit beeps.
Liquid damage
Problem
Cause/solution
Liquid or other form of moisture has entered the handset/base unit.
Disconnect the AC adaptor and telephone line cord from the base unit. Remove the batteries from the handset and leave to dry for at least 3 days. After the handset/base unit are completely dry, reconnect the AC adaptor and telephone line cord. Insert the batteries and charge fully before use. If the unit does not work properly, contact an authorized service center.
Caution: To avoid permanent damage, do not use a microwave oven to speed up the drying process
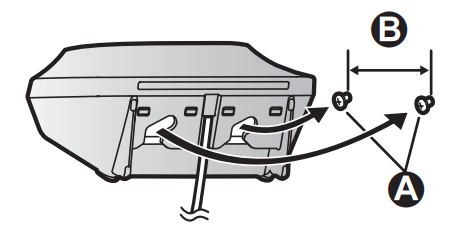
Wall mounting (Charger only)
Note: Make sure that the wall and the fixing method are strong enough to support the weight of the unit.
Drive the screws ( A ) (not supplied) into the wall. B 27.2 mm (1 1/16 inches)


 : Select the desired setting. →


 : “Yes” → [SELECTN]
 →
→ 

 .
.  or
or  . To adjust the receiver or speaker volume, press
  or
or  repeatedly. 3 When you finish talking, press
 REDIAL
 →
→  .
. during an outside call.
 during a call.
  allows you to use the special features of your host PBX.
 or
or  →
→ 

 2 times →


 until all digits are erased. →
  , you have new voicemail messages.

 still flashes,
 is displayed, or
 ,
,  ) and the charge contacts with a dry cloth and charge again.
 is displayed.