Loading ...
Loading ...
Loading ...
11
WIRING INSTRUCTIONS
FINAL INSTRUCTIONS
3.
Note: Flushmount installation will not use the downrod
assembly (B) or canopy cover (D).
Note: If the canopy cover (D) is loosen during installation,
please press it to the inner edge of the canopy (C).
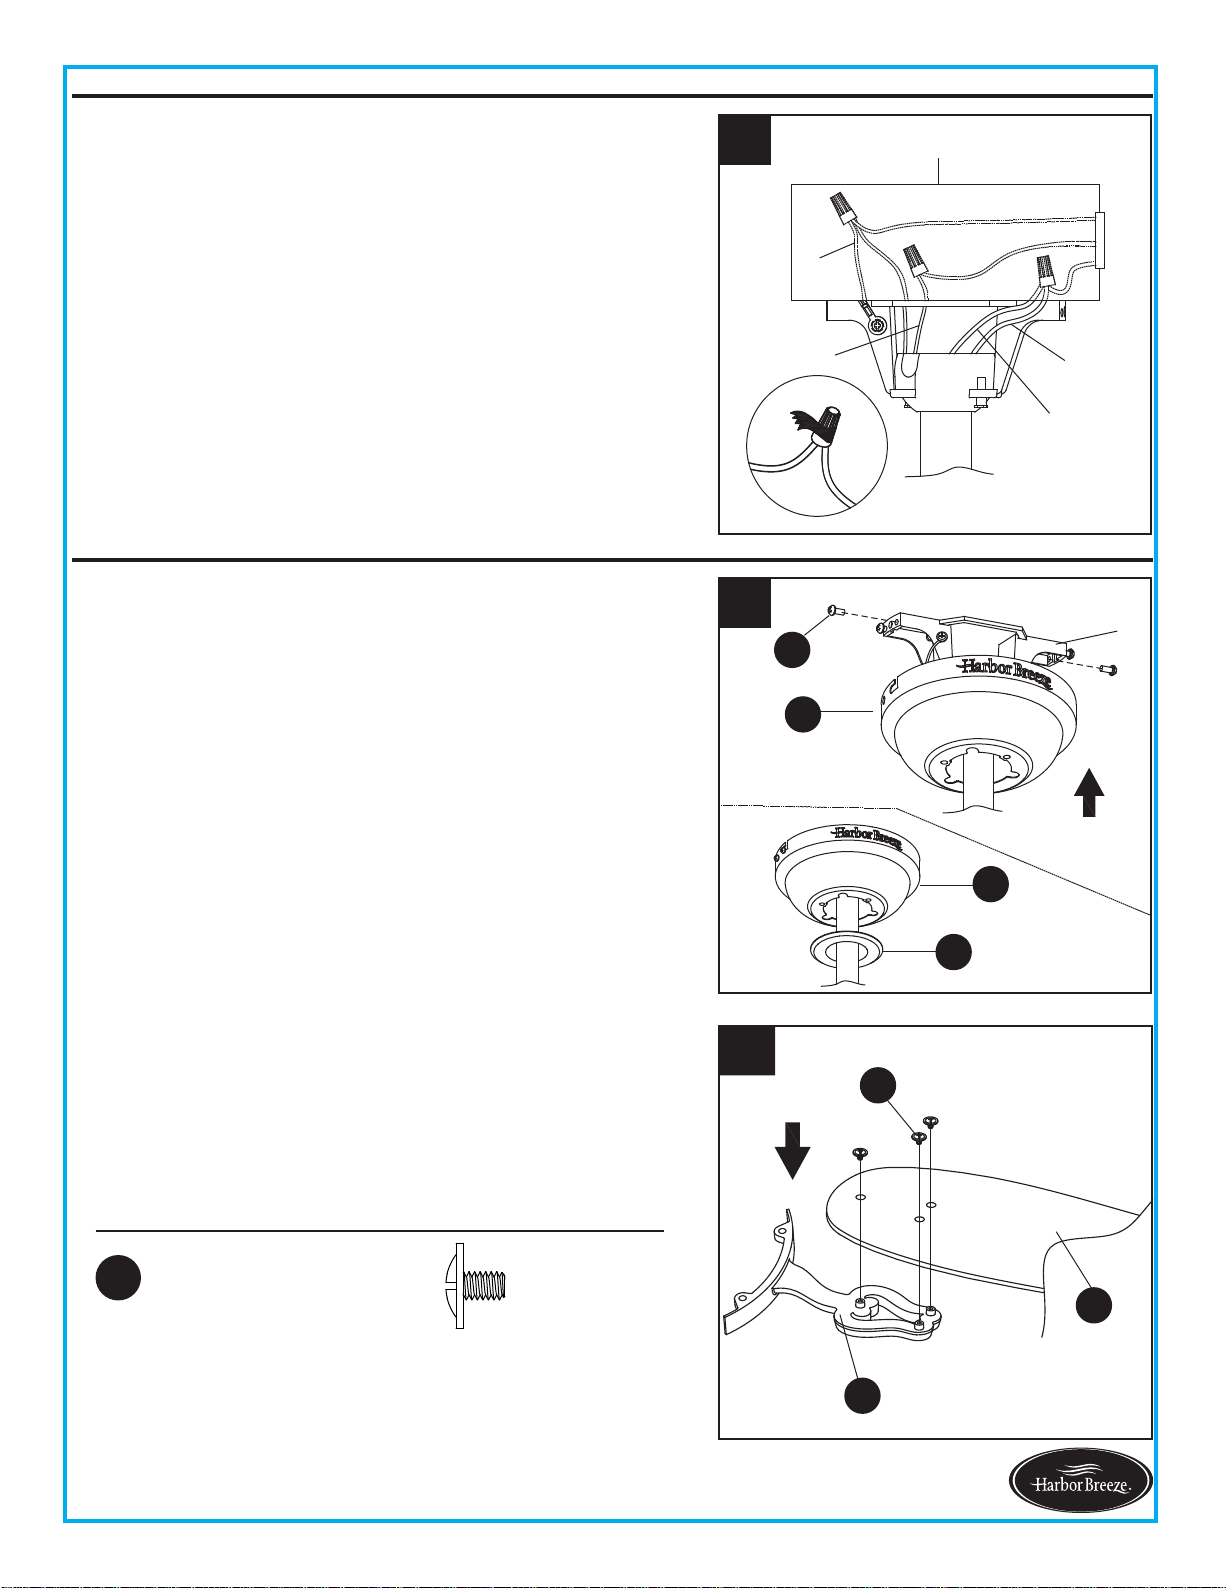
1. Loosen (but do not remove) the two preassembled
mounting screws (Q) on mounting bracket (A) that align
with the slotted holes on canopy (C). Remove the other
two mounting screws (Q).
Lift canopy (C) up so slotted holes engage loosened
screw heads on mounting bracket (A), then twist canopy
(C) clockwise. Re-install previously removed mounting
screws, then tighten all screws securely.
2. Position one blade iron (G) under blade (H). Insert three
blade screws (BB) through blade (H) and into blade iron
(G). Tighten each blade screw (BB) evenly, starting with
the center blade screw (BB). Repeat for the remaining
blade assemblies.
2
H
G
BB
Hardware Used
Blade Screw
x 15
BB
Lowes.com/harborbrBBze
3
BLACK
BLUE
WHITE
GREEN
Outlet Box
A
1
Q
C
C
D
Wrap electrical tape (not included) around each wire
connector and make sure no bare wire or wire strands
are visible after making connections. Then, turn wires
upward and carefully push them into the outlet box;
make sure the WHITE and GREEN connections are on
one side and the BLACK connections are on the other
side.
Loading ...
Loading ...
Loading ...