Loading ...
Loading ...
Loading ...
English 19
Maintenance
Maintenance
Cleaning
WARNING
• Make sure the oven and accessories are cool before cleaning.
• Do not use abrasive cleaning agents, hard brushes, scouring pads or cloths, steel
wool, knives or any other abrasive materials.
Oven interior
• For cleaning the interior of the oven, use a clean cloth and a mild cleaning agent
or warm soapy water.
• Do not hand-clean the door seal.
• To avoid damaging the enamelled oven surfaces, only use standard oven
cleaners.
• To remove stubborn soils, use a special oven cleaner.
Oven exterior
For cleaning the exterior of the oven such as the oven door, handle, and display,
use a clean cloth and a mild cleaning detergent or warm soapy water, and dry with
a kitchen roll or dry towel.
Grease and dirt can remain, especially around the handle because of the hot air
coming from inside. It is recommended to clean the handle after each use.
Accessories
Wash the accessories after every use, and dry it with a tea towel. To remove
stubborn impurities, soak the used accessories in warm soapy water for about 30
minutes before washing.
Catalytic enamel surface (applicable models only)
The removable parts are coated with dark grey catalytic enamel. They can be
soiled with oil and fat spattered by the circulating air during convection heating.
However, these impurities burn off at oven temperatures of 200 °C or above.
1. Remove all accessories from the oven.
2. Clean the interior of the oven.
3. Select Convection mode with max temperature, and run the cycle for an hour.
Door
Do not remove the oven door unless for cleaning purposes. To remove the door for
cleaning, follow these instructions.
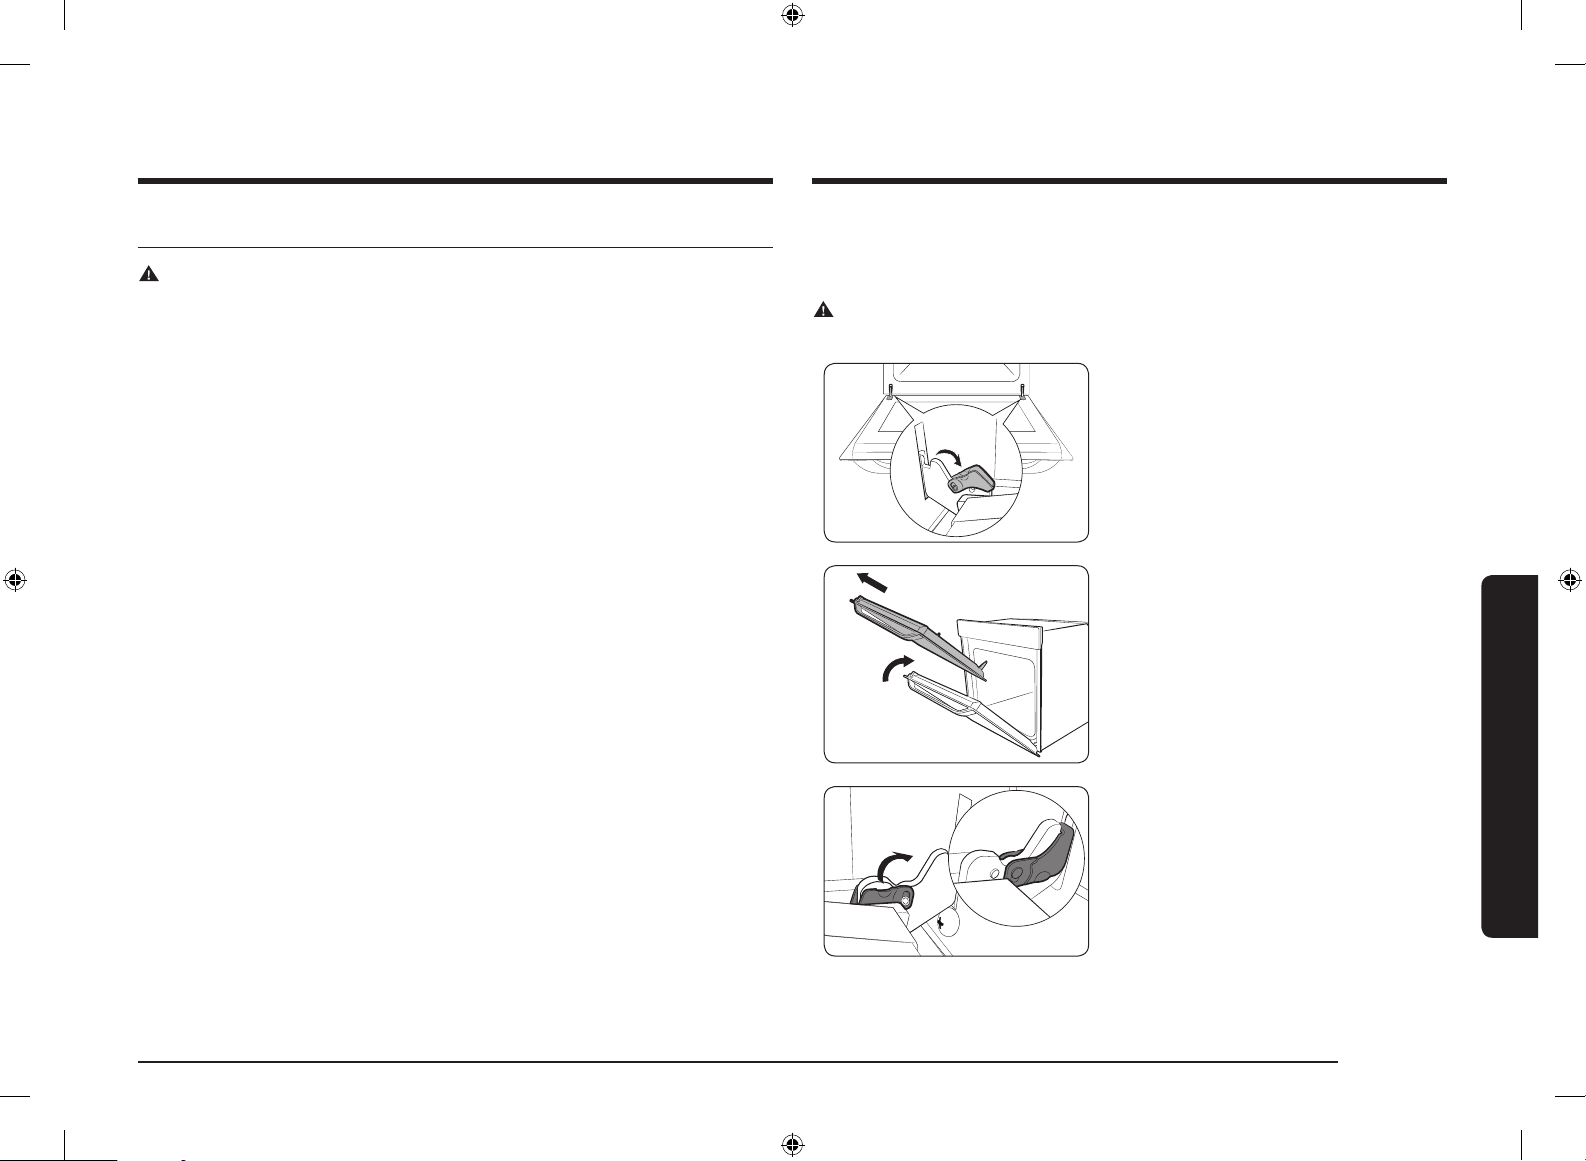
WARNING
The oven door is heavy.
1. Open the door and ip open the clips at
both hinges.
2. Close the door approximately 70°. Hold
the oven door by the sides using both
hands, and lift and pull upwards until the
hinges are removed.
3. Clean the door with soapy water and a
clean cloth.
4. When done, follow steps 1 to 2 above in
the reverse order to reinstall the door.
Make sure the clips are hinged on both
sides.
NV75K3340RS_EU_DG68-00750A-01_EN.indd 19 2016-12-06 11:51:37
Loading ...
Loading ...
Loading ...