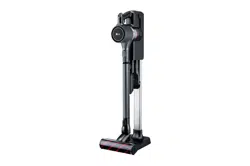
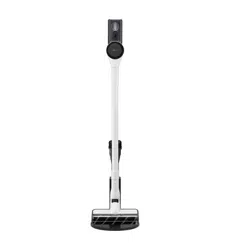
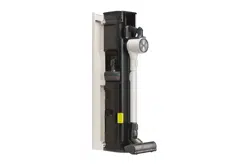
1 Product body 2 Extending wand 3 Power Carpet Nozzle 4 Charging station 5 Charging station stand 6 Attachment storage 7 Detachable nozzle storage (optional) 8 Charging station base 9 Adapter 10 Battery
Included Accessories
• Included accessories may vary based on model purchased.
• Please note that these parts come with their corresponding models only.
Installation
Freestanding Installation
1. Assemble the charging station stand by inserting the support pipe into the base. Slide the detachable nozzle storage (optional) and the charging station onto the top of the charging station stand.
2. Insert the power cable into the jack at the back of the charging station. Clip the cord into the cable hook under the jack.
• Keep the cord tidy by threading it through the anchoring ring on the back of the support pipe.
3. After ensuring there are no pipes or wires in the way inside the wall, make a hole at the appropriate height to anchor the charging station and insert the wall anchor.
• Recommended diameter of hole: Φ6.5; Recommended depth: 100 mm.
4. Put the anchoring block on the back of the charging station and anchor the charging station with the screw.
• Make sure to fully tighten the screw.
Using Double-Sided Tape
Do not use this installation method on wallpaper.
1. Use double-sided tape to attach the wall anchoring block to the charging station in step 4.
• Discard the center section of one piece of double-sided tape before attaching the tape to the block.
2. Use the entire second piece of tape to anchor the station to the wall.
CAUTION
To avoid product damage or personal injury, take care not to drop the product parts while unpacking them.
Do not use the double-sided tape on wallpaper.
The weight of the charging station and the product could damage the paper.
We recommend anchoring the station with the anchoring screw.
If attaching to concrete or a wall stud, use the setscrew without a wall anchor.
If attaching to drywall, drill a hole and insert the wall anchor first.
Note:
Once assembled, the charging station support and base cannot be disassembled.
The charging station can be removed as needed. After unscrewing it from the wall, pull the station upward while the bottom of the station remains upright on the floor.
Wall Installation
Insert the power cable into the jack at the back of the charging station and plug the power cord into the power outlet.
Hold the station 3.25 ft (1 m) from the floor and near enough to easily reach the power outlet. Mark the positions of the screw holes on the wall. Insert the wall anchors at the marks, if needed.
Recommended diameter of hole: Φ6.5; Recommended depth: 60 mm.
Use the 2 shorter wall anchoring screws provided to attach the charging station to the wall.
Uninstalling the Station
If the station is not installed, separate the extension pipe and nozzle from the body before storing or charging the product.
Attachment Storage
When not in use, the crevice and brush attachments can be snapped onto the ports at the bottom of the charging station.
1. Attach the combination tool and crevice tool to the dedicated holders.
2. Press and hold the inlet removal button and pull downward to remove the combination tool or crevice tool
Nozzle Storage
When a nozzle is not in use, store it in the convenient detachable nozzle storage (optional) so you can easily find it.
1. To store, slide the hook on the nozzle into the cradle.
2. Lift the nozzle to remove it from the cradle.
The nozzle storage cradle is compatible with the Power carpet nozzle.
Operation
Before Using
The dust bin lid must be in place before using the product. Otherwise, the suction strength will deteriorate and cleaning will not be satisfactory.
Support the bottom of the product when cleaning an elevated surface.
Store the vacuum in the charging station or flat on the floor when not in use. Leaning the vacuum against a wall or chair can result in product damage or personal injury if the vacuum falls.
Make sure that the exhaust filter is properly assembled before using the product.
Environmental conditions such as temperature and humidity may cause occasional static buildup to accumulate on the product. If this is a persistent issue, contact an LG Electronics customer information center.
Any foreign object on the inlet port or extension pipe will prevent the product from functioning properly. Make sure to remove any foreign object such as a sock or stocking before using the product.
The battery runtime will be shortened after using the product repeatedly for an extended period due to its characteristics.
After extended use, all batteries experience reduced battery life.
The last bar on the battery indicator begins to flash when the battery needs to be recharged.
Please use the product at normal room temperatures as the battery runtime will deteriorate severely if used at temperatures lower than 41°F (5°C) or higher than 100°F (38°C) for an extended period of time.
Refer to product specifications for battery run time details.
These times are a guide only and may be shorter for some surfaces.
Follow manufacturer's recommendations when cleaning flooring, carpets, and rugs.
To avoid marking polished flooring, keep the nozzle and brushes free from grit, sand, or abrasive objects.
To maintain battery life on dual-battery models, swap the positions of the two batteries periodically, between the main body and the auxiliary charging station.
Attaching the Wand and Accessories
1. Attach the wand by sliding it onto the inlet on the product body until it clicks into place. To detach the wand, press the release button. Attach or detach the accessories to the end of the wand in the same way. Insert the battery into the cavity at the back of the vacuum. Inlet port
2. To extend the wand, press the button on the back of the wand and slide the outer pipe until it clicks into place at the desired length. The wand extends in four steps.
3. Accessories can be attached to either the extending wand or the product body.
CAUTION
Do not use attachments to clean TVs, LCDs, or monitors as they may scratch these surfaces.
Keep fingers away from pinch points when assembling the wand or attachments.
If any foreign object is sucked into the inlet during cleaning, operation of the vacuum cleaner might stop in order to prevent damage to the body or motor. Immediately stop using the vacuum cleaner and remove the object before resuming cleaning.
Charging the Battery
1. Put the product on the charging station.
• The battery indicator has 3 bars to indicate the charge level. The bars will flash during charging.
2. An auxiliary battery can be charged in the base of the charging station.
• The auxiliary charge indicator will flash until the auxiliary battery is fully charged.
Charging the Auxiliary Battery
1. Remove the spent battery from the product by pressing in on both sides of the battery and pulling.
2 .Insert the battery into the auxiliary charging station.
Note:
Make sure that the power adapter is connected to both the charging station and the power outlet
If the main battery is charging on the charging station, the auxiliary battery will only start charging once the main battery is fully charged.
The auxiliary battery indicator flashes when charging starts.
The indicator will stay on when the auxiliary battery is fully charged.
Fully charging a single battery usually takes 3.5 hours. It will take twice as long to charge both the main and auxiliary batteries.
Adjusting the Suction
Press the Power On/Off button to turn the vacuum on or off.
Press the plus or minus button on the product body to set the suction strength to Standard, Power, or Turbo mode
Power On/Off button
Press the power On/Off button to activate the Normal mode.
Mode button
Press plus (+) to switch to Power mode.
Press and hold plus (+) to turn on Turbo mode.
It may take a moment to switch from Normal to Turbo mode.
Press minus (-) to switch modes from Turbo > Power > Normal.
Using the Nozzles
• The nozzles included may vary by product.
• The nozzle can be attached to the product body or extension pipe.
• Adjust the suction lower if the inlet gets stuck on the floor, carpet, or bedding or higher if you need more power.
CAUTION
• Do not use the product for anything other than domestic household purposes.
Power Carpet Nozzle
• Use to clean carpets or rugs.
• If used on hard flooring, this nozzle will be noisy.
CAUTION
• Do not use this nozzle on children's PVC play mats.
Power Floor Nozzle (some models only)
• Use to clean hard floor surfaces.
Bedding Power Punch (some models only)
• Bedding Power Punch lets you clean sheets and bedding more effectively. This attachment can be used to remove pet hair from various surfaces without tangling the hair in the brush.
• Lower the suction level when vacuuming bedding such as duvet covers to avoid the thin fabric getting sucked into the nozzle.
Crevice Tool
Use to remove dust from corners or narrow spaces.
Combination Tool
This accessory is helpful for cleaning corners or small gaps.
Use the tool in crevice mode to clean flat surfaces such as sofas or mattresses.
Use the tool in brush mode to clean delicate surfaces such as frames or furniture.
CAUTION
• Prolonged use of the product with an accessory tool attached may overheat the motor.
• Using this accessory tool on a TV, monitor or LCD display may scratch the screen.
• Avoid getting your finger stuck in any gaps when fitting the accessory tools.
• If any foreign object is sucked into the inlet during cleaning, operation of the unit might stop in order to prevent damage to the body or motor. Immediately stop using the vacuum cleaner and remove the object before resuming cleaning.
Maintenance
Emptying the Dust Bin
Remove the battery from the unit before cleaning the dustbin.
Hold the dust bin over a wastebasket or trash can.
Press the release button at the bottom front of the dust bin to open the bin and shake to empty it.
Be careful as dust/foreign matter may spill out when you open the dustbin.
4. Insert the crevice tool into the large dust separator and turn it counterclockwise to remove it.
5. Rinse the large dust separator under running water and allow to dry completely before reinstalling.
• Be sure to dry the separator completely before using it.
6. With the dust separator removed, use the combination tool to clean out the dust inside the dustbin.
WARNING
• Never wash the product body with water. Water may reach the motor and cause electric shock or fire.
• Do not apply force or any impact to the dust bin parts or the dust separator as it may damage them.
• Reassemble the dust separator before using the product. Failure to do so will damage the product.
Cleaning the Filters
The pre-filter and exhaust filter need to be cleaned at least once a month to maintain the cleaning performance of the product. The frequency of cleaning depends on where and how often you use the product. Clean the filters more often if used in areas with a lot of dust.
1. Turn the outer exhaust filter counterclockwise to remove it. Lift out the pre-filter by the handle.
2. Use the brush attachment to clean off the motor inside the filter compartment. Do not use water.
3. Clean the exhaust filter with a brush or running water.
• To maintain cleaning performance, remove the dust from the exhaust filter at least once a month.
• Allow the exhaust filter to dry out of direct sunlight in a well-ventilated place. Reinstalling the filter before it is completely dry may result in mildew or odor.
4. Clean the pre-filter with a brush or running water.
• Allow the pre-filter to dry out of direct sunlight in a well-ventilated place. Reinstalling the filter before it is completely dry may result in mildew or odor.
• The more often the filters are cleaned, the more optimal the suction power will be.
• Filters are consumables. Please purchase more filters from an authorized service center.
5. Reassemble the pre-filter first. Then align the exhaust filter with the hollow circle at top and turn the filter clockwise until the solid white circles align.
WARNING
• Never wash the product body or separator with water. Water may reach the motor and cause electric shock or fire.
• Keep foreign objects away from the motor to avoid product damage, explosion or fire.
• Do not insert fingers or sharp objects into the motor enclosure to avoid product damage, personal injury, or electric shock.
CAUTION
• Make sure to reattach the exhaust filter and prefilter to the product after washing them. Using the product without these filters will allow dust to reach the motor inside the product and cause malfunction.
Note :
• Dust buildup reduces the suction power, so for best results, make sure the filters are clean each time you use the product.
※Removing foreign objects from inside the product
In order to maintain product performance, be sure to remove any foreign objects and dust from inside the product (body, extension pipe, inlets). Foreign materials inside the product can cause the product to shut down during operation, generate noise, or cause poor suction.
※ If the inside of the product body, extension pipe, or inlet port is clogged with foreign objects, the power automatically turns off to protect the product. Separate the battery from the product and remove the foreign objects.
Cleaning the Power Floor/Carpet Nozzle
Check the brush and roller heads before using and clean as needed.
1. Remove the nozzle from the product. Press the release button to remove the head from the wand or product body.
2. Turn the head upside down and insert a flatblade screwdriver in the cover lock slot. Rotate the lock counterclockwise as shown to open the cover.
3. Rotate the brush cover up and pull the brush out.
4. Attach the crevice tool to the unit and use the vacuum to remove dust/foreign objects from the brush and the bottom of the nozzle.
5. Use a wet towel or tissue to remove any remaining foreign matter and dust from the brush and the bottom of the nozzle.
6. Slide the brush back into the head and rotate the cover back into place. Turn the cover lock clockwise to lock the cover.
CAUTION
• Keep fingers away from pinch points when removing and assembling the brush.
• Do not immerse the brush or head in water or rinse them in running water.
• Do not pick up oils or liquids with the vacuum.
Cleaning the Bedding Power Punch
1. Remove the Bedding Power Punch and turn it upside down.
2. Attach the crevice tool to the unit and use the vacuum to remove dust/foreign objects from the bottom of the Bedding Power Punch.
3. Use a wet towel or tissue to move any remaining foreign matter and dust.
Before Calling for Service
Save time and money by checking the following before calling for service.
Symptom
Cause
Solution
The vacuum does not operate.
Battery is dead.
• Charge the battery.
Vacuum is powered off.
• Press the power button to power on the vacuum.
Suction is weak.
Dust bin is full.
• Empty the dustbin.
Filter is clogged.
• Clean the pre-filter. If suction is still weak after cleaning the pre-filter, call for service.
Foreign object on brush or in inlet port.
• Remove foreign objects.
Vacuum won't charge.
Power adapter is not connected to the charging station.
• Plug the adapter firmly into the charging station.
Power cord is unplugged.
• Plug the power cord securely into the outlet.
Charging terminals are dirty.
• Clean off the charging terminals with a dry cloth.
Hot air blowing out of the vacuum.
Motor is cooling.
• If the vacuum is otherwise running normally, the hot air is from the motor cooling and is normal.
A strange odor is coming from the vacuum.
The vacuum is less than 3 months old.
• The cleaner may emit a smell of rubber for about 3 months after purchase.
The dust bin is full.
• The dust in the dust bin may have an odor. Empty the dust bin and clean it.
The filter is dirty.
• Clean the pre-filter and exhaust filter regularly.
The pre-filter was installed while damp or wet.
• Wash the pre-filter thoroughly under running water and allow it to dry completely before reinstalling it.
The exhaust filter was installed while damp or wet.
• Wash the exhaust filter thoroughly under running water and allow it to dry completely before reinstalling it.
The vacuum is too loud.
Running vacuum in Turbo mode.
• If the vacuum is otherwise working fine, the noise is likely just from the motor running at high speed.
The unit powers off too soon.
The battery is not fully charged.
• Fully charge the battery before using the vacuum. If the problem persists even with a fully charged battery, call for service.
The product body, extension wand or nozzle is clogged or dirty.
• Remove the foreign objects from the product body, Extension wand, or Inlet port.