Loading ...
Loading ...
Loading ...
English 9
Installation
Vent connector installation
The range hood is factory set for use the top vent outlet.
Determine whether the range hood will be installed using either a top or
rear vent connection.
Rear vent connector installation
NOTE
For rear venting, the blower motor position must be changed. You will
need the rear motor mounting bracket that is included with the range
hood.
1. Remove the bafe lters. See the “Range hood care” section.
2. Place the range hood on its back. Fit the vent system over the ex-
haust outlet.
3. Disconnect the blower motor electrical connector from the electrical
box connector.
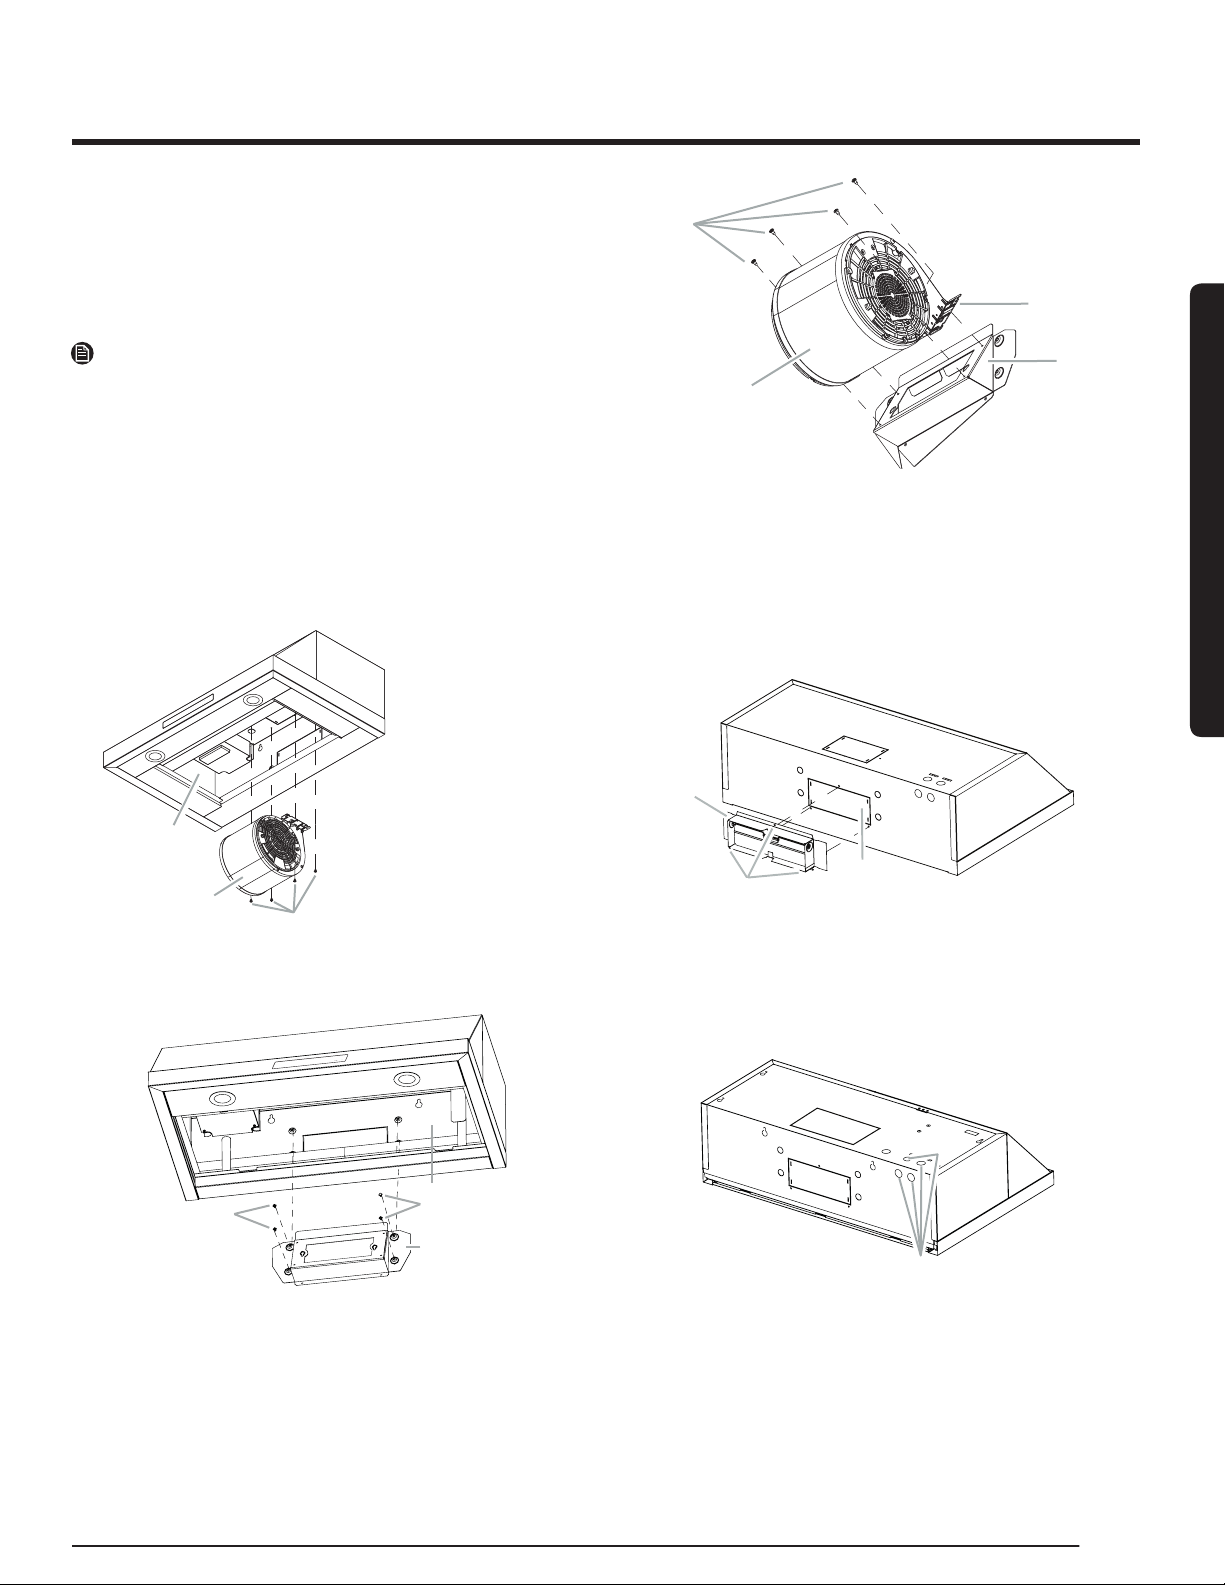
4. Using a T20® adapter, remove the 4 screws holding the blower motor
in place. Push up on the blower motor to disengage the tabs from
range hood cavity back. Remove the blower motor and set it aside.
C
B
A
A. Range hood canopy
(inside top)
B. Blower motor
C. Blower motor mounting
screws
5. Install the rear blower mounting bracket into the range hood and
secure it with the (4) 4.2 x 8 mm screws.
A
B
B
C
A. Range hood canopy (inside back)
B. 4.2 x 8 mm screws (4)
C. Rear blower motor mounting bracket assembly
6. Install the blower motor onto the rear motor mounting bracket (included
with the range hood). Engage the motor mounting tabs with the
keyhole slots in the rear mounting bracket and push down to secure.
Install the 4 screws removed previously and tighten to secure motor
bracket.
A
B
C
D
A. Rear motor mounting bracket
B. Motor mounting tabs (2)
C. Blower motor
D. Blower motor mounting screws (4)
7. Reconnect blower motor electrical connector to the electrical box
connector.
8. Remove the rear vent knockout.
9. Attach the 3
1
⁄4” x 10” (8.3 cm x 25.4 cm) rectangular vent damper us-
ing 3 - 4.2x8 mm vent transition mounting screws.
C
B
A
A. Rear vent knockout
B. Rear rectangular transition knockout mounting screws (3)
C. Rear rectangular vent transition
10. Remove one of the round knockouts from the top or back of the
range hood (depending on your wiring location) for the wiring strain
relief and install a
1
⁄2” UL listed or CSA approved strain relief.
A
A. Round knockout
Installation
Connect Vent System
Loading ...
Loading ...
Loading ...