Loading ...
Loading ...
Loading ...
10 English
Installation
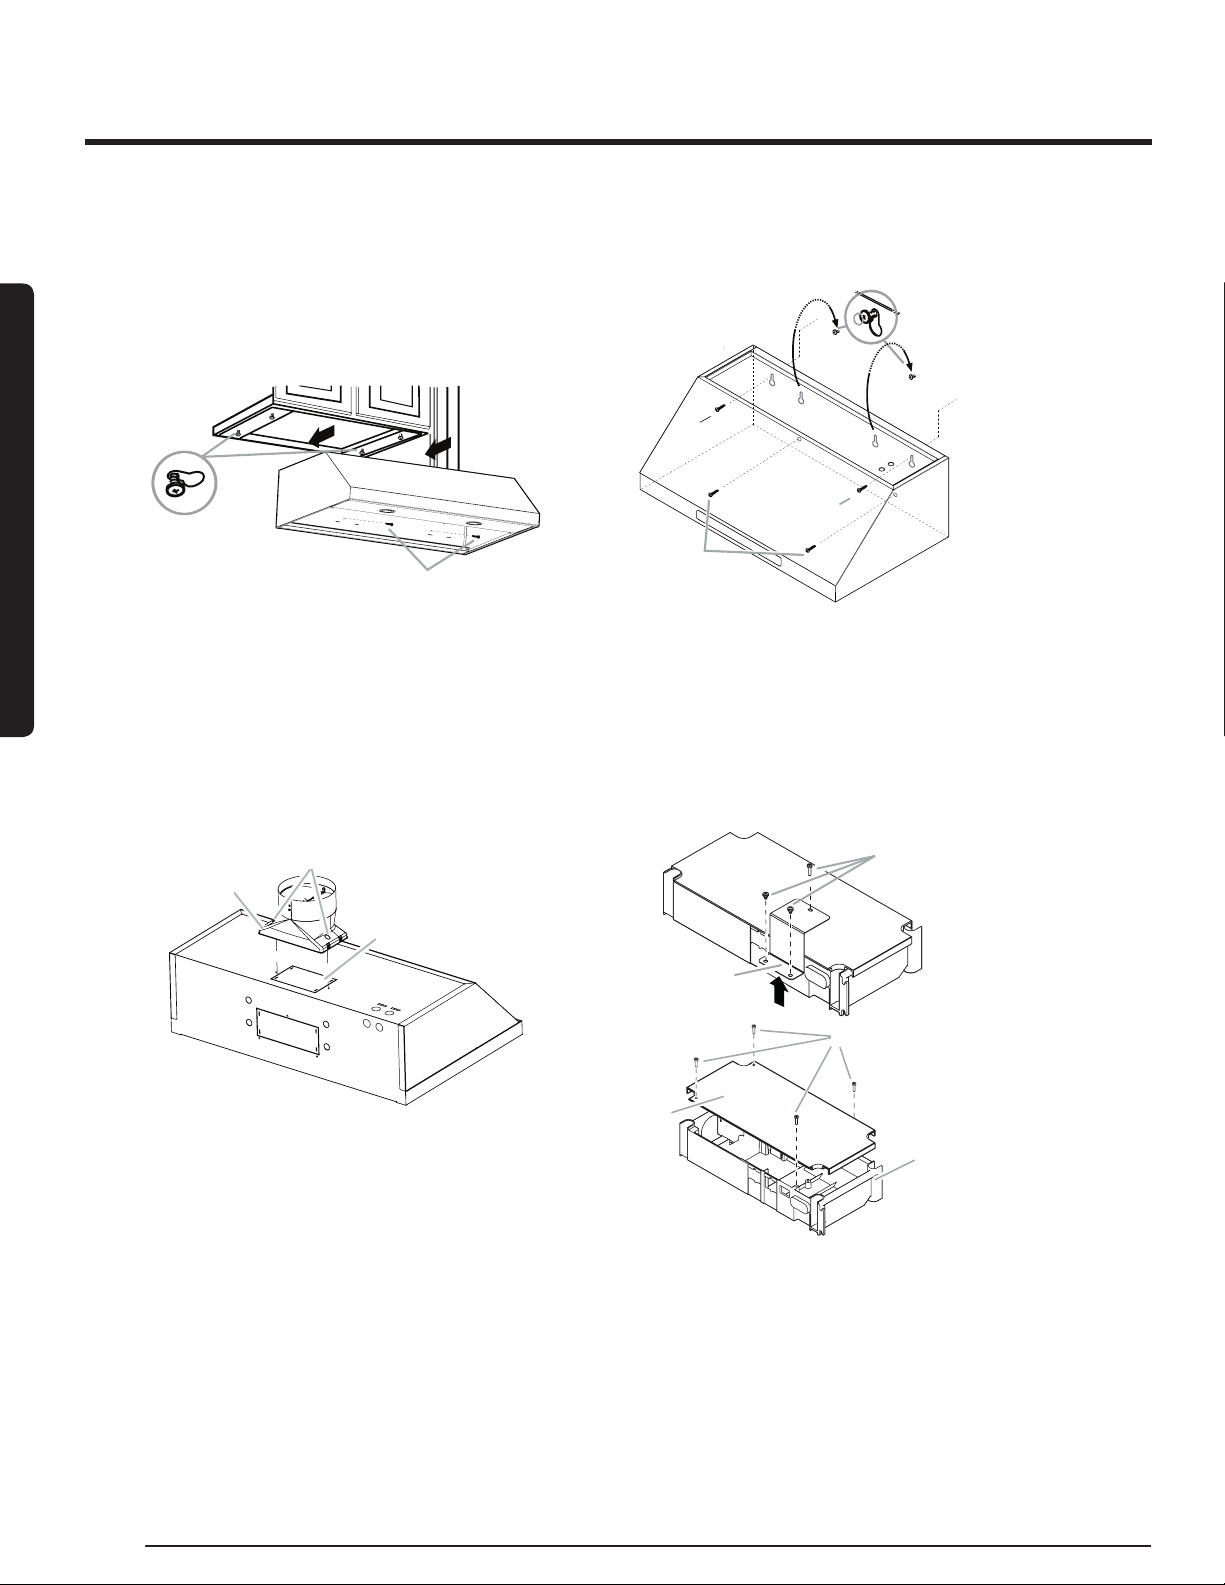
Mounting the Range Hood on a Cabinet
1. Using 2 people, lift the range hood into it’s nal location. Feed enough
electrical wire through the strain relief to make connections in the termi-
nal box. Tighten the strain relief screws.
2. Position the range hood so that the large end of the keyhole slots
are over the mounting screws. Then, push the hood toward the wall
so that the screws are in the neck of the slots. The hood should
be against the wall. Tighten the mounting screws, making sure the
mounting screws are in the narrow neck of the slots.
B
A
A. 4- mounting screws
B. Security screws
3. Check that damper, if used, rotates up and down freely.
4. Connect the ventwork to the hood. Seal joints with clamps to make
secure and airtight.
Top vent transition installation
1. Remove the top vent knockout.
2. Attach the round vent transition damper using 2 - 3.5x9.5 mm vent tran-
sition mounting screws.
3. Remove the tape from the damper ap.
A
B
C
A. Top round vent transition
B. Top round vent transition mounting screws (2)
C. Top vent knockout
Installation
Mounting the Range Hood on the Wall
1. Fix the wiring conduit of the hood.
2. Slide the hood back against the wall. Tighten the mounting screws.
Be sure the screw heads are in the narrow neck of the keyhole slot.
A
C
B
B
A. Mounting Screws
B. Upper security screws
(Wall Installation)
C. Lower security screws
(Wall Installation)
3. Insert 2 screws into the upper security screw locations (see B in the
image above). Tighten the screws.
4. Insert 2 screws into the lower security screw location (see C in the
image above). Tighten the screws.
5. Connect the ductwork to the hood.
Electrical Connection
1. Disconnect power.
2. Remove the bracket, and then the terminal box cover.
A
B
D
C
B
A. Bracket
B. Terminal box screws
C. Terminal box cover
D. Terminal box
Loading ...
Loading ...
Loading ...