

2
Quick User Guide
Important notes to help you get a quick start.
Warning:If WINBOT is used to clean a window above ground level, the Safety Pod MUST be
used.
WINBOT must be used in strict accordance with the directions in the Instruction Manual.
ECOVACS can not be held liable or responsible for any damages or injuries caused due to
improper use.
1. Make sure that there is enough power cord for the WINBOT to clean the entire window without restricting
its movement. If there is not enough cord, it is not safe to use the WINBOT on that particular window until a
WINBOT Extension Cord is attached.
2. Loop one end of the Safety Rope around the Safety Pod's channel and pull it tight.
3. Loop the other end of the Safety Rope to the power connector on the power cord and tighten.
4. If an Extension Cord is attached, the Safety Rope must be tied to the power connector on the Extension
Cord.
Note: Do NOT attach the Safety Rope to the thin part of the cord.
5. Press the Safety Pod suction cup FIRMLY in the lower corner on the opposite side of the glass you are
cleaning. Make sure the Safety Pod suction cup is securely in place.
6. Place WINBOT on the window, close the window if cleaning the outside of the window, and start WINBOT.
7. After WINBOT is done cleaning remove it from the window. Grasp the handle, switch the unit OFF, insert
finger into Air Release Trigger and pull up on it for 20 seconds until suction has diminished.
1. Important Safety Instructions
1.1 Should you be cleaning the outside of the window, you must use the Safety Pod. Read the instructions
on SAFETY ROPE use in your Instruction Manual.
1.2 When removing the WINBOT, grasp the handle of the unit and move the switch under the handle to
the left - OFF position, and while still grasping the unit, insert finger into the Air Release trigger and
Pulling up on it, remove the unit from the window when the suction has diminished.
1.3 Place the WINBOT horizontally on the window and about 10cm (4‘’) from the lower corners of the
window
1.4 The unit may NOT be used outside while raining, snowing or colder than 5
℃
(40
℉
) as it will
damage the product and could cause electrical problems.
2. PREPARATION BEFORE USE
1.1 Before charging, please firstly turn on the button at the bottom of the WINBOT. (“ ” OFF “
” ON. The default state is “ ”) Otherwise, WINBOT can NOT be charged or working.
1.2 Plug the adapter into your electrical receptacle and assemble the two connectors, tightening the nut so
the connector will not pull apart. Place the WINBOT’s switch button, located under the handle, in the

3
Charging Position (far to the right) and charge for 2 hours. The indicator light flashes GREEN and will
go to a steady GREEN when the charging is complete.
1.3 While the unit is charging, take time to read the Instruction Manual for Safety Notes and proper use
of the unit.
1.4 For most of your windows, the cord supplied will meet your demands. Should you be cleaning the
outside of the window, you must use the Safety Pod. Read the instructions on Safety Pod use in
your Instruction Manual.
1.5 You MUST place the large cleaning pad on the front floating plate, making sure to cover the whole
plate. The smaller cleaning pad to be attached to the rear of the unit in the space provided.
1.6 Make sure the button on the bottom of the WINBOT is turned ON.
1.7 Just prior to placing the unit onto the window, take the glass cleaning solution bottle and spray ONLY
the FRONT pad. The pad should just be damp.
3. USE OF PRODUCT
1.1 Grasping the unit by the handle, place the unit on the window which is most convenient to you, BUT
making sure it is at least 10cm (4‘’)up and in from the corner of the window frame.
1.2 While still having a hold on the handle, move the switch from the OFF position (far left) to the ON
position (Center) and you will hear a slight noise. This is the vacuum motor creating suction to hold
the unit to the window. When the indicator light turns BLUE, the unit has attached itself to the
window and you can now let go of the handle.
1.3 After ensuring the WINBOT is correctly placed on the glass, press “Start/Pause” (Icon) button of the
Remote Control momentarily or directly press the “Start/Pause” (Icon) button on the Main Unit, then
the product will use automatic cleaning mode for cleaning the window and when finished cleaning it
will return to the start position.
1.4 If you want the product to pause during the cleaning, press “Start/Pause” (Icon) button on the Remote
Control momentarily or directly press “Start/Pause” (Icon) button on the Main Unit, then the product
will pause working and go on standby.
1.5 When the unit is done cleaning and has returned to the START position, grasp the handle of the unit
and move the switch under the handle to the OFF position - left, and while still grasping the unit, insert
finger into the Air Release trigger and Pulling up on it, remove the unit from the window.

4
For more complete and detailed information, please refer to Instruction Manual, which provides important
safety, use and maintenance information. Do NOT replace reading the Instruction Manual with review of the
Quick User Guide.
Welcome and congratulations on your purchase of a WINBOT
We trust the purchase of your new product will help you to keep your home clean and provide you more
quality time to do other things.
Before you go any further, we ask you to record your model number, serial number and date of purchase below.
We also suggest you attach your Receipt to this page for safe keeping.
MODEL # ________________
DATE OF PURCHASE ___ / ___ / ___

5
Thank you for your choice!
TABLE OF CONTENTS
1. Package Contents & Part Name
1.1. Package Contents
1.2. Part Name
1.3. Technical Parameters
2. Safety Instructions
2.1 About this Instruction Manual
2.2 WINBOT Power
2.3 Product Application Range
2.4 Product Precautionary Items
2.5 About Children Safety
2.6 About Disposal of The Product
2.7About Replacement of Battery of WINBOT and Disposal of Used Batteries
2.8Cases of Product Problems
3. Preparation Before Use
3.1 Charge WINBOT’s Back-up Battery
4. Use of Product
4.1 Placement of Product
4.2 Product Start
4.3 Product Pause
4.4 Product Stop
4.5 Product Restart
5. Accessories
5.1 Safety Pod
5.2 Remote Control
6. Day-to-day Storage
7. Maintenance
7.1 Cleaning the Unit
7.2 Cleaning and Replacing Cleaning Cloth
7.3 Squeegee
7.4 Cleaning Driving Treads
7.5 Cupule
7.6 Extension Cord.
8. Meaning of Indicators
9. Alarm & Solutions

6
10. Common malfunctions
11. Check of Battery Status
12. Other Problems
Warning: If WINBOT is used to clean a window above ground level, the Safety Pod MUST be
used.
WINBOT must be used in strict accordance with the directions in the Instruction Manual.
ECOVACS can not be held liable or responsible for any damages or injuries caused due to
improper use.
1. Make sure that there is enough power cord for the WINBOT to clean the entire window without restricting
its movement. If there is not enough cord, it is not safe to use the WINBOT on that particular window until a
WINBOT Extension Cord is attached.
2. Loop one end of the Safety Rope around the Safety Pod's channel and pull it tight.
3. Tie the other end of the Safety Rope to the power connector on the power cord and tighten.
4. If an Extension Cord is attached, the Safety Rope must be tied to the power connector on the Extension
Cord.
Note: Do NOT attach the Safety Rope to the thin part of the cord.
5. Press the Safety Pod suction cup FIRMLY in the lower corner on the opposite side of the glass you are
cleaning. Make sure the Safety Pod suction cup is securely in place.
6. Place WINBOT on the window, close the window if cleaning the outside of the window, and start WINBOT.
7. After WINBOT is done cleaning remove it from the window. Grasp the handle, switch the unit OFF, insert
finger into Air Release Trigger and pull up on it for 20 seconds until suction has diminished.
Warning (picture)
1. When using the product, a person should be in the vicinity to assist should there be a problem.
2. Before using the product on the outside of the window, you must use the Safety Pod. Read the instructions
on Safety Pod use in your Instruction Manual.
3. When removing the WINBOT, grasp the handle of the unit and move the switch under the handle to the
left - OFF position, and while still grasping the unit, insert finger into the Air Release trigger and Pulling up on it,
remove the unit from the window when the suction has diminished.
4. Please make sure the WINBOT’s back-up battery is fully charged before use. If you have not used the
product for over a month or the product alarms (which consumes the back-up battery’s power) over an hour,
please recharge its battery.
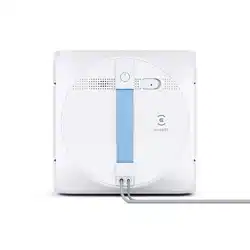
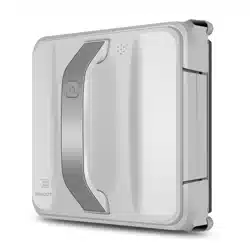
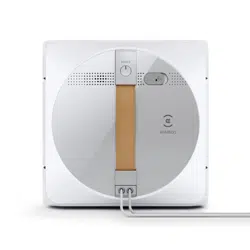
1. Package Contents & Part Name
1.1 Package Contents
Main Unit
Instruction Manual
Safety Pod
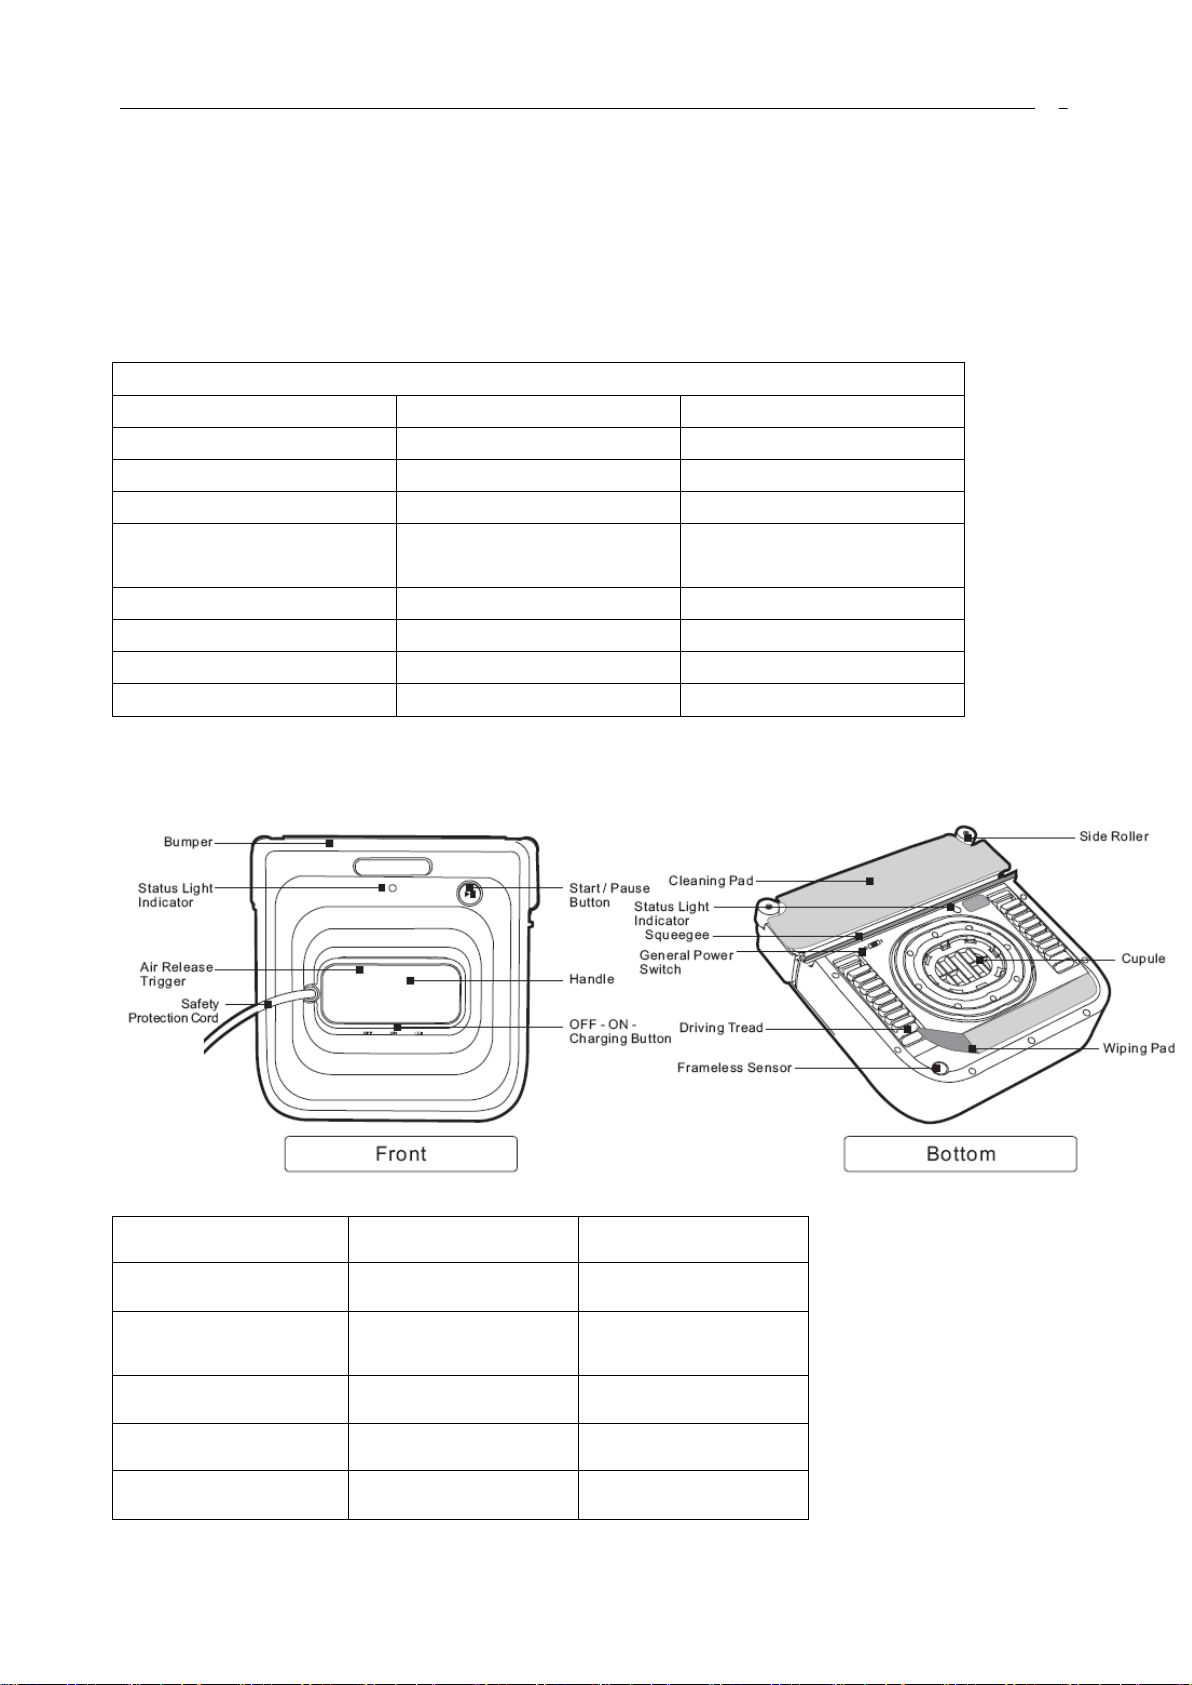
7
Safety Rope
Remote Control
Cleaning Solution
Remote Control Battery
Cleaning Pad
Power Cord
Finishing Cloth
Packed Contents
Model
W710
W730
Main Unit
YES
YES
Instruction Manual
YES
YES
Safety Pod & Safety Rope
YES
YES
Remote Control (with
batteries)
YES
YES
Cleaning Solution
YES
YES
Cleaning Pads
YES
YES
Power Adapter
YES
YES
Finishing Cloth
YES
YES
1.2 Part Name
1.3 Technical Parameters
Model
W710
W730
Working speed
0.15m/s (6ft/s)
0.15m/s (6ft/s)
Built-in battery capacity
(mAh)
400
400
Working time (min)
Unlimited
Unlimited
Working noise (db)
55
55
Frameless identification
NO
YES

8
Cleanable glass thickness
Unlimited
Unlimited
Back up battery for loss
of electric
Lithium
Lithium
About noise:
The data is from Laboratory testing at our Company based on noise test in accordance with IEC 60704-1:1997, IEC
60704-2-1:2001 International Standard.
The actual heard noise is different according to different use environment (room temperature, humidity,
atmospheric pressure, original indoor noise, etc.).
Our company reserves the right to make any technology and design changes to this product due to the needs of
continuous improvement of the product. The right of interpretation belongs to ECOVACS Robotics Co., Ltd.
2. Safety Instructions
2.1 About this Instruction Manual
Before use of the product, please follow the basic safety precautions as follows:
Please carefully read all contents of this Instruction Manual, and use the product in accordance with its
instructions.
Place the Instruction Manual in a safe place to refer to questions on operation or possible solution to
problems you might encounter. Make sure all people who will use this product know where the
Instruction Manual is kept.
Operation of the unit inconsistent with the enclosed instructions could possibly damage the product and
require repair outside of Warranty.
2.2 WINBOT Power
Your WINBOT is powered through the adapter provided. You MUST only use the power adapter that is
sold with the unit. Should a replacement become necessary, please call our service number and have your
model number and the number on the PC label ready to give to the person so the correct adapter will be
purchased and sent to you.
Please check and confirm the marked power supply voltage to ensure the product is used under the
condition of indicated voltage.
The lithium battery in the WINBOT is used to power the Pump motor should your electric fail or the
adapter cord become unplugged. This is a Safety precaution so the unit will not loose suction and fall
from the window and cause damage. A warning will sound every 3 minutes until you turn the unit OFF
and remove from the window.
While the unit is plugged in and being used to clean the window, the lithium battery will be charging.
You may also charge the lithium battery when done using by placing the slide switch under the handle to
the Charge position.
If the either power cord or power plug is found to be damaged, do not use the product. Call our service
number to find the nearest Authorized Service Center or to order replacement parts.
Do not excessively distort, twist or squeeze the power cord, nor nip it when the window is closed or place
heavy objects on the power cord.
Do not let the power cord contact with the surfaces of hot objects or sharp objects.
Do not unplug the power plug from the socket by pulling the power cord.
Do not touch power plug or the machine with wet hands.

9
Frequently clean the dust on the plug with dry cotton cloth.
2.3 Product Application Range
This product is intended for cleaning dust on common home windows.
A glass with uneven surface, such as frosted, textured, patterned or leaded is not suitable to be cleaned by
the WINBOT.
If there are any coatings or films (tints) on windows or glass, do not use WINBOT as it may damage the
coating or tint.
This product can not be used on windows whose frame thickness is less than 5mm (0.2’’).
WINBOT is intended for home use only. It can NOT be used on huge windows or in complex places, for
example, the windows of commercial office buildings and industrial sites.
Product not designed for use on small windows (less than 60cm (24’’) high and less than 45 cm (18’’)
wide).
The product will not work on wet windows as the tread will not be able to grasp the window and move
the unit, instead it will slide down the window.
Should the kitchen window have a film of oil or grease from cooking, the unit may not be able to grasp
the window and move the unit, instead it will slide down the window.
The unit may NOT be used outside while raining, snowing or colder than 5℃ (40℉) as it will damage the
product and could cause electrical problems.
Because of the electrical nature of the product, the product may NOT be used in areas where flammable
material is used or stored
The product may not be used to clean cracked or broken windows as the suction will do further damage
to the window and would also damage the product.
2.4 Product Precautionary Items
Please check that cleaning pads are installed on WINBOT before cleaning.
If the window is too dirty, we suggest cleaning a small area to place the WINBOT on the window.
WINBOT can NOT be used to clean stains such as painting, glue, etc.
WINBOT can NOT be used to remove items such as chewing gum, label, papers, etc. which may cause
suction failure.
Do NOT place any obstacles on the window or the window sill which would obstruct WINBOT’s cleaning
path.
Since the cleaning of the window does not take a long period of time, it is recommended you be in the
same room the unit is cleaning the window so when the unit is done, you can attend to the removal of
the unit from the window. This will also allow you, should there still be a dirty spot, to use the Remote
control to guide the unit to clean the spot and then return the unit to a convenient spot for removal from
the window.
We recommend that you use the SAFETY POD for cleaning the outside of windows as described in the
Safety Pod section of this Instruction Manual.
The adapter should be plugged into a receptacle as close to the window as possible. The adapter MUST
never be allowed to hang outside the window.
The Supply Wire from the adapter must be free to move as the unit cleans the inside of the window.
Should the unit be cleaning the outside of the window, enough supply cord must be on the outside of the
window so as not to restrict movement of the unit.

10
When electrical connection fails or WINBOT finishes cleaning, please remove it from the window.
Grasping the handle, turn the unit OFF and use the Air Release Button or hold onto the handle for 30
seconds or more.
Because the vacuum generated on the bottom of the unit is rather strong, do not place close to body or
hand as it will suck the skin into the orifice and unit would have to be turned OFF to remove the unit from
the body part.
Please check the cupule on the bottom of the unit before each use to make sure they are not damaged
and would prevent good suction to the window.
2.5 About Children Safety
The product cannot be used by children or mentally disabled people.
The product should be stored out of the reach of children.
The product is NOT a toy for children to play with.
Keep all packing material out of the reach of children and dispose of it immediately.
2.6 Product Disposal
As soon as the unit is unpacked and you have verified that all components have been accounted for, you
should dispose of the packaging material right away to keep the children from playing with it.
Please recycle all packing material.
2.7 Replacement of WINBOT’s Battery and Disposal of Used Batteries (Picture)
Replace the Lithium battery with only genuine ECOVACS replacement battery. By calling our service
number and with the Model number and the numbers from the UPC label on the bottom of the unit, you
can order a replacement Lithium battery.
Should the Lithium battery need replaced, dispose of the old battery in accordance with your local laws.
2.8 Cases of Product Problems (picture)
Should there be a problem with your unit, please consult the questions and answers at the end of the
Instruction Manual. Should you not find the necessary help in the Question and Answer section, please
call our service number for further technical assistance.
Please contact our after-sales service department or the professional maintenance agency developed by
our company so that the professional maintenance personnel can provide after-sales service and
maintenance.
3. Preparation Before Use
3.1 Charging WINBOT’s Backup Battery
Before charging, please firstly turn on the button at the bottom of the WINBOT. (“ ” OFF
“ ” ON. The default state is “ ”) Otherwise, WINBOT can NOT be charged or working.
After plugging the adapter into your receptacle, connect the supply cord to the WINBOT so the Back Up
battery can be fully charged. The Battery MUST be fully charged before the unit will work when placed on
the WINBOT.

11
WARNING: Please make sure that the cord of the unit and adapter are not within reach of a child so that
they can pull the unit down upon themselves and cause injury.
Move the switch on the handle to the furthest right position (Battery Symbol). The Indicator Light will
flash Green indicating that the Back Up battery needs to be charged. When the Back Up battery is fully
charged, the Indicator Light will light a continuous Green.
Charging time for the battery is approximately 2 hours. This time will vary depending on the temperature
of the room, a cooler or warmer room may take longer to charge the battery.
NOTE: While the unit is cleaning the window, make sure the Switch on the Handle is in the ON (center
position) and the unit is connected to the adapter and the adapter is plugged into your receptacle.
4. Use of product
Warning:If WINBOT is used to clean a window above ground level, the Safety Pod MUST be
used.
WINBOT must be used in strict accordance with the directions in the Instruction Manual.
ECOVACS can not be held liable or responsible for any damages or injuries caused due to
improper use.
Note: Before operation of the unit, you must carefully read the content of “Safety Introductions” before using
the product. Any operation inconsistent with the contents of Instruction Manual may cause damage to the
product or cause personal injury.
Placement of WINBOT
Make sure that there is enough power cord for the WINBOT to clean the entire window without
restricting its movement. If there is not enough cord, it is not safe to use the WINBOT on that particular
window until a WINBOT Extension Cord is attached.
Loop one end of the Safety Rope around the Safety Pod's channel and pull it tight.
Loop the other end of the Safety Rope to the power connector on the power cord and tighten.
If an Extension Cord is attached, the Safety Rope must be tied to the power connector on the Extension
Cord.
Note: Do NOT attach the Safety Rope to the thin part of the cord.
Press the Safety Pod suction cup FIRMLY in the lower corner on the opposite side of the glass you are
cleaning. Make sure the Safety Pod suction cup is securely in place.
Place WINBOT on the window, close the window if cleaning the outside of the window, and start
WINBOT.
Make sure the button on the bottom of the WINBOT is turned ON.
Plugging the Adapter into your receptacle and push the power button to start WINBOT.
Spray the front Pad with the provided Window Cleaning Solution lightly. After having cleaned your
windows a number of times, you will begin to know how damp the Pad should be to clean your windows.
If you get the Pad too Wet, it may not allow the treads to properly drive the unit on the window. Do NOT
spray the back pad as this Pad is for wiping the window after the treads.
With the unit placed horizontally on the window and about 10cm (4‘’) from the corners of the lower

12
window, move the switch to the ON position and only let go once the unit has securely attached itself to
the window being indicated by the Indicator Light flashing BLUE in color. At this point, you should remove
your hand from the unit. When Indicator Light do NOT light, it means the suction power in too small.
Please check or replace the cupule. When Indicator Light flashes red, please adjust the height of
placement and restart the product.
With the Safety Pod attached to the inside of the window, close the window without damaging the outer
skin of the Supply Cord. Make sure there is enough cord between the Safety Pod and the WINBOT for the
unit to clean the entire window without restricting its movement.
4.2 Product Start
Once the unit is attached to the outside of the window, press the Start Button on the unit or the
Start/Pause button on the Remote. The product will use its automatic cleaning mode to clean the
window and return to the position (which is near the start point) after having cleaned the window.
NOTE:
This product is intended for cleaning dust on common home windows. WINBOT can NOT be used to
clean stains such as painting, glue, etc. WINBOT can NOT be used to remove items such as chewing
gum, label, papers, etc which may cause suction failure.
Glass with uneven surface, such as frosted, textured, patterned or leaded is not suitable to be cleaned
by the WINBOT.
After WINBOT has finished cleaning one window, if the cleaning pads are too dirty, please replace them
with a clean set.
The unit may NOT be used outside while raining, snowing or colder than 5℃ (40℉) as it will damage
the product and could cause electrical problems.
Should the unit stop working and the Indicator Light blink RED, you need to respond by grasping the
handle of the unit and turn the switch OFF. You may then turn the switch back ON and press the
Pause/Start button to start the cleaning process.
4.3 Product Pause
If you want to Pause the product during the cleaning process, press the “Start/Pause” (Icon) button on
the Remote Control momentarily or press the “Start/Pause” (Icon) button on the unit. The product will
pause and wait for further instructions.
While the unit is in the Pause Mode, you may use the Remote to move the unit around the window by
pressing the appropriate directional arrow. This is handy for your use when a spot on the window is
difficult to clean, because you can move the unit back to the spot and clean again. When you want to
return the unit to the Auto Mode to continue cleaning, press the pause button on the Remote.
If using WINBOT for a long period of time continuously, give yourself and WINBOT a 10 minutes break for
every hour of use, this will extend the life and performance of robot and avoid overheating.
4.4 Product Stop
After the product has finished cleaning the window, it will return to the place where you had started the
cleaning. If you find the stopping place is not convenient for you to grasp to remove the unit, use the

13
Remote by pressing the appropriate directional arrow until the unit is where you can grasp the handle
more conveniently.
Holding the handle of the unit, move the switch to the OFF position, to the far left, and place finger in the
Air Release slot and lifting with your finger, you will release the vacuum from the inner circle. In a few
seconds, the unit will be free from the window.
If you do NOT use the Air Release button, you need to hold the handle for about 45 to 60 seconds. Do
NOT try to use the handle as leverage to pry the unit from the window as you could damage the product.
After removing the unit from the window, do the required maintenance on the product in preparation for
storage. BEFORE storing, while the unit is plugged into your receptacle, move the switch to the Charge
position and allow the battery to charge until the Green light quits Flashing.
Always Store the unit with the switch in the OFF position.
4.5 Product Restart
When the product cycles a place repeatedly during the operation, or stops working, sending a warning prompt
and the red indicator light flashing, grasp the unit by the handle and turn the switch to the OFF position.
Then, turn the unit back ON and press the Pause/Start button on the unit to continue the cleaning process.
5. Accessories
5.1 Safety Pod
Warning:If WINBOT is used to clean a window above ground level, the Safety Pod MUST be
used.
WINBOT must be used in strict accordance with the directions in the Instruction Manual.
ECOVACS can not be held liable or responsible for any damages or injuries caused due to
improper use.
1. Make sure that there is enough power cord for the WINBOT to clean the entire window without restricting
its movement. If there is not enough cord, it is not safe to use the WINBOT on that particular window until a
WINBOT Extension Cord is attached.
2. Loop one end of the Safety Rope around the Safety Pod's channel and pull it tight.
3. Loop the other end of the Safety Rope to the power connector on the power cord and tighten.
4. If an Extension Cord is attached, the Safety Rope must be tied to the power connector on the Extension
Cord.
Note: Do NOT attach the Safety Rope to the thin part of the cord.
5. Press the Safety Pod suction cup FIRMLY in the lower corner on the opposite side of the glass you are
cleaning. Make sure the Safety Pod suction cup is securely in place.
6. Place WINBOT on the window, close the window if cleaning the outside of the window, and start WINBOT.
7. After WINBOT is done cleaning remove it from the window. Grasp the handle, switch the unit OFF, insert
finger into Air Release Trigger and pull up on it for 20 seconds until suction has diminished.

14
5.2 Remote Control
Before use of the remote control, please confirm whether the battery has been installed correctly.
The remote control uses two AAA batteries.
During installation of the battery, be sure to pay attention to the direction of the positive and negative poles
of the battery and the diagram in the Remote Control casing.
If the battery power is low, replace both batteries; never use a new battery with an old battery.
If the remote control is not used for a long time, please remove the batteries so they will not damage the
Remote Control.
Do not place the remote control in the Sun or next to a heat source as this can damage the Remote Control.
Should liquid be spilled on the Remote Control, remove the batteries immediately and shake till as much of
the liquid is out of the Remote Control. Allow to dry for 24 hours before replacing the batteries. Try to
use the Remote with the unit on the window while the unit is within easy reach to see that it works. If the
Remote does NOT work, do not use the unit until the Remote has been replaced.
While replacing the battery, should a foreign object be dropped into the battery area, please remove
immediately. IF the object is left in the battery area, possible shorting of the batteries could happen and
render the Remote Control useless.
Please follow the local environmental regulations for the disposal of the discarded batteries.
(picture)
The Remote has a series of functions which you need to become familiar with while the unit is on the window
and within easy reach. While you read the following instructions and operate the unit by the Remote, you will
see how easy it is to use the Remote and control the unit.
1 RESET button – should the unit NOT work in any of the following ways, the RESET button can be pressed to
restart the product and make the product restore to the factory default state.
2 Start / Pause button – Starts or Stops the product
3 4 5 6 Arrows – each arrow indicates the direction the unit will travel, remembering the UP arrow is the Front
of the Unit.
7 Pairing button - this button pairs the Remote Control with WINBOT.
Notice: The Remote Control is already paired with WINBOT when it arrives from the factory. If you need to
replace the Remote Control, please use the Pairing button to pair the Remote Control with WINBOT.
Pairing method:
Plug WINBOT in and place WINBOT’s switch to the CHARGE position. Hold the Pairing button on the Remote
Control unit. Then press the Start/Pause on WINBOT until WINBOT beeps (about 3 seconds). Pairing action is
complete when WINBOT beeps
The Remote Control will work best when within 2m (6.5’) of the unit. Maximum distance between Remote
Control and WINBOT is 12m (39.4’).
6. Day-to-day Storage
Storage of the unit must be away from high temperatures as the plastic and electronic components can
be affected.
Do not store the unit close to liquids where the liquid might be spilled onto the unit and get inside and
damage the unit.

15
Pay attention to the maintenance requirements of the unit as spelled out in that section of the
Instruction Manual.
7. Product Maintenance
7.1 Cleaning the Unit
The Unit must be in the OFF position and unplugged from the electrical source.
The Unit may NOT be cleaned with any volatile liquid such as solvent, gas, etc. or a detergent containing acidic
or pine sole additives as they will negatively affect the plastic.
7.2 Cleaning and Replacing Cleaning Cloth
After each cleaning or should the Pad get really dirty before finishing the cleaning of the window, the Pad can
be rinsed in clear warm water. Be careful of detergent you might use to wash the pad as you do not want to
leave a soapy film on the pad that will not allow the Pad to properly clean the window. After thoroughly dried
(generally dry for 24 hours), re-install the pad on the unit.
7.3 Squeegee
Squeegee maintenance
After each use, gently wipe the Squeegee with a damp cloth to remove residue from its surface. A wet cloth
will allow water to get inside the unit and cause damage to the internal components. A replacement
squeegee may be purchased by going to our Web Site or calling our service number.
Squeegee replacement
1 Push the Squeegee to the center from each end of the Squeegee, then take it off.
2 Replace it with a new one: put the new one into the groove and pull the end of the Squeegee to each side.
7.4 Cleaning Driving Treads
After each use inspect the Treads for possible accumulation of dirt. The total tread can be inspected by using
the remote and pressing the Forward or Reverse arrow. Clean any dirt with a soft damp pad.
NOTE: Dirty treads can negatively affect the function of the treads driving the unit on the window.
7.5 Cupule
Cupule maintenance
The Cupule assembly is a basic part of the units function and is located on the bottom of the unit. After each
use, you need to inspect the cupule’s surface to make sure it is not torn or cut. Any debris that is stuck to the
surface must be carefully removed.
Cupule replacement
1 Take the cupule off with a screw driver.
2 Replace it with a new one.
7.6 Extension Cord
Extension Cord is used to extend WINBOT's working range. If your window is too large, this will be a perfect
choose. For the use of Extension Cord, please see the following picture.
Meaning of Indicators
NO.
Sound
Indicator Light
Meaning
16
1
Emits *ding
dong
*Tone
None
WINBOT has been connected to power.
2
None
Indicator Light
flashes GREEN
Back up battery is charging.
3
None
Indicator Light
steady GREEN
Back up Battery is Fully Charged.
4
None
Indicator Light
flashes BLUE
WINBOT has been placed on window and has successfully suctioned
itself to the glass.
5
None
Indicator Light
steady BLUE
WINBOT is in the process of cleaning the window.
6
Emits Song
Indicator Light
flashes BLUE
WINBOT has finished cleaning the window and is ready to be
removed.
7
Emits Double
Tone
Indicator Light
flashes RED
WINBOT may need to be moved or reset. Please refer to Alarm and
Solutions Section.
8
Emits Double
Tone
Indicator Light
steady RED
WINBOT has a problem and requires our Service Center.
8. Alarm & Solutions
Alarm Sound
Light
Causes
Solutions
Toot, toot
RED
Indicator
Light
flashes
1. Turning WINBOT ON when not
plugged into receptacle
1. Connect unit to the Power Adapter
and plug into the receptacle.
2. Plug the Power Adapter back into
the receptacle.
3. Remove WINBOT from the window
and turn the power switch OFF (far
left). Turn the unit over, inspect the
Cupule for dirt stuck on the Cupule’s
surface. Gently clean the surface
with a soft damp cloth to make it
smooth again. Check the window to
make sure there is no hard debris
that would affect the Cupule.
4. Use the Remote Control to move
the WINBOT away from the window
frame by pushing Arrow buttons.
5. The smallest window WINBOT can
automatically clean is 60cm (24’’)
high by 45cm (18’’) wide.
6. The window frame thickness must
be over 5mm (0.2’’).
2. While cleaning the window, WINBOT
becomes disconnected from the Power
Source
3. Vacuum is leaking at the cupule
4. Bumper is pressed against the
window frame and raised;
5. Window is too small for WINBOT to
17
clean
If problem persists, please contact our
Service Center.
6. The window frame is too thin.
9. Common malfunctions
NO.
Problem
Solutions
1
WINBOT fails to stick to
window
a. when you turn the switch ON, the Indicator Light does not light
BLUE, check that WINBOT is connected to the Adapter and the
Adapter is plugged into the receptacle, or
b. The window surface is not smooth and WINBOT is not able to
suction to the window, or
c. The Cupule’s surface on the bottom is dirty and needs to be
cleaned, or
d. Upon inspecting the Cupule’s surface there is a tear or is worn and
needs to be replaced.
2
Machine stops,
sounds an alarm and
the Indicator Light
flashes RED
a. Should WINBOT be against the frame, move it away from the frame
by use of the Remote and then press the START button on the unit
or RESET on the Remote to start the cleaning process, or
b. Should WINBOT be on the edge of the glass, grasp the unit and
move it away form the edge of the window and then press the
START button on the unit of reset BUTTON on the Remote to start
the cleaning process, or
c. WINBOT has encountered HARD debris on the window that has
caused a loss of suction in the outer ring and is not capable of
moving itself away from the spot without possibility of losing
suction and dropping from the window; you may use the Remote to
move the unit away and then press the START button on the unit or
the RESET button on the Remote to start the cleaning process
again.
3
WINBOT leaves streaks
on the window while
cleaning
a. WINBOT's front cleaning pad is too dirty to clean the dirt from the
window, needs to be replaced with a clean moist pad, or
b. The front pad is not moist enough and is not properly absorbing the
dirt in to the pad, or
c. The squeegee is dirty and needs to be cleaned off, or
d. The treads are dirty and / or have accumulated debris that needs to
be cleaned off, or
e. The rear pad is dirty and needs to be replaced with a clean pad.
4
Lower cleaning ability
a. Check the front and rear pads to see if there is debris in the pads
that is creating the noise on the window, or

18
b. Check the gasket that debris is not attached to the surface and
creates a noise when rubbing against the window, or
c. Check the treads to see that debris has not stuck itself on the tread,
or
d. Check that the front pad plate is free to move up and down, or
e. Should the noise still exist, call our Service Center and talk with
Technician for further direction.
5
There is loud noise
when the product
works.
a. Turn off the power switch of the product, remove the cleaning
cloth and clean, or
b. Clean the dirt and other unclean matters on the driving wheel, or
c. Check whether the cover plate of the cleaning cloth is flexible, and
whether it is stuck by foreign object, or
d. If the fault remains after cleaning in accordance with the above
steps, please contact our after-sales service department.
6
Driving treads slip on
the window
a. The front pad is too wet and leaves water on the window, or
b. The treads are too dirty and must be cleaned, or
c. The treads are heavily worn and you need to call our Service Center
and talk to a Technician.
7
Remote control does
not work
a. Remote control works best when used within 2m (6.5’) of WINBOT,
or
b. Check Batteries. If batteries are installed properly and the Remote
Control is not functioning, replace the batteries, or
c. Remote Control may need to be Paired with WINBOT. For Pairing
instructions, please see section 5.2, or
d. Check Alarm or Indicator Light. If WINBOT has sounded a toot toot
warning because it has lost power or suction, it can not be
maneuvered with the Remote Control. Reconnect power or reattach
WINBOT to Window.
10. Check of Battery Status
With WINBOT connected to the Adapter and plugged into your receptacle, move the switch on the Handle to
the extreme right position (Battery symbol). If the Indicator Light flashes Green, the Battery needs to charge.
Leave WINBOT in this position until the Indicator Light will turn a steady Green, indicating the battery is fully
charged. You may then use the unit.
12. Questions and Answers:
1.5.1 Are there any notes for the Consumer during the use of the product above the ground level?
A. During use of the product, be sure to fix and protect the product with Safety Pod, to improve the safety
performance of the product. ② The time for cleaning each window is very short; therefore, we
recommend the Consumer to be aware of its function to timely discover any abnormal function of the
product and take necessary corrective actions. ③ During use of the product, please keep the power cord
free from restrictions so that it will NOT hamper the unit from cleaning the entire surface of the window

19
or possibly cause the unit to become unplugged and lose power.
1.5.2 Will WINBOT fall during cleaning?
A. WINBOT is designed to keep from encountering situations where it would lose suction. Should the power
from the receptacle fail, the built-in battery has enough stored energy to keep the vacuum motor
running until you can quickly attend to the WINBOT. For safety, we have included a Safety Pod that will
suction to the inside of the window and keep the unit on the outside of the window from falling very far
and to make for easy retrieval.
1.5.3 Can WINBOT work without someone watching ?
A. WINBOT is designed to clean the window without a person’s physical assistance. We do recommend
that you be within the same room where WINBOT is cleaning the windows because in most cases the
window will be cleaned within a very short time. When it has finished, you will be needed to remove the
WINBOT from the window and attend to its cleaning and preparation for the next window.
1.5.4 Can the product be used on various thicknesses of glass in the window or door?
A. The thickness of the glass does not cause problems in its operation. However, various types of uneven
glass, such as: frosted, stained glass, patterned glass, etc. will cause the unit to loose suction and fall from
the window.
1.5.5 Why does the product send out “toot” alarm and the Indicator Light flash red when you have just
started to use the product?
A. Please refer to the Common Failures section of the Manual where it will be covered in more detail.
1.5.6 WINBOT can NOT work and the Indicator Light do NOT flash when WINBOT is on the window ?
A. If this happens, it means the suction power is too small. Please check WINBOT’s cupule and driving treads.
If there is too much dirt or dust on them, the suction power will be affected and cause WINBOT stop
working. Therefore, it is recommended to clean the cupule and driving treads when they get dirty.
1.5.7 Why does the product fail to work when the START button is pressed on WINBOT?
A. 1) WINBOT will NOT clean the window if it is not plugged into a receptacle. Its battery power will send
the unit to the bottom of the window. Should this happen, plug the adapter into a nearby receptacle for
its power. 2) WINBOT can NOT work if it is not correctly placed on the window. Please refer to the
Product Placement section for proper placement on the window.
1.5.8 What if WINBOT encounters frame obstructions?
A. Under normal circumstances, WINBOT will automatically move around the obstruction and continue its
cleaning.
1.5.9 Why does the product fail to completely clean the door or window glass?
A. 1) The front pad could be dirty from cleaning the glass and as a result is leaving a residue on the glass.
Stop and replace the pad with a clean pad. 2) The rear pad may be dirty or contain some debris that is
leaving marks on the glass. You should replace the rear pad with a clean pad. 3) Check that the treads
are clean. They may also contain some matter that will leave marks on the glass that the rear pad can not

20
wipe off. The treads should be checked often for cleanliness and wiped with a damp cloth. 4) The
provided cleaning solution should be used when cleaning the glass. A dry cloth will only wipe dust and
NOT clean the glass. 5) WINBOT cannot clean paint, stains, paper, or glue from the window. You will
have to continue removing these residues by hand as you have done previously.
1.5.10 How to completely clean the door or window glass?
A. WINBOT cannot clean paint, stains, paper, or glue from the window. You will have to continue removing
these residues by hand as you have done previously.
1.5.11 How to store the product when not in use?
A. The product must be cleaned and with the switch in the OFF position. It needs to be stored in a dry
place away from heat and strong sun light which can have a detrimental affect on the unit.
1.5.12 When the product cleans the outside of the window and the alarm goes off, I may not be able to
hear the alarm.
A. WINBOT has a feature that will visually let you know if a problem occurs while also sounding its alarm.
The Indicator light on the bottom of the unit will flash red, letting you know there is a problem that
requires your attention.
1.5.13 When the product gets into trouble, such as stopping in a place on the window or in the corners,
what do I do?
A. The product may get into trouble when cleaning the door and window glass. In such cases, it will try to
get out of trouble; if it fails, your assistance will be needed. First, press RESET button to restart the
product and the product should start cleaning again.
1.5.14 Can WINBOT completely clean the corners of the window glass?
A. WINBOT is programmed to clean the windows as good and efficiently as possible. There may be some
circumstances that corners may not be totally cleaned. With the Remote control, you can move the
WINBOT when it has finished cleaning the window and drive it to those spots that need to be attended
to. We feel that this will satisfactorily resolve your problem.
Should you still encounter some situations that have not been properly addressed to your satisfaction, we
ask that you contact our Service Department where a Technician can properly address your specific
problem or question. Or call our service number.
Enjoy Smart Life
ECOVACS

21