Loading ...
Loading ...
Loading ...
Window kit Installation
The
window
kit
has
been
designed to fit most standard vertical and horizontal windows. However, it
may be necessary to modify the installation procedures to accommodate your window.
NOTE:
• If your window opening is smaller than the minimum length of the window slider kit, the window
slider kit can be cut to fit the window opening. Never cut into the exhaust and intake hose cut-outs on
the window slider kit.
• If your window opening is larger than the maximum length of the window slider kit, additional
material will be needed to cover the open space such as, Plexiglas, PVC plastic, ply wood, etc.
Alternately, an additional window slider kit can be purchased to be used in combination with the
included kit.
• When using the window slider kit on a window or sliding door, additional security measures may be
needed.
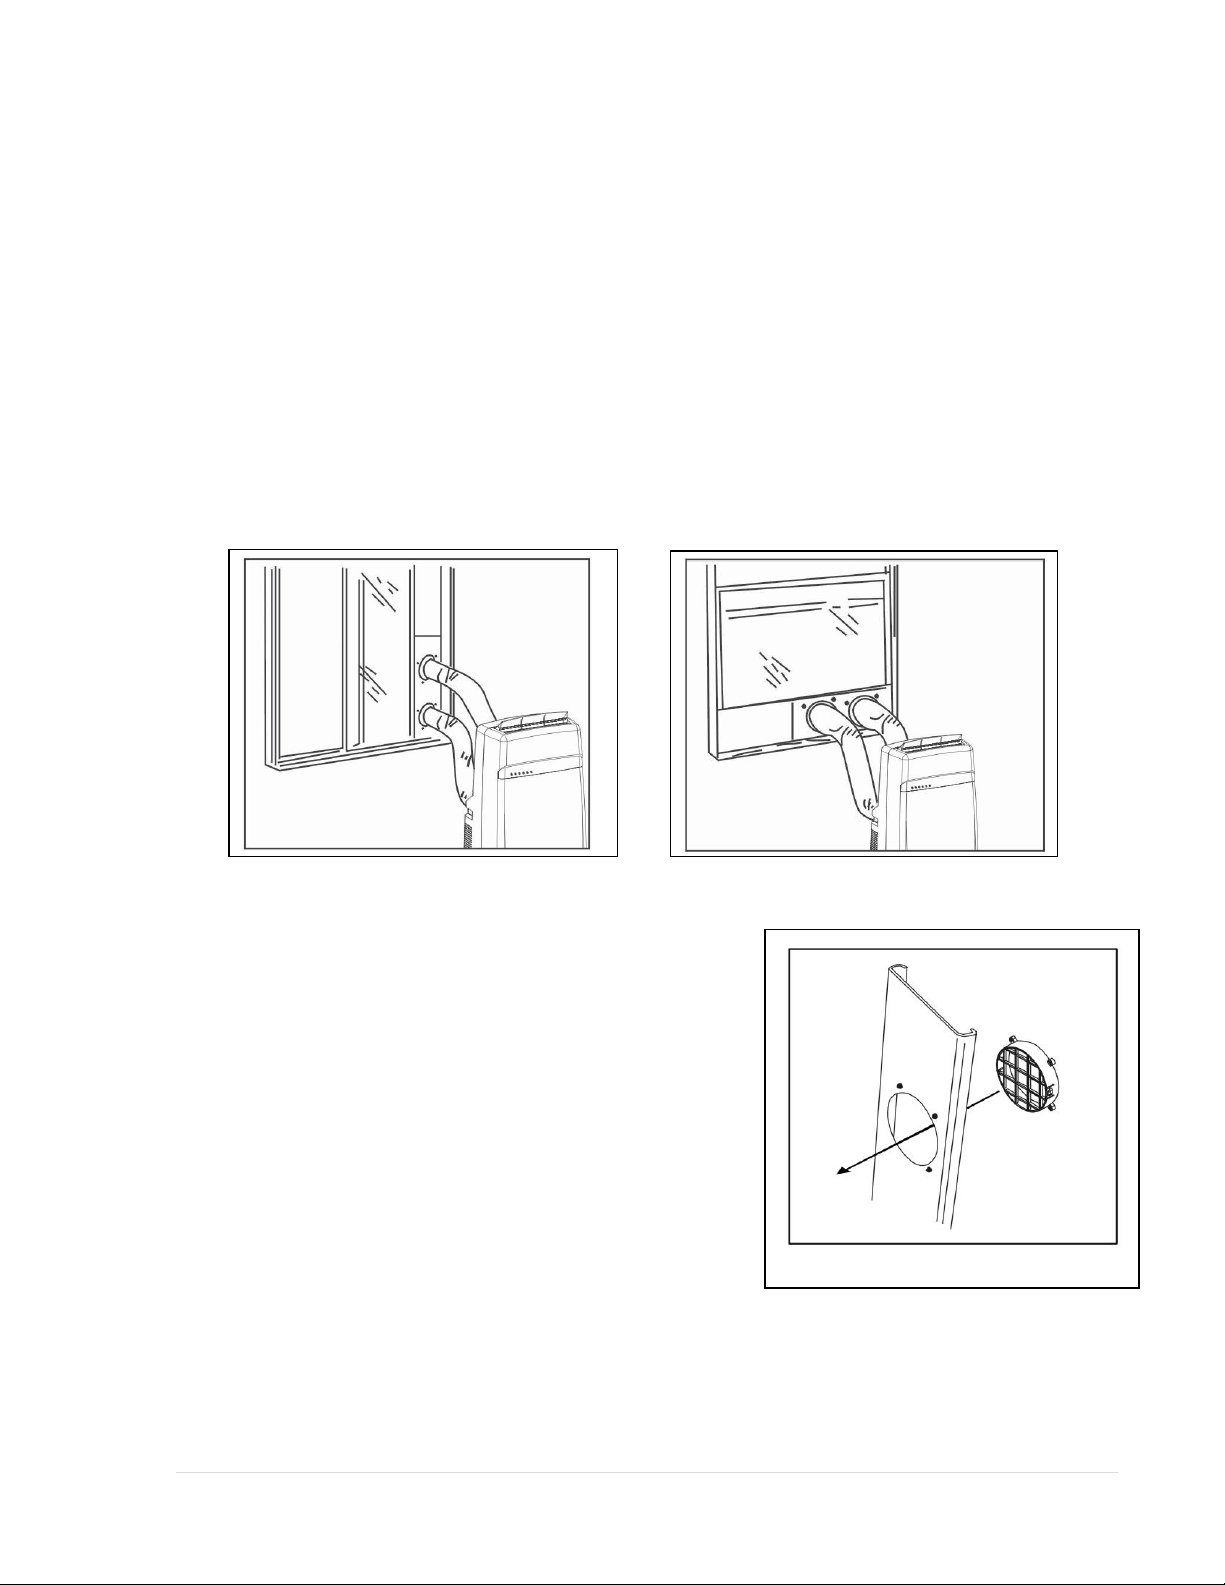
1. Open the window approximately 5”.
2. Adjust the length of the window slider to the same length
and width of the opening of the window. Cut the window
slider if necessary to fit the length of your window.
3. Insert the fixture through the back grooved side of the
window slider hose cut-out. Line up the fixture with the 4
screw holes and tighten the fixture with 4 screws from the
front side of the slider panel. (Fig. 1)
4. Fit the window slider kit into the window opening and close
the window to secure the window slider kit. For long term
installation, you may screw the window kit into your window
frame.
5. Move the air conditioner close to the window, extend the
hose to the necessary length, keeping it as short and as
straight as possible and attach the other end of the hose to
the window slider kit.
6. Align the tab cut-outs of the hose connector to the tabs on
the fixture and snap the hose connector to the window slider
kit.
Figure 1
10 | P a g e
Loading ...
Loading ...
Loading ...