Loading ...
Loading ...
Loading ...
9
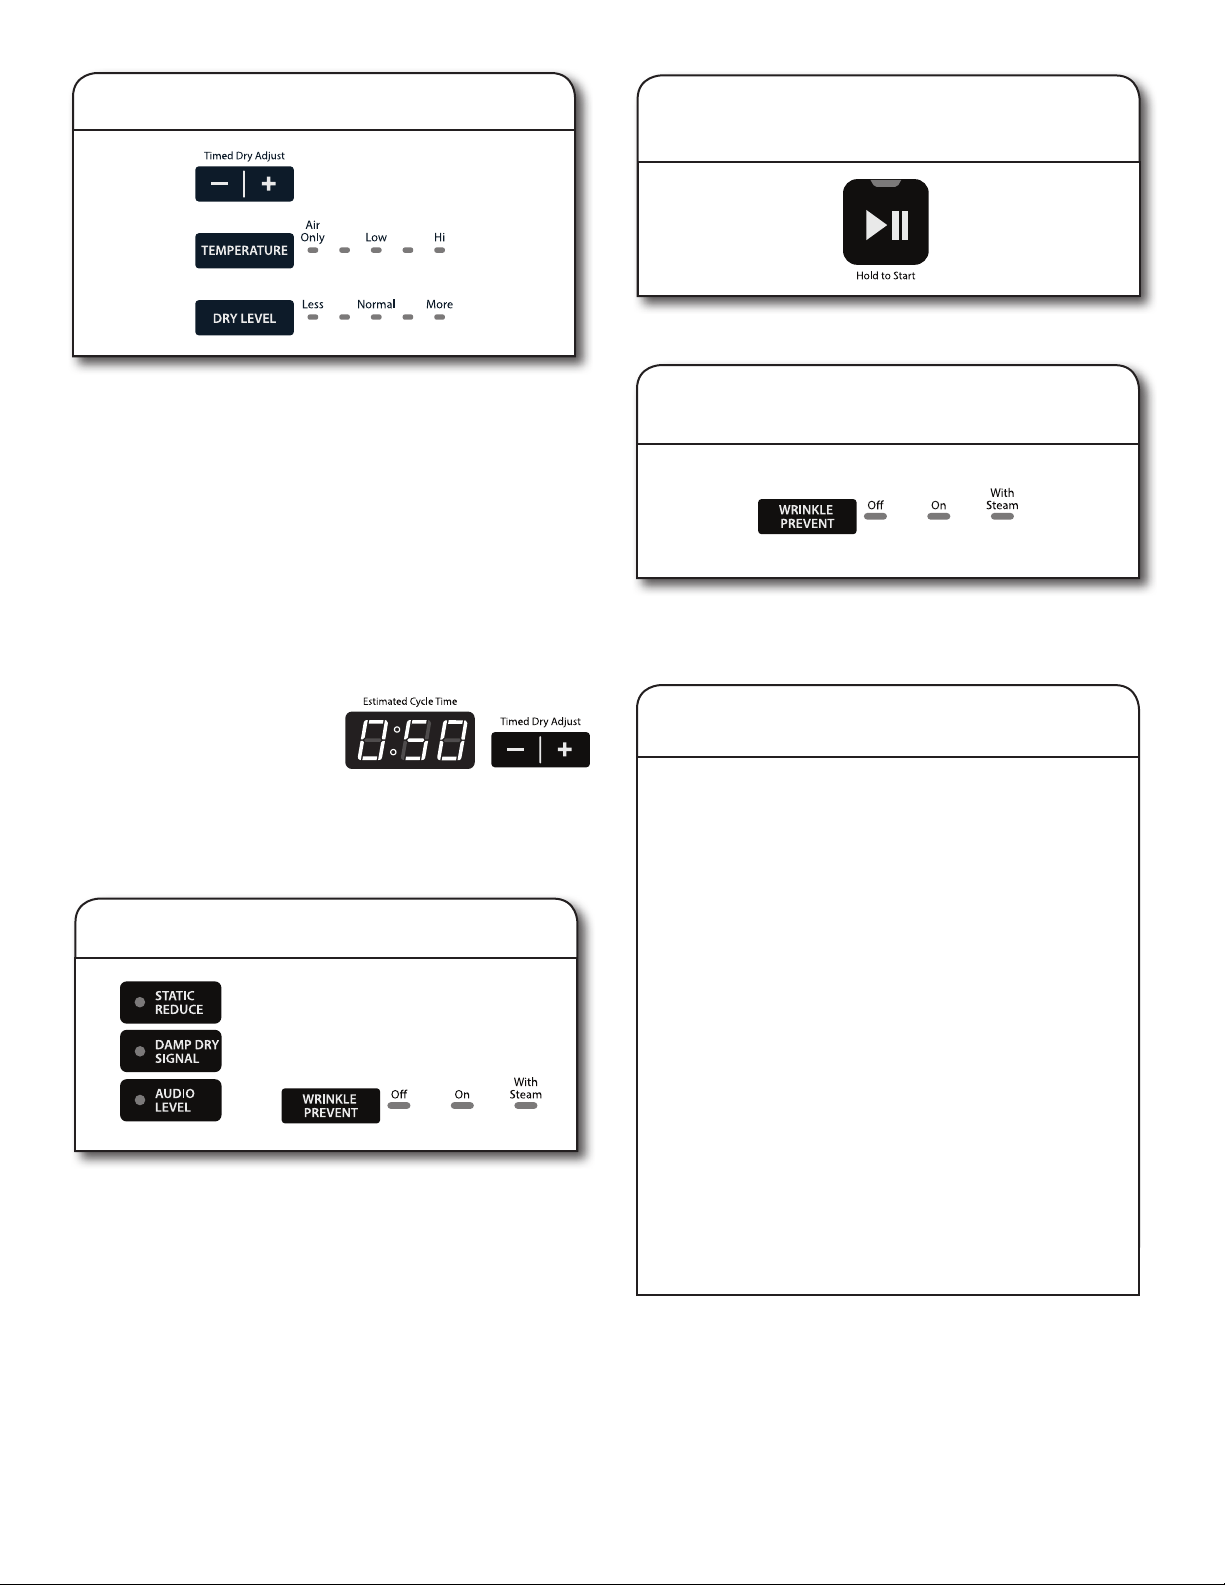
Promptly remove garments after cycle has completed to
reduce wrinkling. If you will be unable to remove the load
promptly, select the Wrinkle Prevent option.
7. Touch and hold START/PAUSE button
to begin cycle
Touch and hold the START/PAUSE button to begin the cycle.
8. Remove garments promptly
after cycle is nished
5. Adjust cycle settings, if desired
You may adjust different settings, depending on whether you
have selected a Sensor cycle, Timed cycle, or Steam Refresh
cycle. See the “Cycle Guide” for detailed information.
NOTE: Not all options and settings are available with all
cycles. Not all cycles are on all models.
Sensor Cycles:
You can select a different dryness level, depending on your
load, by touching Dry Level to scroll to More, Normal, or
Less. Selecting More, Normal, or Less automatically adjusts
the dryness level at which the dryer will shut off. Dry Level
can be changed in the rst 5–8 minutes of the cycle.
Sensor cycles give the best drying in the shortest time.
Drying time varies based on fabric type, load size, and
dryness setting.
Timed Cycles:
When you select a Timed cycle,
the default time appears in the
display. Touch “+” and “–” to
increase or decrease the time
in 1-minute increments. Touch and hold to change the time
in 5-minute increments.
The default temperature may be changed by touching
Temperature until the desired dry temperature is lit.
6. Select any additional options
Add additional options such as Static Reduce by touching that
option. If you will be unable to remove the load promptly, select
the Wrinkle Prevent options before touching the Start/Pause
button.
NOTE: Not all options and settings are available with all cycles.
Changing the Sensor Cycle settings
to increase drying time
If all your loads on all Sensor Cycles are consistently not as
dry as you would like, you may change the default settings
to increase or decrease the default dryness level.
Your sensor drying settings can be adjusted to adapt to
different installations, environmental conditions, or personal
preference. This change is retained and will affect all of your
Sensor cycles, not just the current cycle/load. There are 5
drying settings, which are displayed using the time display:
0 Much wetter clothes, 30% less drying time
1 Slightly wetter clothes, 15% less drying time
2 Factory preset dryness level
3 Slightly drier clothes, 15% more drying time
4 Much drier clothes, 30% more drying time
To change the drying settings:
NOTE: The settings cannot be changed while the dryer
is running or paused. The dryer must be in Standby mode
(power is off) to adjust the default settings.
1. Before starting a cycle, touch and hold DRY LEVEL
for 6 seconds.
2. Touch DRY LEVEL to select the dryness level shown
in the time display: 0, 1, 2, 3, or 4.
3. Touch the START/PAUSE button to save the new
dryness level setting.
Loading ...
Loading ...
Loading ...