Loading ...
Loading ...
Loading ...
13
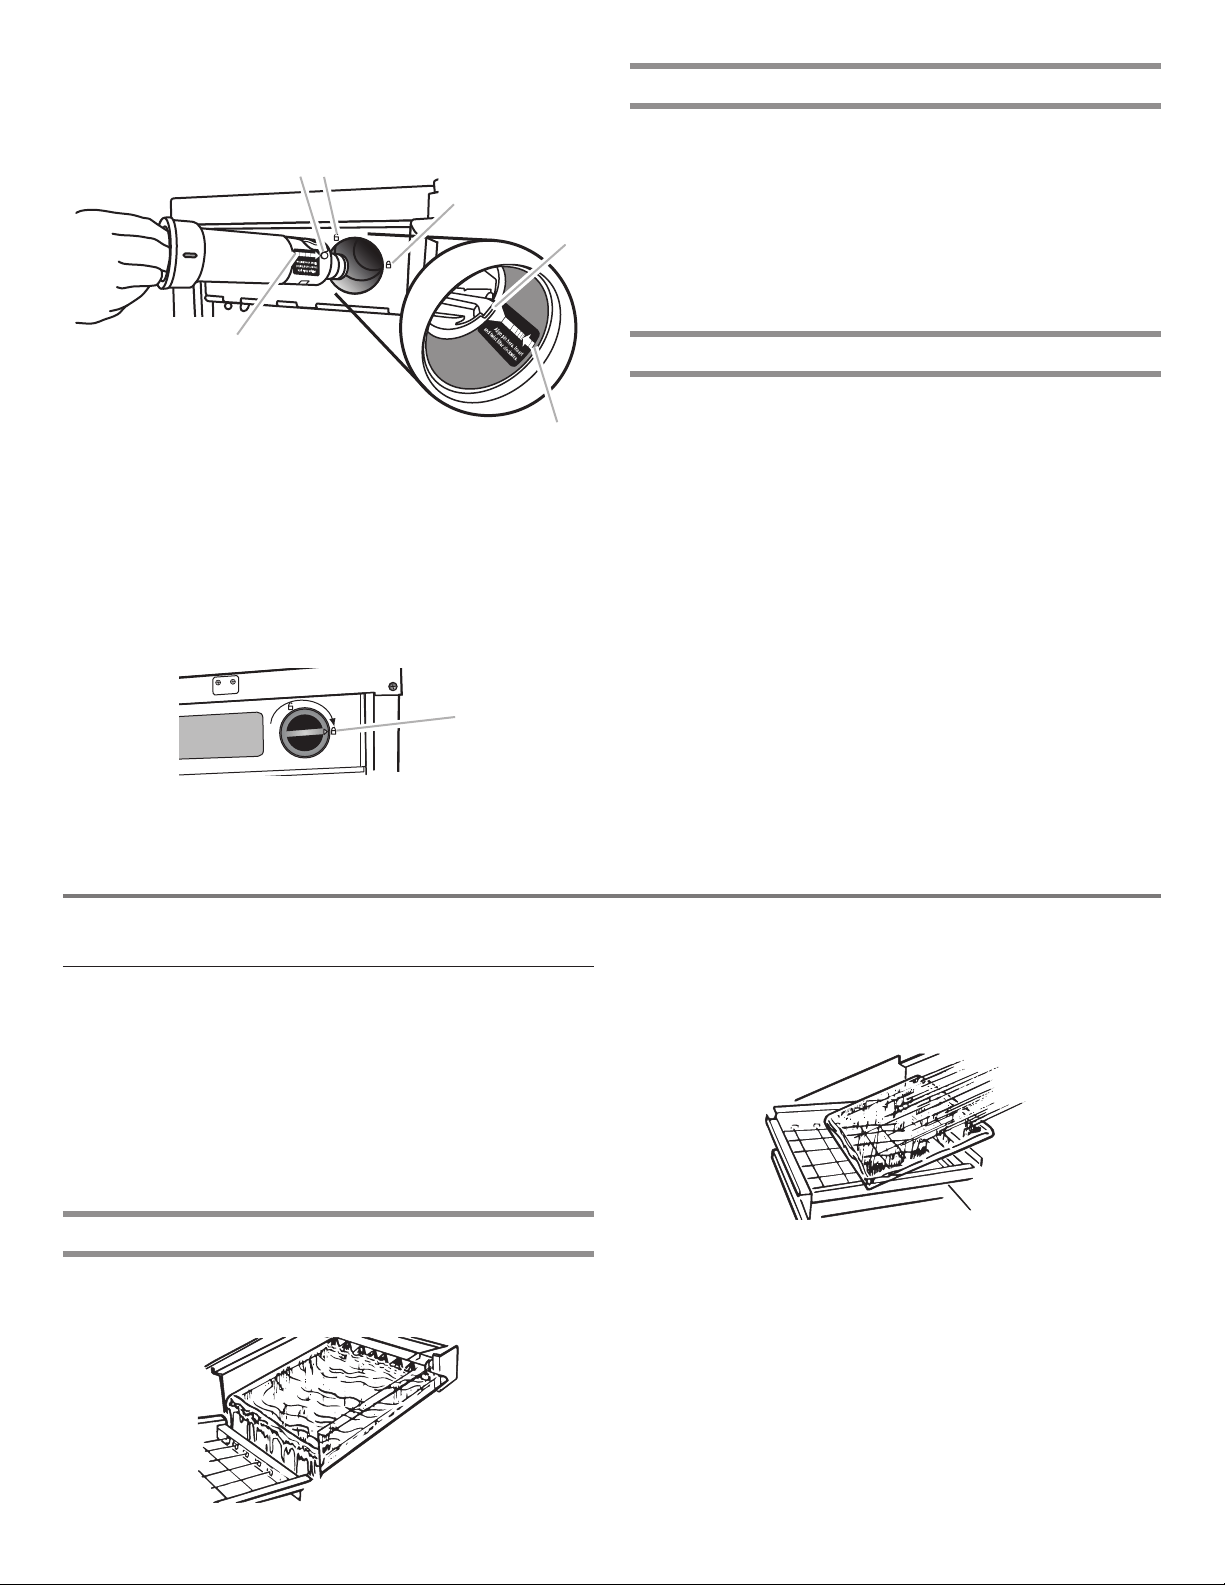
4. Using the arrow pointing to the alignment pin on the side of
the lter and the arrow inside the control housing, align the
alignment pin with the cutout notch and insert the lter into
the housing.
5. Turn the lter clockwise until it locks into the housing. Ensure
that the alignment arrow on the lter head aligns with the
locked symbol on the control box housing.
NOTE: If the lter is not correctly locked into the housing, the
ice maker will not produce ice.
The Water Filter Status Light
The water lter status lights will help you know when to change
your water lter.
■ The “Order Filter” status light will be illuminated when it is
time to order a replacement lter.
■ The “Replace Filter” status light will be illuminated when it is
time to replace the lter.
■ Replacing the disposable water lter with a new lter will
automatically reset the lter status tracking feature. See
“Using the Controls.”
Replace the Water Filter
To purchase a replacement water lter, see “Accessories.”
Replace the disposable water lter when indicated on the water
lter status display or at least every 9 months. If the ice making
rate decreases before the Replace Filter light illuminates, then
replace the lter.
1. Locate the water lter compartment in the right-hand side of
the control housing. See Step 3 in the “Install Water Filter”
section.
2. Turn the water lter counterclockwise (to the left), and pull it
straight out of the compartment.
NOTE: There may be some water in the lter. Some spilling
may occur.
3. Install the replacement water lter by following steps 2
through 5 in the “Install the Water Filter” section.
ICE MAKER USE
How Your Ice Maker Works
When you rst start your ice maker, the water pan will ll and the
system will rinse itself before starting to make ice. The rinsing
process takes about 5 minutes.
Under normal operating conditions, the ice maker will cycle
at preset temperatures. The ice level sensor located in the ice
storage bin will monitor the ice levels.
IMPORTANT: If the water supply to the ice maker is turned off, be
sure to set the ice maker control to OFF.
The Ice Making Process
1. Water is constantly circulated over a freezing plate. As the
water freezes into ice, the minerals in the water are rejected.
This produces a sheet of ice with a low mineral content.
2. When the desired thickness is reached, the ice sheet is
released and slides onto a cutter grid. The grid divides the
sheet into individual cubes.
3. The water containing the rejected minerals is drained after
each freezing cycle.
4. Fresh water enters the machine for the next ice making
cycle.
A
C
B
D
E
F
A. Alignment pin
B. Unlocked symbol
C. Locked symbol
D. Cutout notch inside control housing
E. Arrow pointing to cutout notch
F. Arrow pointing to alignment pin
A
A. Alignment arrow aligned with locked symbol
Loading ...
Loading ...
Loading ...