Loading ...
Loading ...
Loading ...
11
2. Remove the handle screws and handle (on some models).
3. Remove the hinge pin from the top hinge.
4. Remove the door from the hinges and replace the top hinge
pin.
5. Remove the screw and door stop at corner A. Remove the
screw and end cap at corner C. Place the door stop at corner
C, and tighten screw. Place the end cap at corner A, and
tighten screw.
6. Remove the screw and door stop at corner D. Remove the
screw and end cap at corner B. Place the door stop at corner
B, and tighten screw. Place the end cap at corner D, and
tighten screw.
7. Depending on your model, the brand badge for the front door
of your ice maker may be in the package with the Use and
Care Guide. Fasten the brand badge to the door.
8. Set the door aside.
Reverse Hinges
1. Unscrew and remove the top hinge. Replace the screws in the
empty hinge holes.
2. Remove the screws from the bottom of the opposite side of
the ice maker cabinet. Turn the top hinge upside down so
that the hinge pin points up. Place the hinge on the bottom
opposite side of the ice maker and tighten screws.
3. Remove the “old” bottom hinge screws and hinge. Replace
the screws in the empty hinge holes.
4. Remove the screws from the top of the opposite side of the
ice maker cabinet. Turn the hinge upside down so that the
hinge pin points down. Place the hinge on the top opposite
side of the ice maker and tighten the screws.
5. Remove the top hinge pin.
Replace Door
1. Place the door on the bottom hinge pin.
2. Align the door with the top hinge hole and replace the top
hinge pin.
3. Replace the handle and handle screws.
Replace Door Wrap (on some models)
1. Place the door wrap ange onto the door top and ensure that
it ts correctly.
2. Rotate the door wrap downward until it covers the door
surface completely.
3. Install the 2 hex-head screws into the bottom of the door.
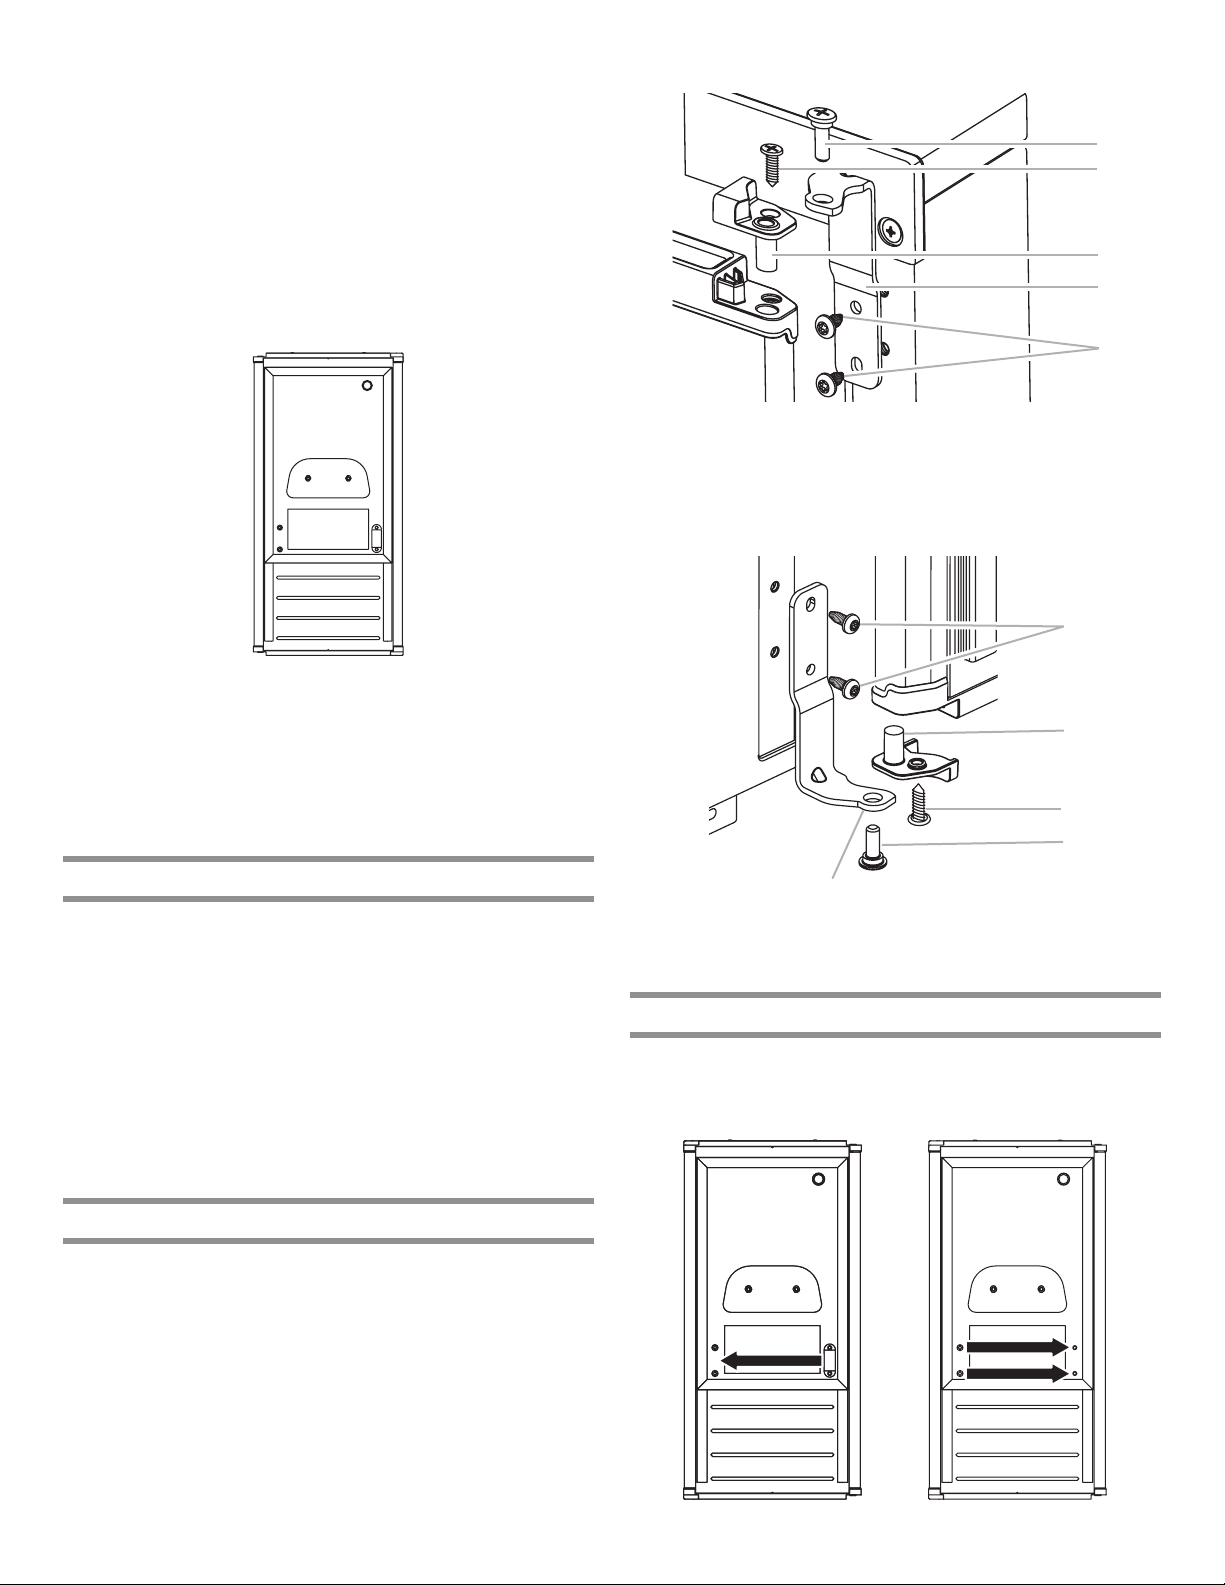
Top Hinge
Bottom Hinge
Reverse Door Catch
1. Remove the white decorative screws from the opposite side
of the door and set aside.
2. Remove the screws from the magnetic door catch and replace
it on the opposite side of the door.
A
B
D
C
A. Top corner open (no end cap)
B. Beginning top corner end cap
C. Beginning bottom corner end cap
D. Bottom corner open (no end cap)
A
C
D
E
B
A. Hinge pin
B. Phillips-head
countersink screw
C. Hinge pin sleeve
D. Hinge
E. Hex-head hinge screw
A
B
E
D
C
A. Hex-head hinge screw
B. Hinge pin sleeve
C. Phillips-head countersink screw
D. Hinge pin
E. Hinge
Loading ...
Loading ...
Loading ...