Loading ...
Loading ...
Loading ...
You are now ready to attach the included visual accessories onto the telescope optical tube.
The Eyepiece
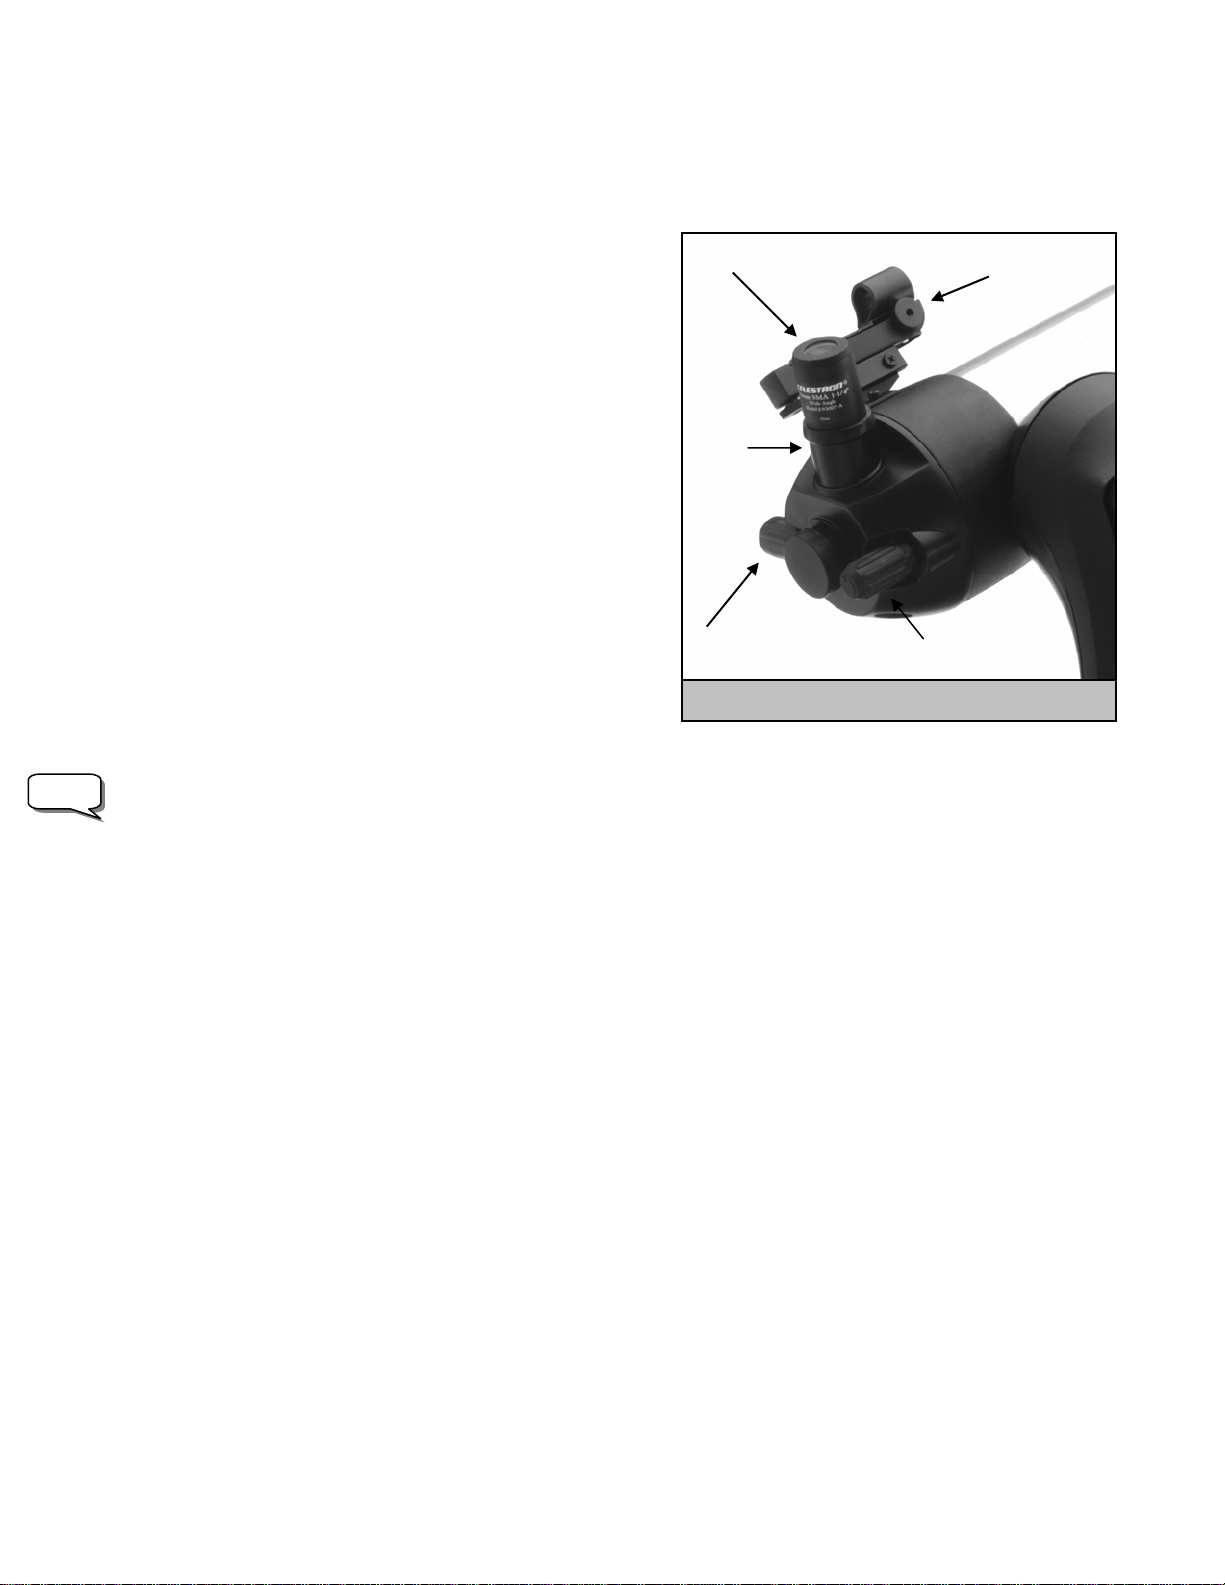
Figure 3-2 – The Rear Cell with Visual Accessories
Focuser Knob
StarPointer Eyepiece
Flip Mirror Control
Diagonal
Barrel
The eyepiece, or ocular, is the optical element that magnifies the image
focused by the telescope. The NexStar 4 has an internal diagonal mirror that
diverts light to the eyepiece barrel on top of the telescope's rear cell. The
eyepiece fits into the barrel built-in to the rear cell. To install the eyepiece:
1. Loosen the thumbscrew on the eyepiece barrel so it does not obstruct the
inner diameter of the barrel.
2. Slide the chrome portion of the eyepiece into the eyepiece barrel.
3. Tighten the thumbscrew to hold the eyepiece in place.
To remove the eyepiece, loosen the thumbscrew on the star diagonal and
slide the eyepiece out.
Eyepieces are commonly referred to by focal length and barrel diameter. The
focal length of each eyepiece is printed on the eyepiece barrel. The longer
the focal length (i.e., the larger the number) the lower the eyepiece power or
magnification; and the shorter the focal length (i.e., the smaller the number)
the higher the magnification. Generally, you will use low-to-moderate power
when viewing. For more information on how to determine power, see the
section on “Calculating Magnification.”
Barrel diameter is the diameter of the barrel that slides into the telescope's eyepiece barrel. The NexStar uses eyepieces with a standard 1-
1/4" barrel diameter.
Note:
As mentioned, the NexStar has an internal flip mirror that can divert light either through the eyepiece barrel at the top of the rear cell or
directly through the photographic opening at the back of the rear cell. Make sure that the flip mirror is in the "up" position for viewing
with an eyepiece and in the "down" position for taking photographs (see Astronomy Basics section of the manual).
The Star Pointer Finderscope
The Star Pointer is the quickest and easiest way to point your telescope exactly at a desired object in the sky. It's like having a laser pointer
that you can shine directly onto the night sky. The Star Pointer is a zero magnification pointing tool that uses a coated glass window to
superimpose the image of a small red dot onto the night sky. While keeping both eyes open when looking through the Star Pointer, simply
move your telescope until the red dot, seen through the Star Pointer, merges with the object as seen with your unaided eye. The red dot is
produced by a light-emitting diode (LED); it is not a laser beam and will not damage the glass window or your eye. The Star Pointer comes
equipped with a variable brightness control, two axes alignment control and a quick-release dovetail mounting bracket. Before the Star
Pointer is ready to be used, it must be attached to the telescope tube and properly aligned:
Star Pointer Installation
1. Locate the dovetail mounting bracket on the rear cell of the optical tube.
2. Slide the mounting track at the bottom of the Star Pointer over the dovetail portion of the bracket. It may be necessary to loosen the two
screws on the side of the mounting track before sliding it over the dovetail. The end of the Star Pointer with the glass window should be
facing out towards the front of the telescope.
3. Tighten the two screws on the side of the mounting track to secure the Star Pointer to the dovetail bracket.
7
Loading ...
Loading ...
Loading ...