Loading ...
Loading ...
Loading ...
English 15
Installation instructions
Install oven
Install
Handle
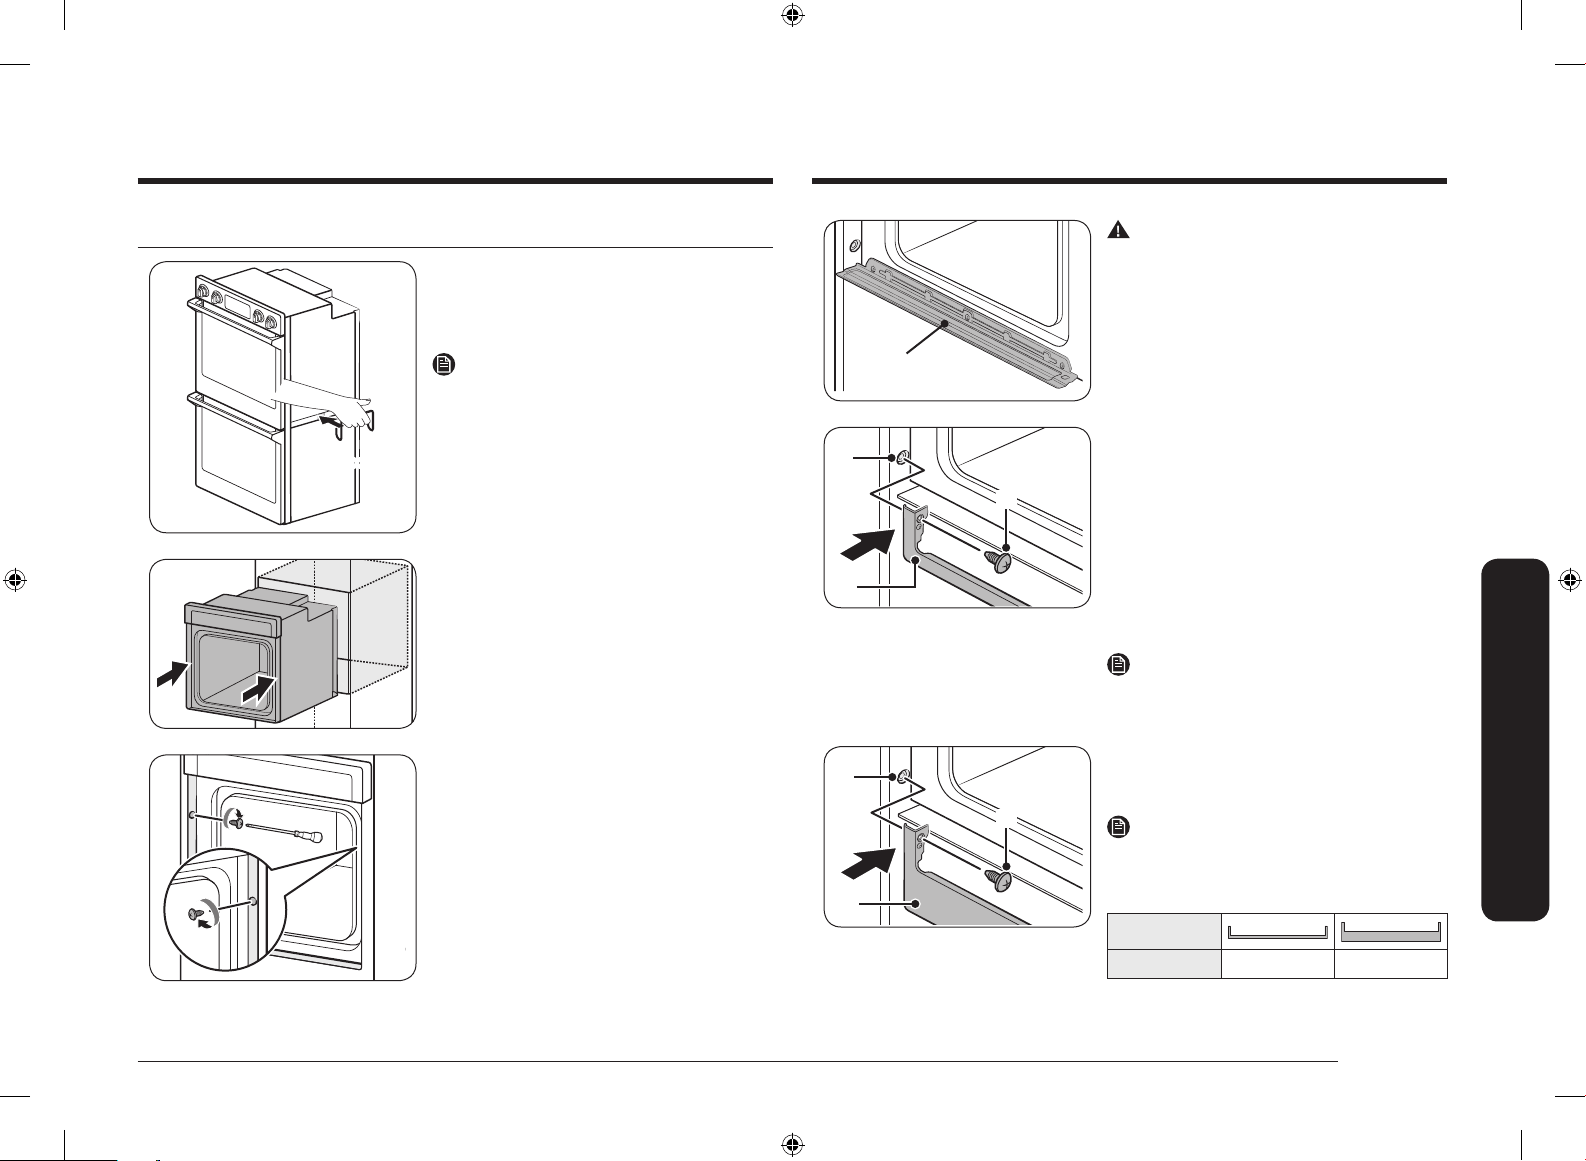
1. Using 2 or more people, lift the oven
partially into the cabinet cutout. Hang
the install handle onto the side hook of
the oven as shown below.
NOTE
Carefully push against front oven frame.
2. Push against the seal area of the front
frame to push the oven into the cabinet
until the back surface of the front frame
touches the front wall of the cabinet.
3. Push oven completely into the cabinet
and center the oven into the cabinet
cutout.
4. Remove the tape from front trims.
• Securely fasten the oven to the
cabinet using the screws provided.
• Insert the screws through hole in
trim aligning with hole in oven
frame. Do not overtighten screws.
Barrier
WARNING
When inserting the oven, use caution not to
deform or damage the barrier underneath.
A
B
C
A. Trim Left
B. Trim Bottom
C. Screw
5. The bottom metal trim are shipped in
the foam packing.
To install the metal bottom trim, see
following instructions.
• Align tab of the bottom trim with a
hole in the left side trim of the unit
as shown. Repeat on the right side.
• Using one screw on each side
of the trim tab, fasten the trim
securely to the oven.
NOTE
The bottom trim piece is to cover any
unwanted gaps.
A
B
C
A. Trim Left
B. Trim Bottom Large
C. Screw
6. If the cutout size is larger than
3
/4
inches use of the wider bottom trim is
recommended.
NOTE
To select the bottom trim properly, measure
the cutout between cabinet and oven. See
the following chart.
TYPE
Cutout 0 –
3
/4”
3
/4” – 2
3
/4”
Install_NW9000K_DG68-00862A-09_EN.indd 15 2019-11-11 5:36:09
Loading ...
Loading ...
Loading ...