Loading ...
Loading ...
Loading ...
10 English
Installation instructions
Installation instructions
• Flexible conduit from the oven should be connected directly to the junction
box.
• Fuse both sides of the line.
• Do not cut the conduit. The length of conduit provided is for serviceability of
the oven.
• A UL listed or CSA approved conduit connector must be provided.
• If the house has aluminum wiring, follow the procedure below:
1. Connect a section of solid copper wire to the ends of the exible conduit
leads.
2. Connect the aluminum wiring to the added section of copper wire using
special connectors and/or tools designed and UL listed for joining copper
to aluminum.
Follow the electrical connector manufacturer's recommended procedure.
Aluminum/copper connection must conform with local codes and industry
accepted wiring practices.
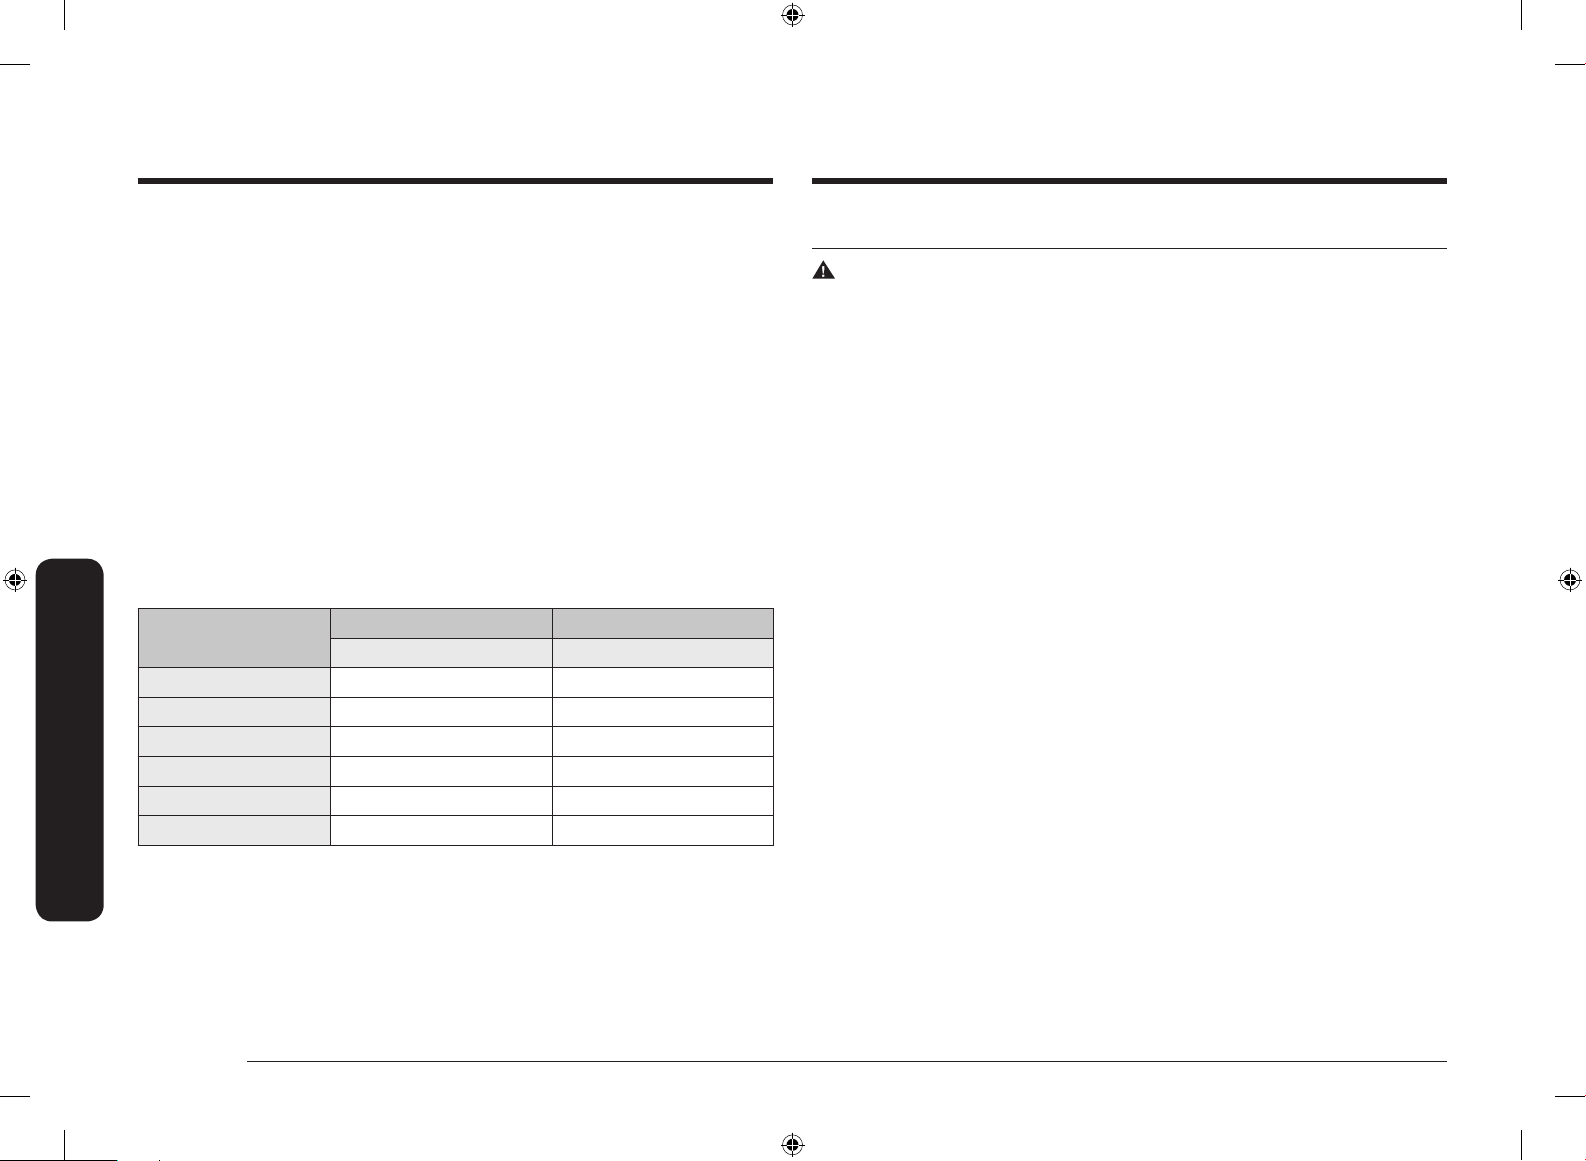
For power requirements for models NV51K6650D, NV51K6650S, NV51K7770D,
NV51K7770S, NV51*5***D, and NV51*5***S, refer to the following table.
Model
240 VAC 208 VAC
kW kW
NV51K6650D 9.3 7.0
NV51K6650S 4.9 3.7
NV51K7770D 10.6 8.0
NV51K7770S 6.2 4.7
NV51*5***D 8.9 6.7
NV51*5***S 4.9 3.7
Installation instructions
Prepare built-in oven
WARNING
Excessive Weight Hazard
Use two or more people to move and install an oven.
Failure to do so can result in back or other injury.
1. Decide on the nal location for the oven. Avoid drilling or cutting into house
wiring during installation.
2. To avoid oor damage, set the oven on a cardboard prior to installation. Do
not use handle or any portion of the front frame for lifting.
3. Remove the shipping materials and tape from the oven.
Remember to keep the packing materials that may be needed for installation.
4. Remove the hardware package from inside of the bag containing literature.
5. Remove racks and other parts from inside the oven.
6. Move oven and cardboard close to the oven’s nal location.
Preparation
Install_NW9000K_DG68-00862A-09_EN.indd 10 2019-11-11 5:36:07
Loading ...
Loading ...
Loading ...