Loading ...
Loading ...
Loading ...
L
10
13. Attach light kit (H) to switch housing (G). Align
the holes between the switch housing (G) and
light kit (H). Install screws previously removed
(Step 11, page 9) and securely tighten.
14. Install the bulbs (L) into sockets.
13
14
Page 10 Page 11
11
H
G
Screw
ASSEMBLY INSTRUCTIONS
16
17
Rubber
washer
Hex nut
J
K
I
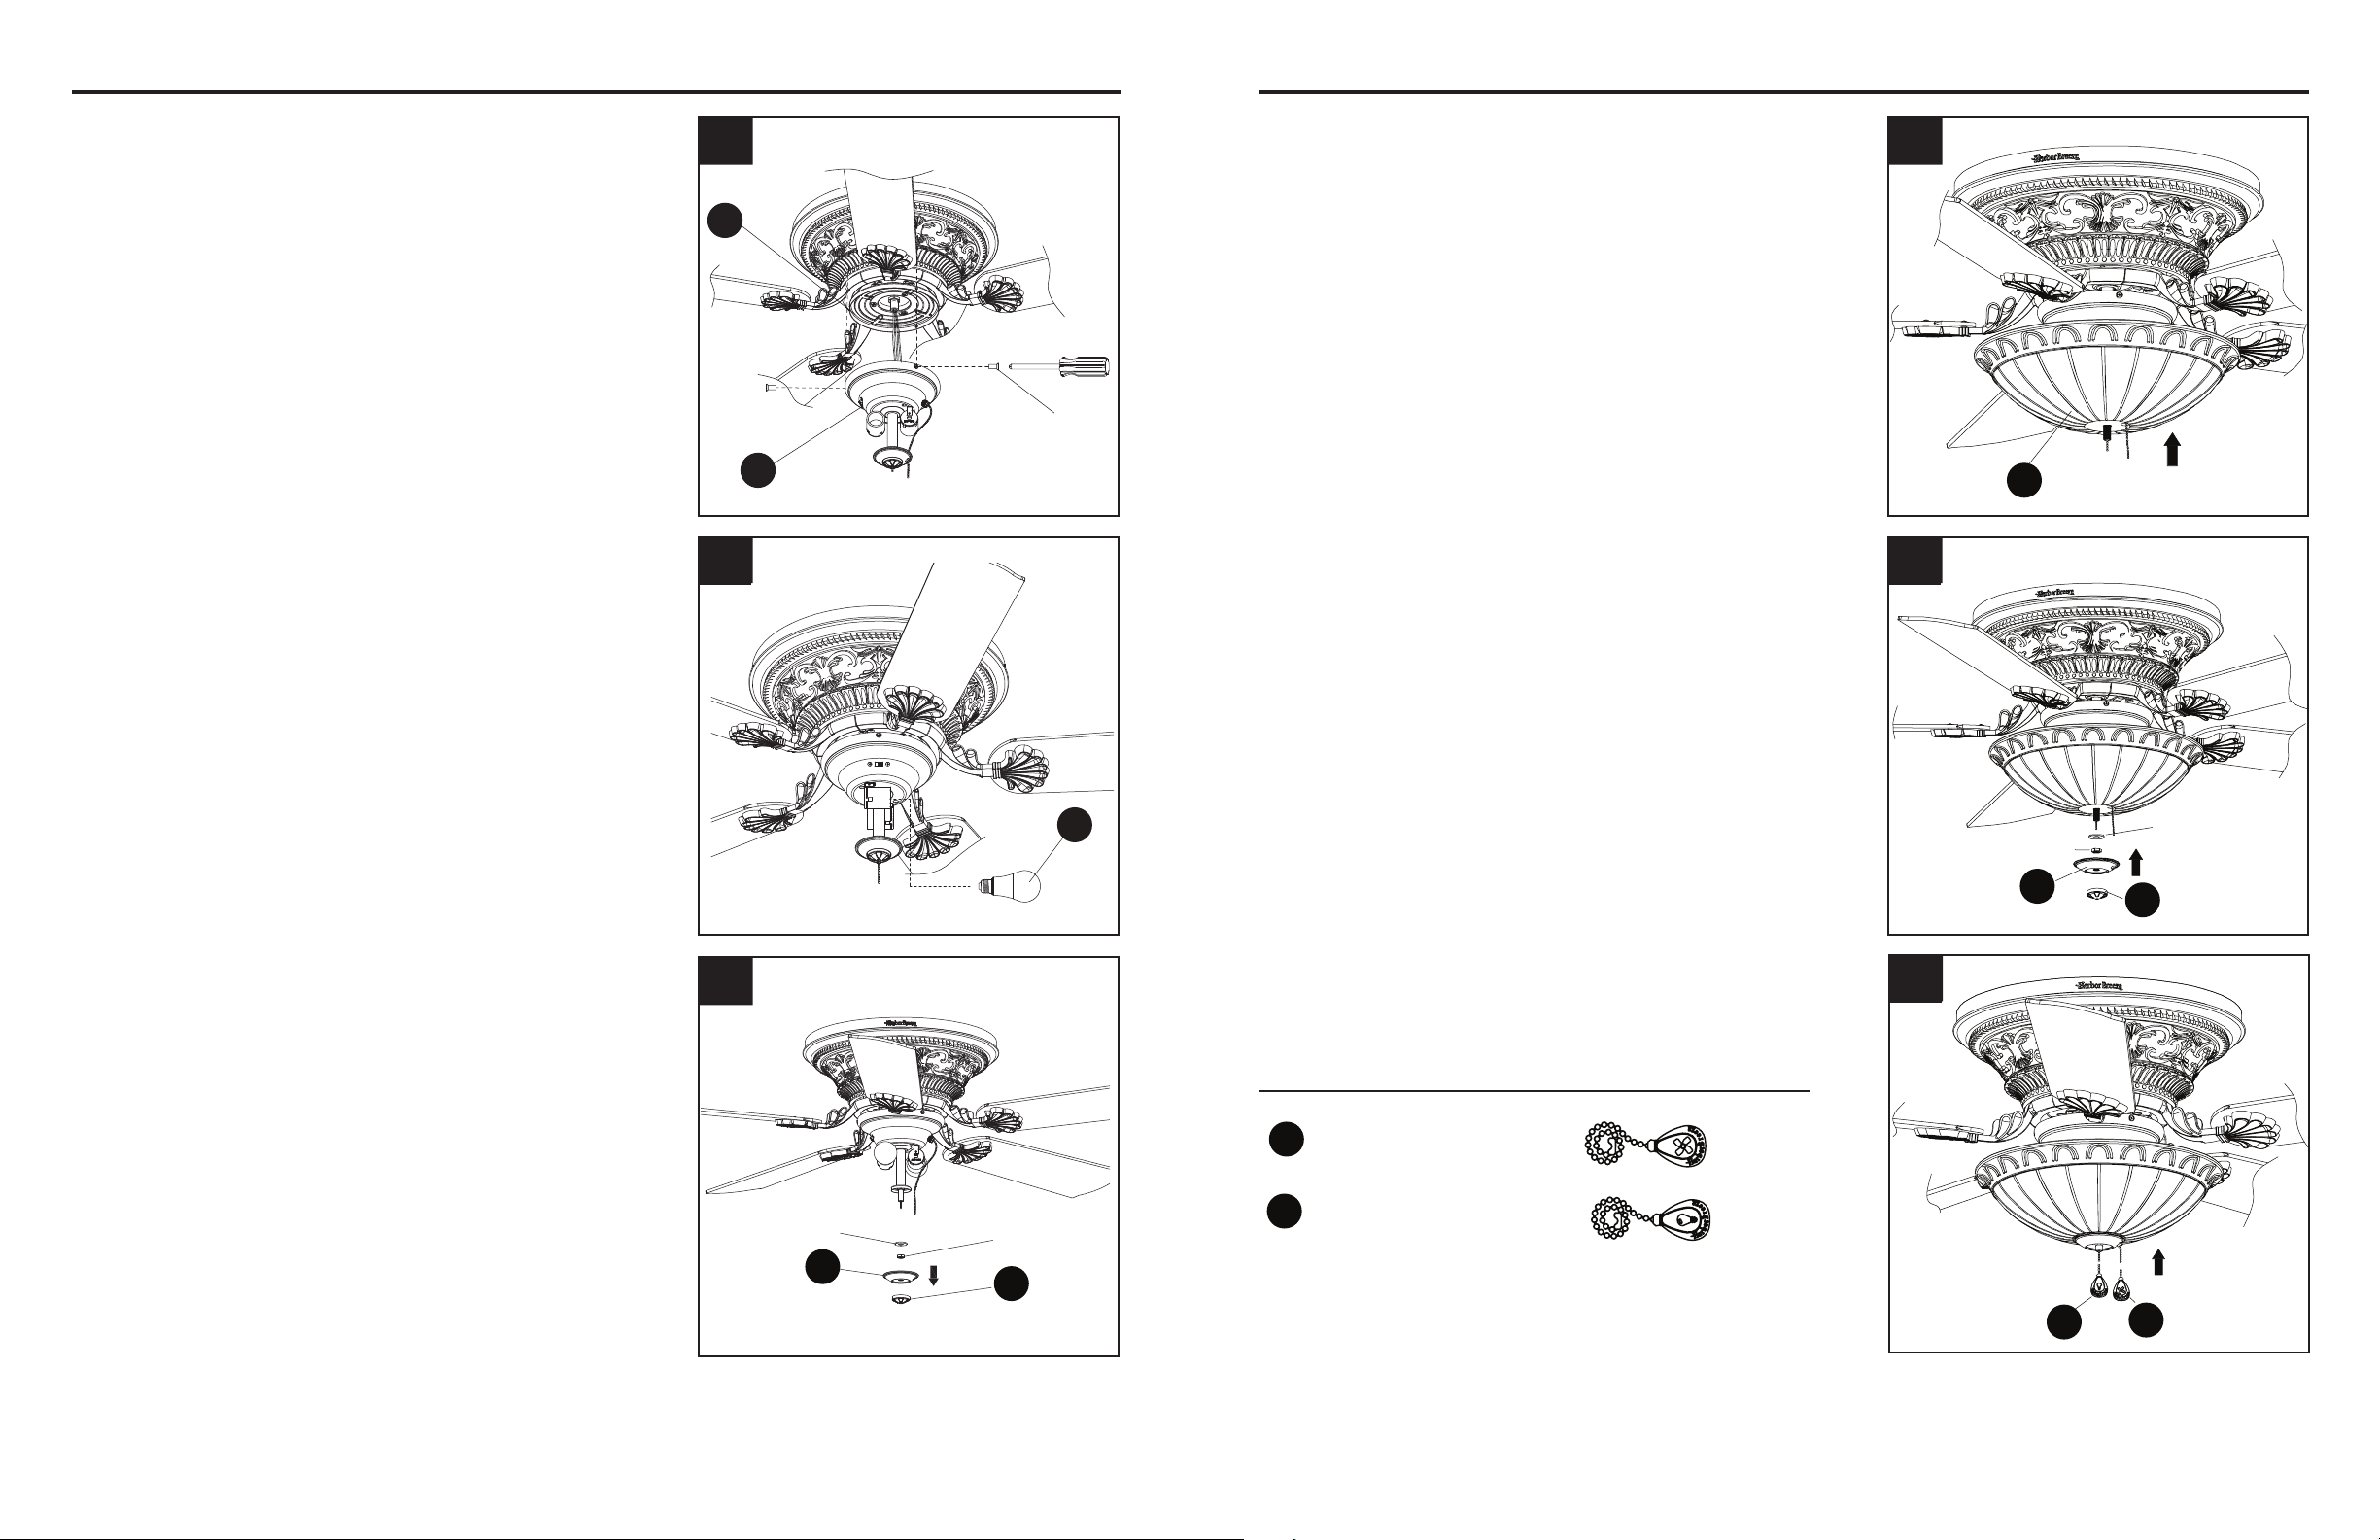
16. Place glass bowl (I) on the preassembled pipe
on light kit (H) until it is ush against the metal
disk. Thread fan pull chain through side hole of
glass bowl (I). Make sure pull chain hangs clear
and is not tangled in light kit (H) socket. Thread
light kit pull chain through center hole of glass
bowl (I).
17. Place previously removed rubber washer
and hex nut (Step 15, page 10) onto the pipe
and securely tighten. Pass the fan pull chain
through the side hole of the bowl cap (J), then
place bowl cap (J) and nial (K) over pipe and
securely tighten.
NOTE: Two people are recommended for this step.
ASSEMBLY INSTRUCTIONS
Rubber
washer
Hex nut
K
J
15
15. Remove the preassembled rubber washer, hex nut,
bowl cap (J) and nial (K) from the light kit (H).
18. Attach the fan pull chain extension (CC)
and light kit pull chain extension (DD) to
corresponding chains.
D
DD
CC
18
Hardware Used
x
1
Fan Pull Chain Extension
Light Pull Chain Extension
x 1
DD
CC
Loading ...
Loading ...
Loading ...