Loading ...
Loading ...
Loading ...
12 13
BEFORE FIRST USE OF YOUR BREVILLE PRODUCTBEFORE FIRST USE OF YOUR BREVILLE PRODUCT
TIPS FOR OPTIMAL TEA BREWING
• Water quality affects taste. For best
results, use filtered water.
• Finer tea particles and leaves will
infuse more quickly than whole leaves.
As a result, finer tea particles often
release too much tannin too quickly,
creating a harsher taste. Adjust the
brewing time until desired strength
is achieved.
• Using the tea scoop provided,
spoon roughly one scoop of tea
per cup / 8oz / 250ml of water.
WATER TO TEA SCOOP RATIO
GLASS JUG
MARKING
CUPS /
OUNCES
TEA
SCOOPS
500mL Approx.
2 Cups / 16oz
2 Scoops
750mL Approx.
3 Cups / 24oz
3 Scoops
1000mL Approx.
4 Cups / 32oz
4 Scoops
1200mL Approx.
5 Cups / 40oz
5 Scoops
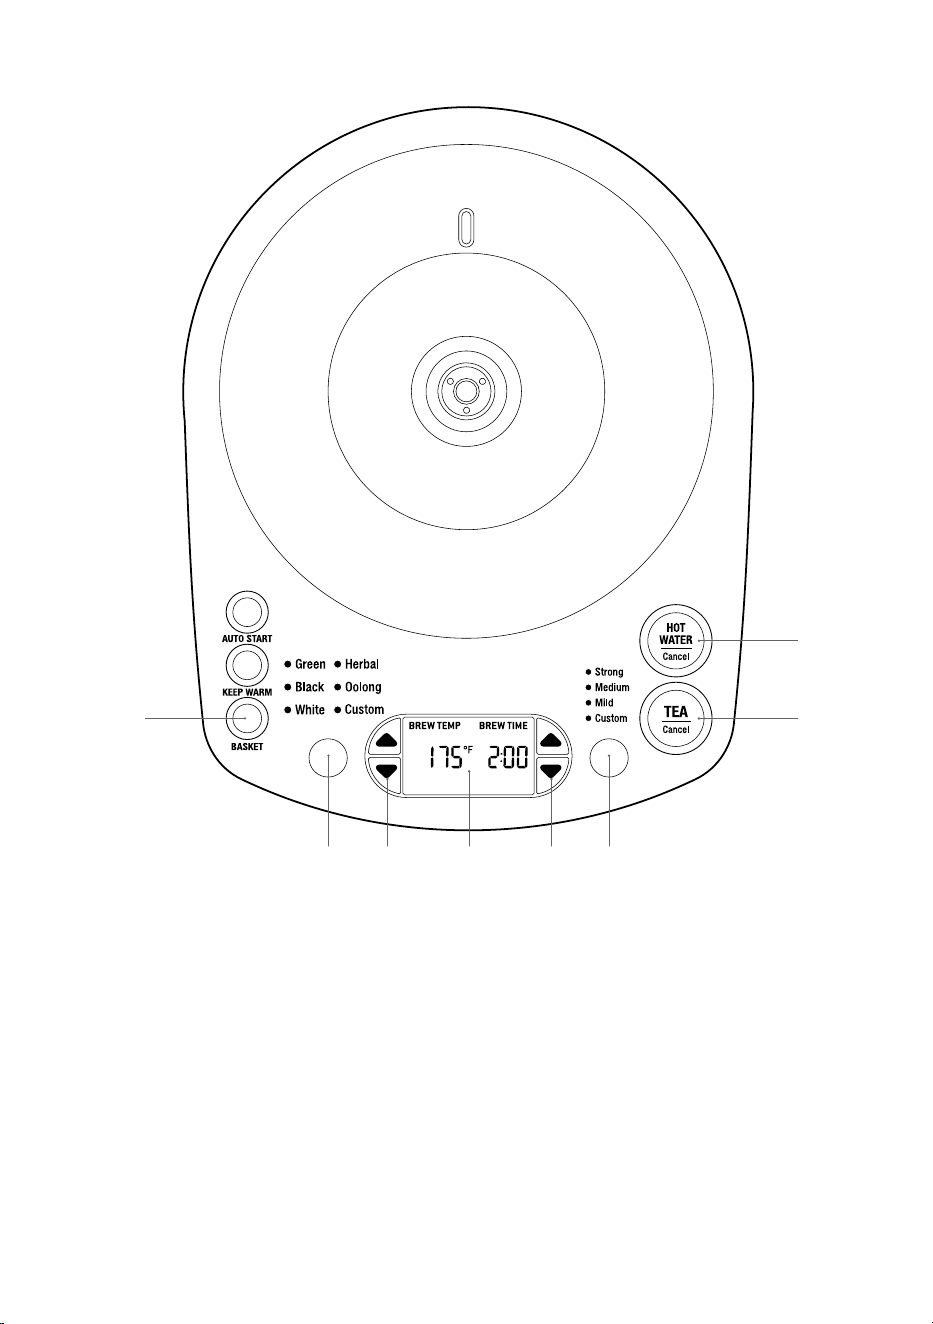
PREPARING THE TEA MAKER
FOR USE
In order to remove any dust or protective
residues from the manufacturing process, it
is recommended to run a boiling cycle then
discard the water.
1. Remove and safely discard any packing
material, promotional labels and tape
from the Tea Maker.
2. Remove the Jug Lid then remove the
Tea Basket from the magnetic post
within the Glass Jug. Wash the Jug Lid,
Tea Basket, Basket Lid and Tea Scoop
in warm soapy water with a soft sponge,
rinse and dry thoroughly.
WARNING
Never immerse the base of the Glass
Jug, the Power Base, power cord or
power plug in water or allow moisture
to come in contact with these parts.
3. Place the Power Base on a flat,
dry surface.
4. Without the Tea Basket in place, fill the
Glass Jug to the water maximum mark
(1500mL WATER MAX) and place on
the Power Base. Securely fit the Jug Lid
onto the Glass Jug.
WARNING
Never fill the glass jug with chilled
water. Allow the tea maker to cool
before refilling.
Filling past the ‘MAX’ line may result
in serious burns or injuries as a result
of overflowing hot or boiling water.
Filling below the ‘MIN’ line will result
in the tea maker switching off before
the water has boiled or reached the
selected temperature
5. Unwind the power cord completely and
insert the power plug into a grounded
wall outlet.
6. The LCD screen will illuminate with
the default brew temperature and brew
time display.
7. Press the left ARROW UP button
until the LCD screen displays 212°F.
The ‘Custom’ LED will automatically
illuminate.
8. Press the HOT WATER|Cancel button
to start the cycle. The button surround
will illuminate and the LCD screen will
display ‘ON’ and the real-time heating
progress in increments of 5°F.
9. Once the water reaches 212°F, the tea
alert will sound three times and the HOT
WATER|Cancel button surround will
cease to illuminate.
10. Discard the water. The Tea Maker is now
ready to use.
Loading ...
Loading ...
Loading ...