Loading ...
Loading ...
Loading ...
17
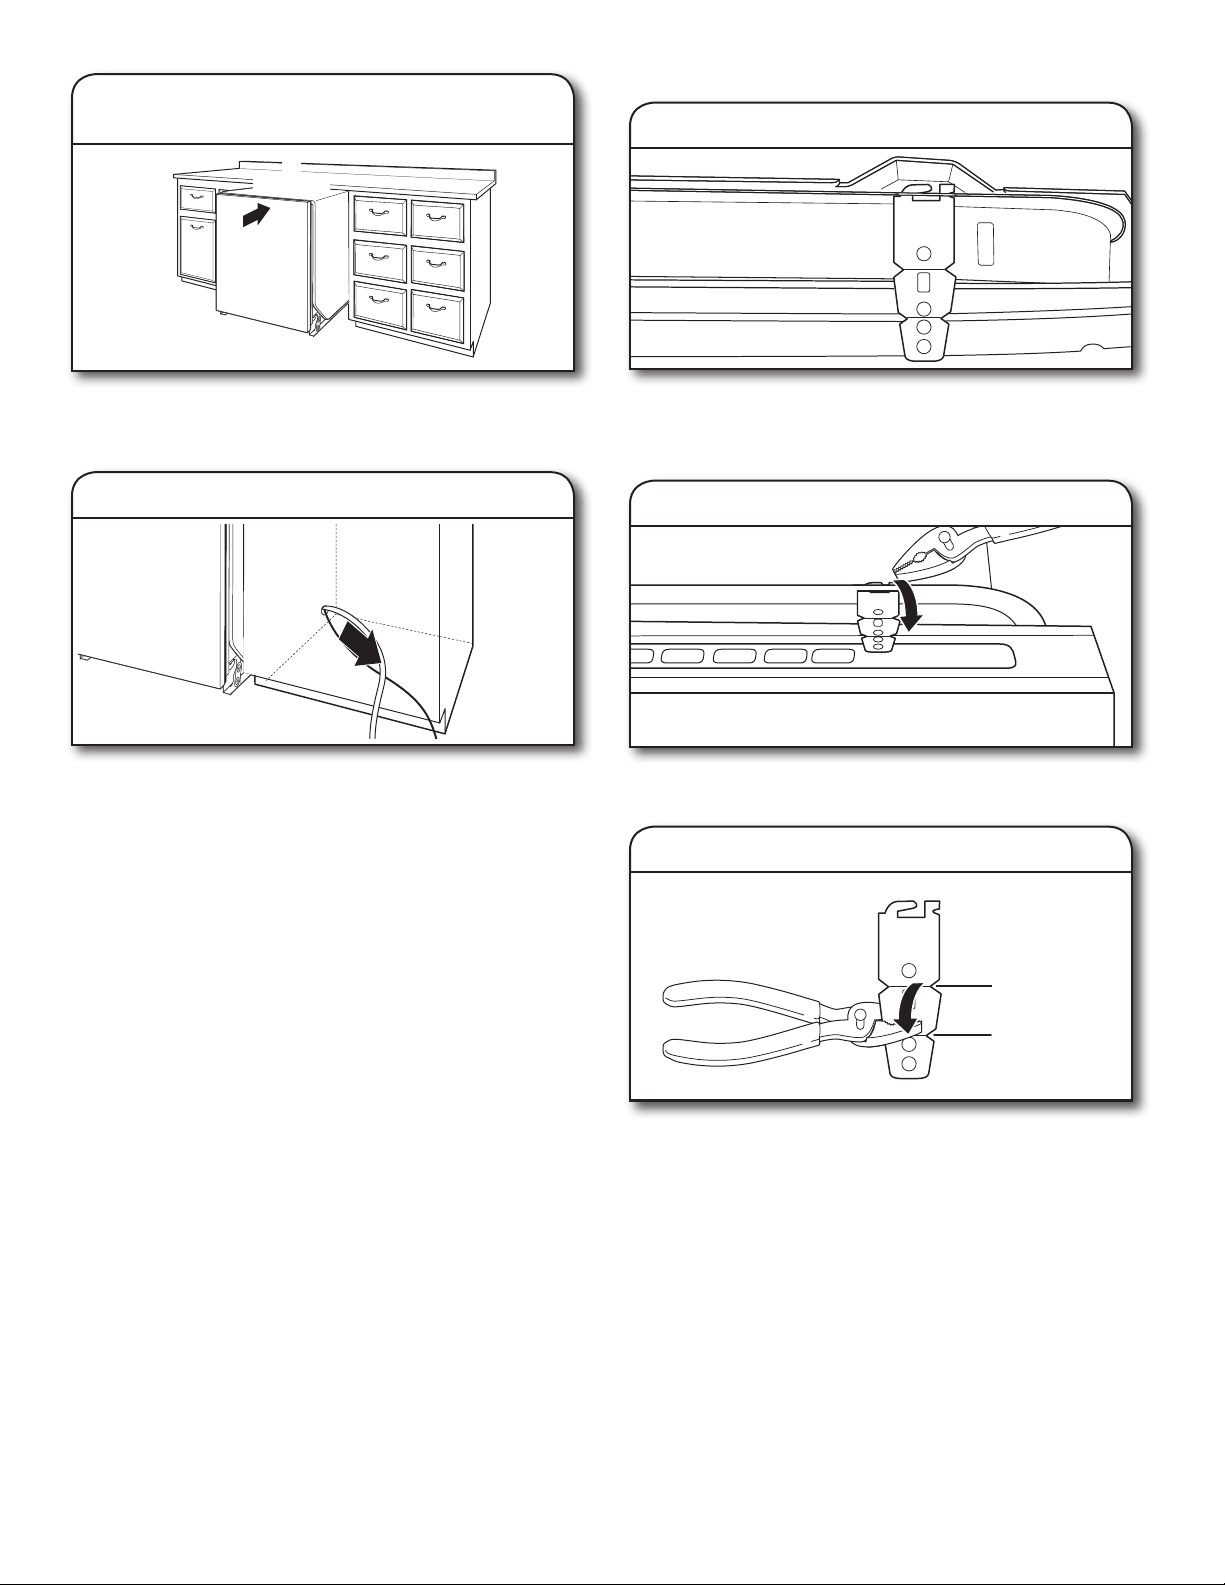
Countertop Attachment:
Remove the brackets from the package and insert into the
open slots on the left- and right-hand top of the dishwasher
collar as shown. Go to Step 41.
Using pliers, bend/twist tab to lock the brackets in place.
Side Attachment:
Break off the end of the bracket along the scored line
using pliers.
36. Insert bracket
Tabs must point
to the right.
Bend tab
37. Break end of bracket
Score line for
plastic tub models
Score line for
plastic tub models
Score line for
plastic tub models
Scored line for
stainless steel
tub models
Scored line
for plastic tub
models
NOTE: Leave unit about 6" (152 mm) out from cabinet in order
to install anchor brackets and adjust door tension if needed.
NOTE: Pull slack out of utilities at the same time the
dishwasher is pushed into the cabinet opening to avoid
any kinks.
CHOOSE ANCHOR ATTACHMENT METHOD
IMPORTANT: The dishwasher must be secured to the
cabinet as one of the final steps. Prepare the dishwasher for
this by attaching the 2 brackets found in the parts bag to
the dishwasher.
– For countertops that are wood, laminate, or another
similar surface, use Countertop Attachment: go to
Step 36
– For countertops that are marble, granite, or another
hard surface, use Side Attachment: go to Step 37
NOTE: If the gap between the top of the door and the
underside of the counter top is tight (less than
1
/
4
" [6,35 mm]),
we suggest using Side Attachment to keep from scratching
the User Interface or console with the anchor screws.
34. Move dishwasher all but 6" (152 mm)
into cabinet opening
6"
(152 mm)
35. Pull slack from utilities
Loading ...
Loading ...
Loading ...