Loading ...
Loading ...
Loading ...
13
CONNECT WATER LINE TO FILL VALVE
– For Copper Line, begin with Step 14
– For Flexible Line, begin with Step 16
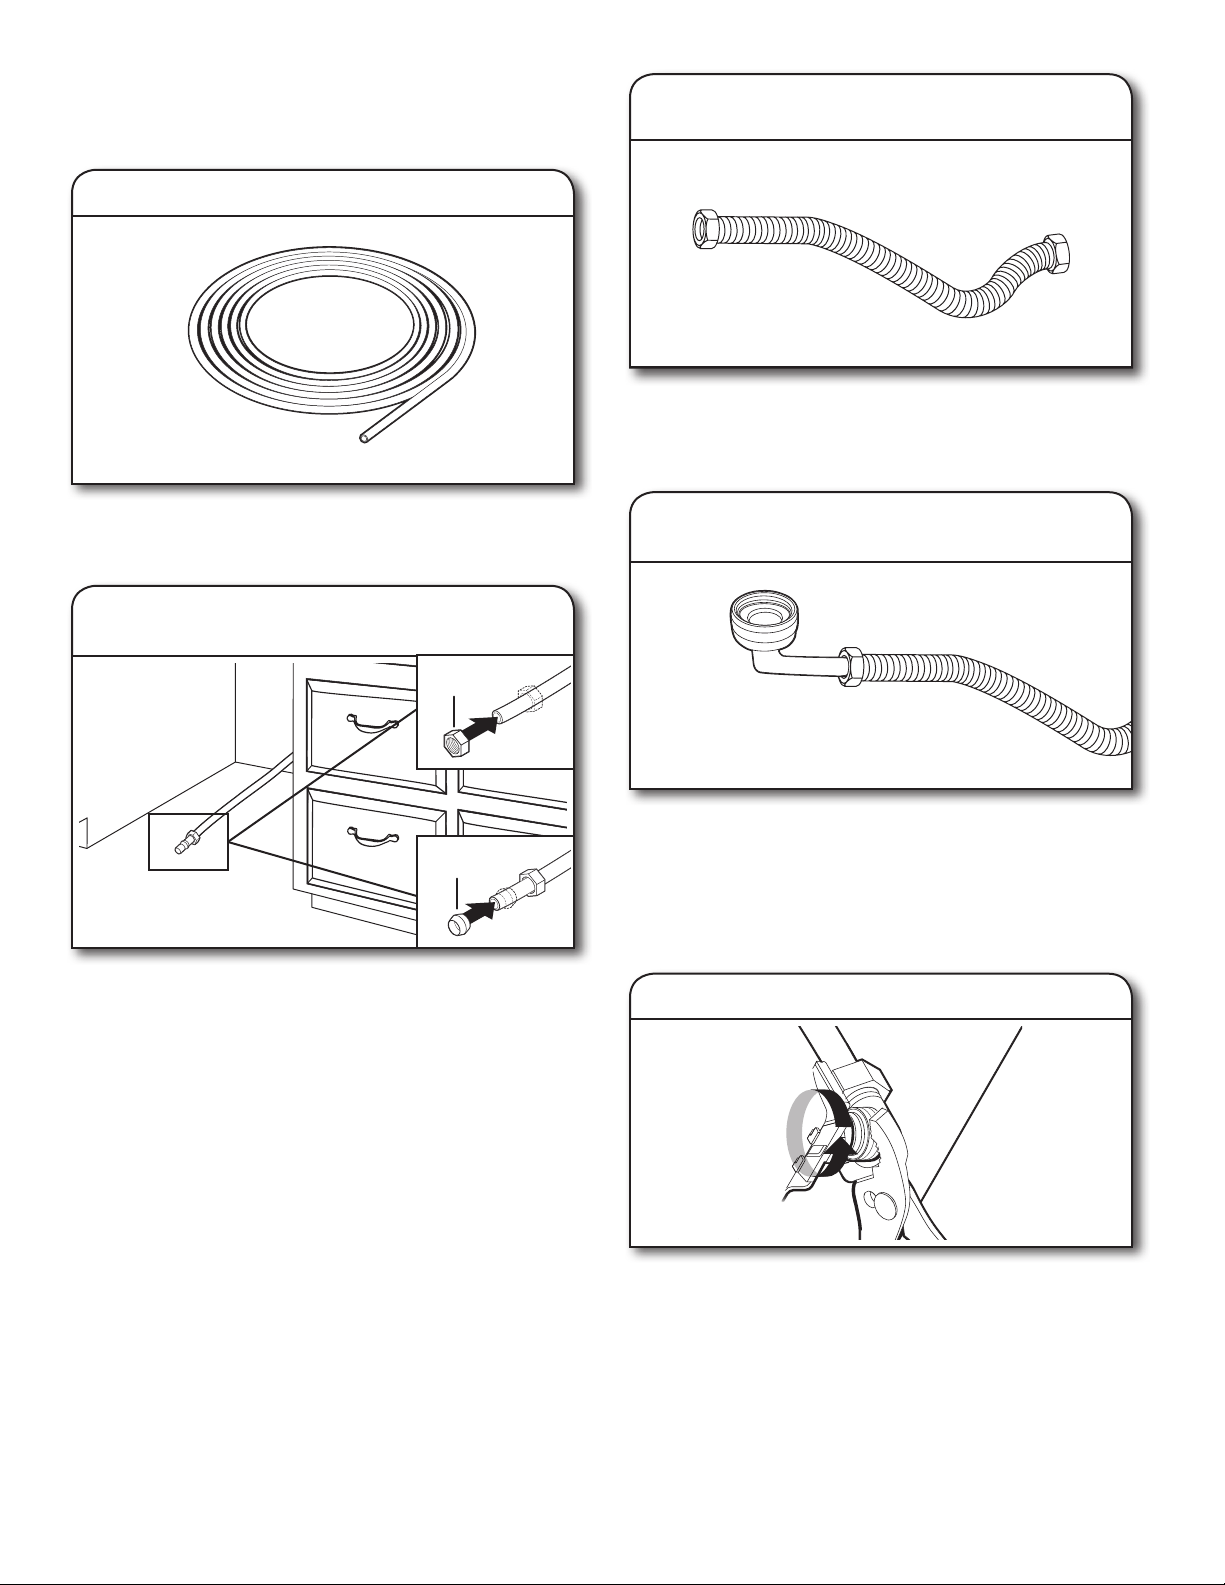
If using copper tubing, measure overall length of copper
tubing required to reach the water supply, cut to length, and
attach with compression fittings.
Copper tubing only: Put the tubing into the 90° elbow fitting
as far as it will go. (The copper tubing bends and kinks easily.)
Slide the nut and ferrule forward and start the nut onto the
elbow threads.
NOTE: To avoid vibration during operation, route the water
supply line so that it does not touch the dishwasher base,
frame, or motor. Go to Step 17.
14. Copper water line
15. Slide nut and ferrule onto tubing
(copper tubing only)
Nut
Ferrule
Flexible braided line: Confirm the flexible braided line is long
enough. See the “Tools and Parts” section at the front of the
guide for part details and orders.
Get
3
/
8
" compression x
3
/
4
" hose fitting with 90° elbow. See
the “Tools and Parts” section at the front of the guide for part
details and orders. Connect the
3
/
8
" compression fitting of the
90° elbow fitting to the water supply line. Attach such that the
3
/
4
" connection is facing upward as shown above.
CONNECT FILL HOSE TO FILL VALVE
Be sure rubber washer is properly seated in fitting. Slide the
3
/
4
" fitting of the 90° elbow up to the valve and hand tighten to
avoid cross-threading. Hand tighten until the coupling is tight.
Using pliers, check the tightness of the coupling. An additional
1
/
4
to
1
/
2
turn may be required to seal the rubber gasket. Route
fill hose out the rear left side of unit.
NOTES:
■ Do not use Teon
®†
tape with compression fittings.
■ Do not over-tighten. Damage to the coupling can result.
†
®
TEFLON is a registered trademark of Chemours.
16. Flexible line
17. Add 90° elbow fitting to the
water supply line
18. Tighten 90° elbow fitting to valve
Loading ...
Loading ...
Loading ...