Loading ...
Loading ...
Loading ...
en Appliance door
24
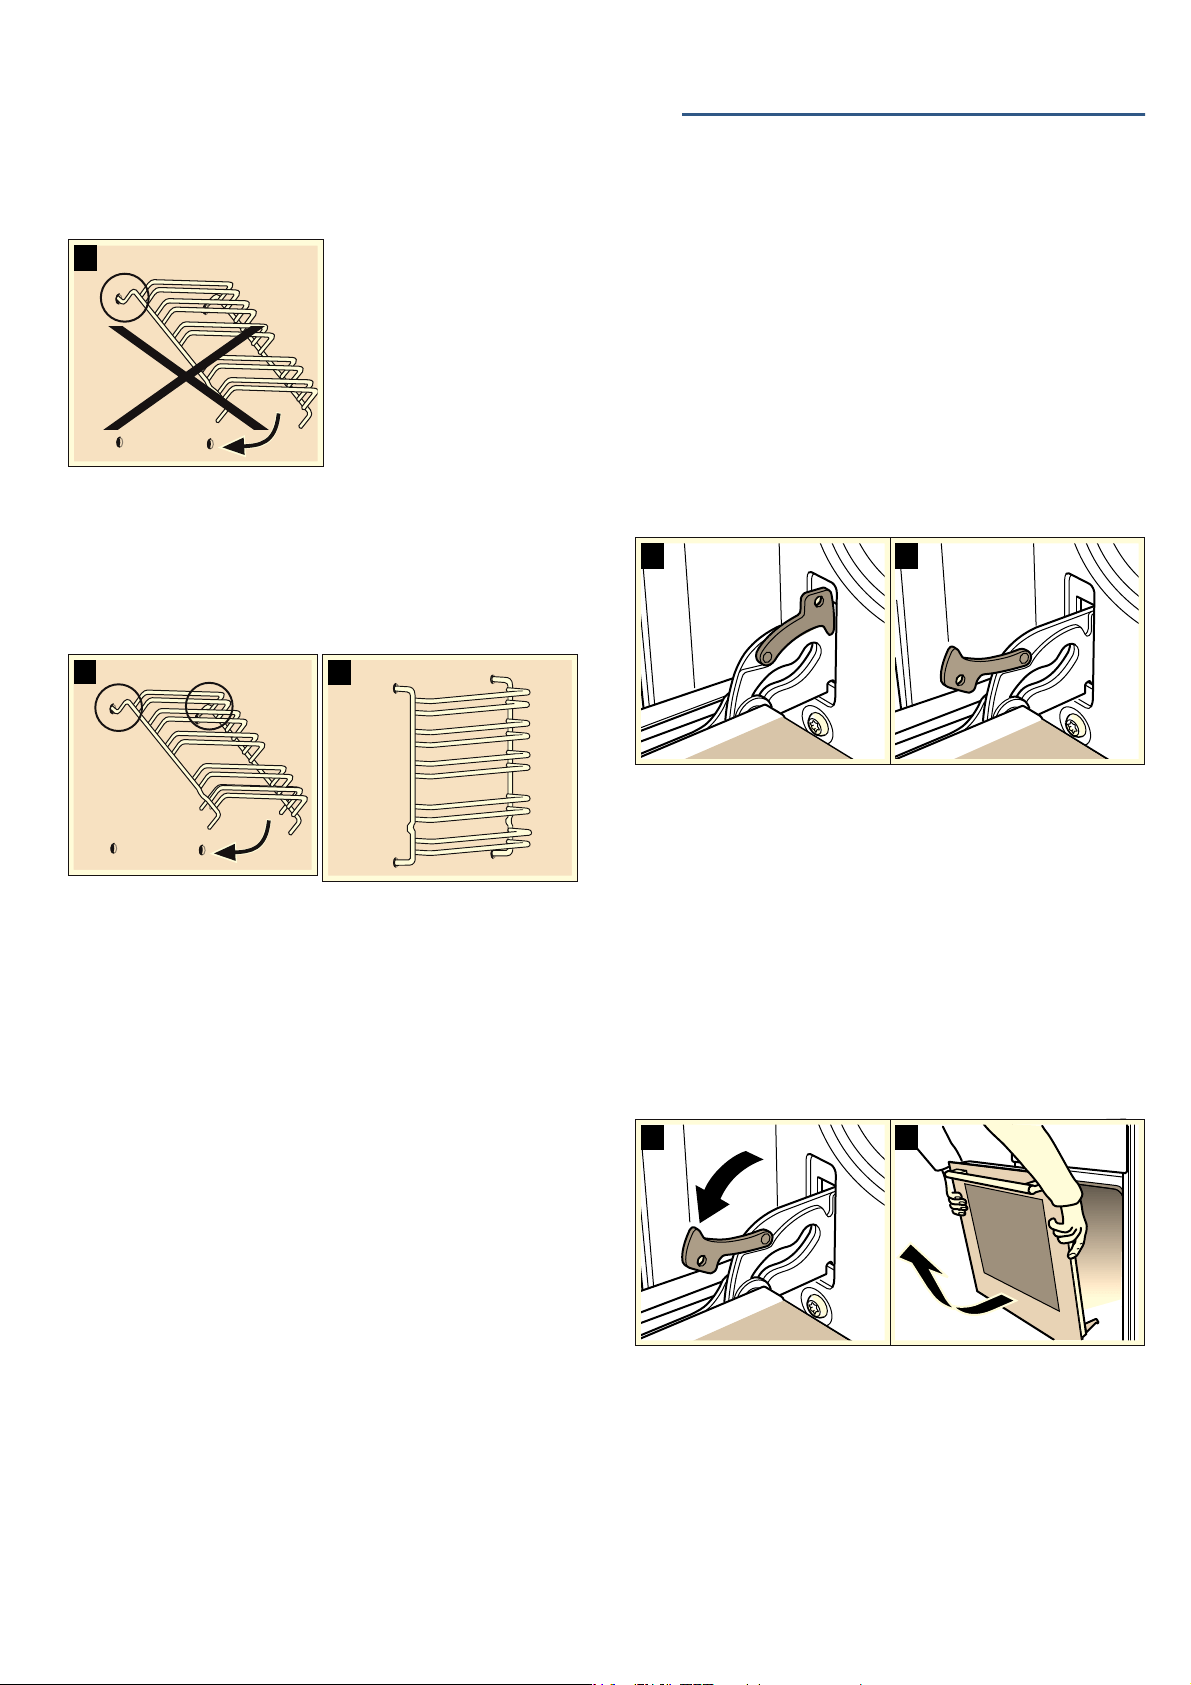
:Warning
Incorrect assembly!
Never move the frame before the two hooks are fully
anchored in the upper holes. The enamel could be
damaged and may break (figure C).
2. the two hooks must be inserted fully into the upper
holes. Now move the frame slowly and carefully
downwards and insert in the lower holes (figure D).
3. Insert both frames into the side walls of the oven
(figure E).
If the rails are fitted correctly, the distance between the
two upper shelf positions is greater.
qAppliance door
Ap p l i a n c e door
With good care and cleaning, your appliance will retain
its appearance and remain fully functional for a long
time to come. This will tell you how to remove the
appliance door and clean it.
Detaching and attaching the oven door
For cleaning purposes and to remove the door panels,
you can detach the oven door.
The oven door hinges each have a locking lever. When
the locking levers are closed (figure A), the oven door
is secured in place. It cannot be detached. When the
locking levers are open in order to detach the oven
door (Fig. B), the hinges are locked. They cannot snap
shut.
:Warning – Risk of injury!
Whenever the hinges are not locked, they snap shut
with great force. Ensure that the locking levers are
always fully closed or, when detaching the oven door,
fully open.
Detaching the door
1. Open the oven door fully.
2. Fold up the two locking levers on the left and right
(figure A).
3. Close the oven door as far as the limit stop. With
both hands, grip the door on the left and right-hand
sides. Close the door a little further and pull it out
(figure B).
&
(
'
%$
%$
Loading ...
Loading ...
Loading ...