Loading ...
Loading ...
Loading ...
en Time-setting options
20
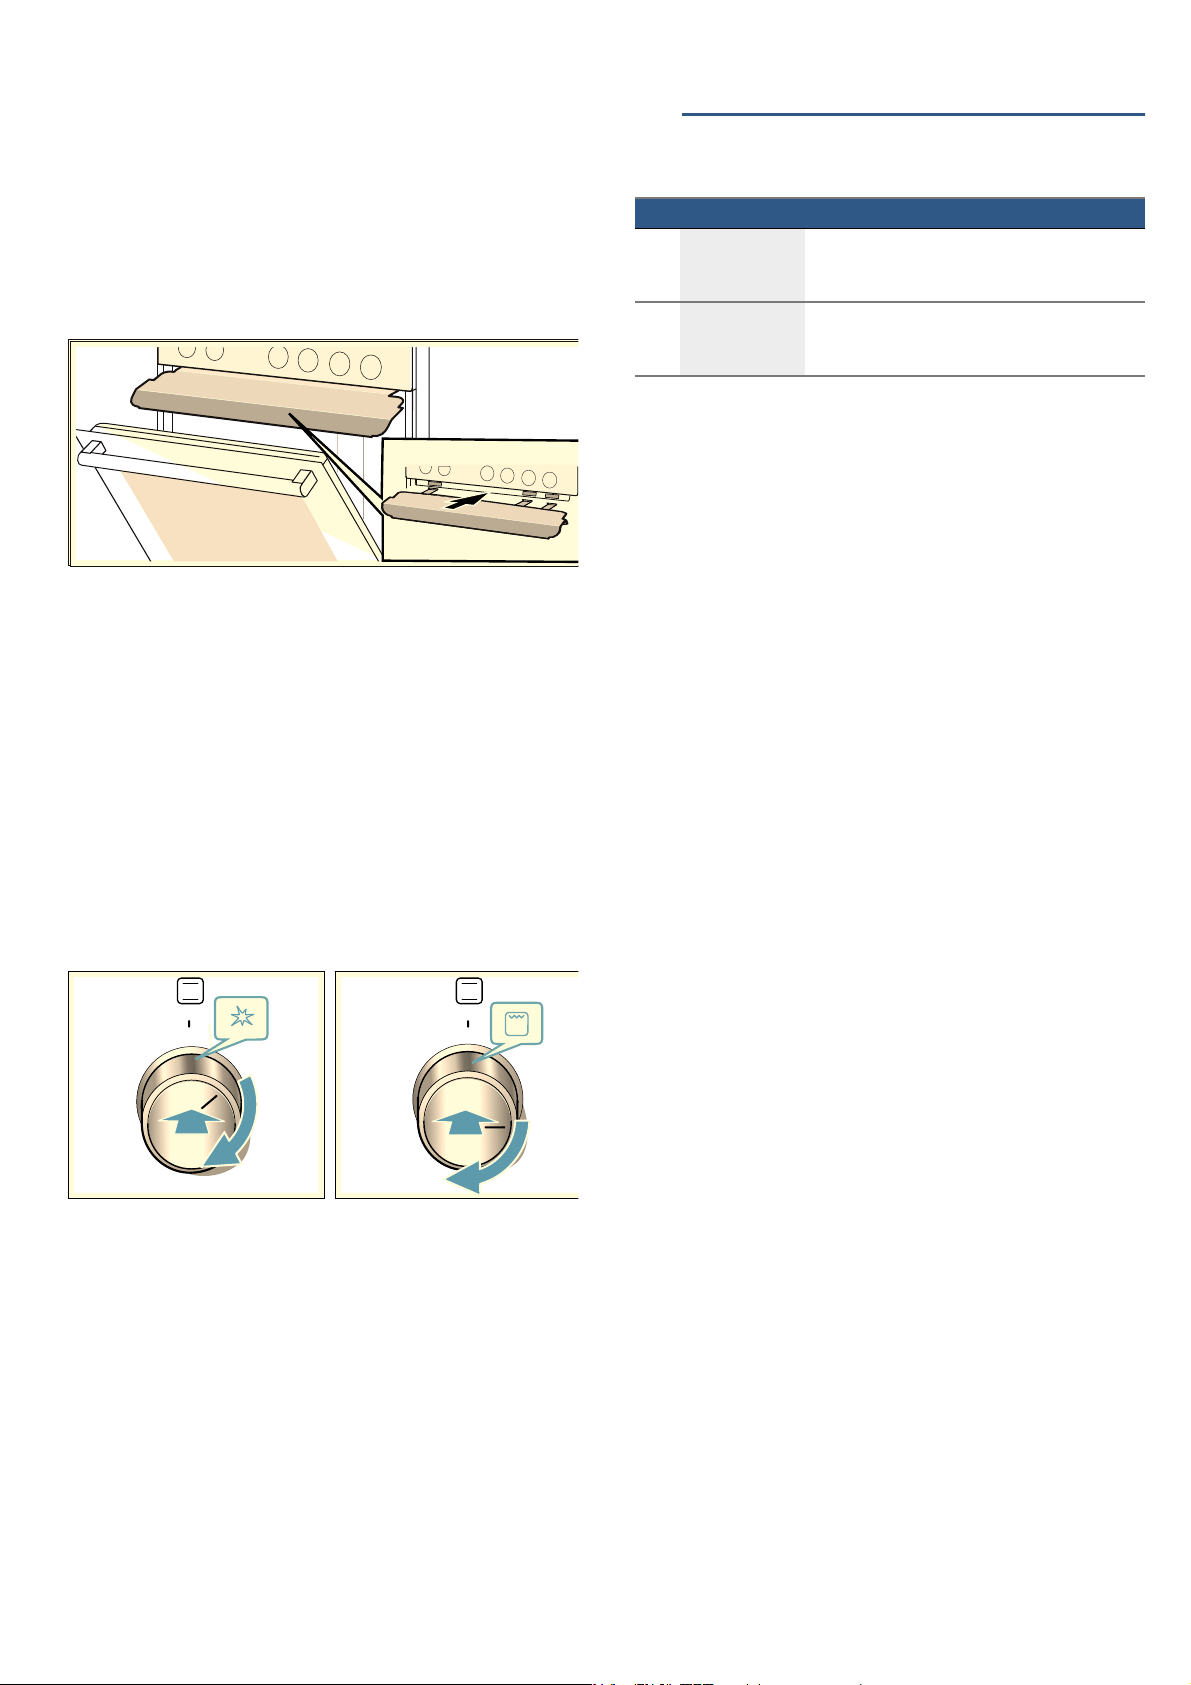
Setting the gas grill
1. Open the top cover. The top cover must remain
open for as long as the cooker is in operation.
2. Turn on the main gas supply to the appliance. Insert
the plug into the socket.
3. Insert the protecting plate into the groove below the
control panel.
Insert the protecting plate with the longer edge at the
front and the curvature at the bottom.
Secure the protecting plate in the groove below the
control panel using the retainers.
Ensure that the protecting plate is engaged in the
retainers. If the protecting plate cannot be removed,
it is properly engaged. You can now safely use the
protecting plate. If it can be removed, insert it into
the groove at a slightly higher angle and make sure
that it engages in the retainers.
4. Close the oven door so that it is as close as possible
to the protecting place.
5. Push in the function selector and turn it clockwise to
the ignition position 8 .
6. Keep the function selector pressed in and turn it to
the grill setting ( .
Keep the function selector pushed in for 10 seconds
so that the safety pilot starts up. The gas coming
from the gas grill is ignited.
7. Check whether the flame continues to light up. If the
flame goes out, repeat the process from step 5.
8. Once the food is cooked, switch off the function
selector. Once the oven has cooled down, remove
the protecting plate.
:Warning – Caution!
The hotplate control should not be actuated for longer
than 15 seconds. If the burner does not ignite within 15
seconds, wait at least 1 minute before repeating the
procedure.
Caution!
The gas grill only works when the protecting plate is
inserted.
Make sure that the protecting plate is correctly inserted.
OTime-setting options
Ti me- set t i ng opt i ons
An audible signal sounds once the timer duration has
elapsed.
Setting the timer
You can use the timer regardless of whether the
appliance itself is in use.
The maximum time that can be set is 23 hours 59
minutes. Up to 10 minutes, the timer duration can be
set in 30-second increments. The higher the value, the
larger the increments.
The timer duration starts at a different default value,
depending on which button you touch first:
5 minutes if you touch the A button and 10 minutes if
you touch the @ button.
1. Touch and hold the v button until the timer
symbol vQ is selected.
2. Use the A or @ button to set the timer duration.
After a few seconds, the timer duration will start to
count down.
The timer duration has elapsed
An audible signal will sound. The timer duration will be
zero on the display.
Touch any button to switch off the timer.
Changing and cancelling
You can use the A or @ button to change the timer
duration at any time. After a few seconds, the change
will be applied.
To cancel, use the A button to reset the timer duration
all the way to zero. The timer is now switched off.
Setting the time
When the appliance is connected to the power supply
or following a power failure, the time flashes in the
display. Set the time.
1. Press the v button.
The time stops flashing.
2. Use the A or @ button to set the time.
The appliance applies the settings after a few seconds.
Changing the time
You can change the time again when you need to, e.g.
from summer to winter time.
Time-setting option Use
Q
Timer The timer functions like an egg timer. It runs
independently of the appliance when it is
heating and does not affect the appliance.
v
Clock time When the timer is not running in the fore-
ground, the appliance will show you the time
of day on the display.
Loading ...
Loading ...
Loading ...