Loading ...
Loading ...
3
THANK YOU for purchasing this high-quality product. Register
your built-in oven at register.kitchenaid.com. In Canada, register your
built-in oven at register.kitchenaid.ca.
For future reference, please make a note of your product model and
serial numbers. They can be found on the label located on the bottom
edge of the control panel, right hand side.
Model Number_________________ Serial Number___________________
TABLE OF CONTENTS
3 INSTALLING THE +POWERED ATTACHMENTS
4 Using the +Powered Attachments
6 Storing the +Powered Attachments
8 SMART OVEN+ POWERED BAKING STONE ATTACHMENT
9 Installing the +Baking Stone Attachment
10 Using the +Baking Stone Attachment
13 SMART OVEN+ POWERED GRILL ATTACHMENT
14 Installing the +Grill Attachment
15 Using the +Grill Attachment
18 SMART OVEN+ POWERED STEAMER ATTACHMENT
19 Installing the +Steamer Attachment
20 Using the +Steamer Attachment
22 TROUBLESHOOTING
24 WARRANTY
INSTALLING THE +POWERED ATTACHMENTS
INSTALLATION
The +Powered Attachments fit on the SatinGlide
TM
Roll-Out Extension Rack for Smart Oven+
Attachments. They will not rock or wobble when installed correctly. Always fully extend the roll-out rack
before placing the +Powered Attachments. The roll-out rack will lock in place when fully extended.
1
2
1
2
3
4
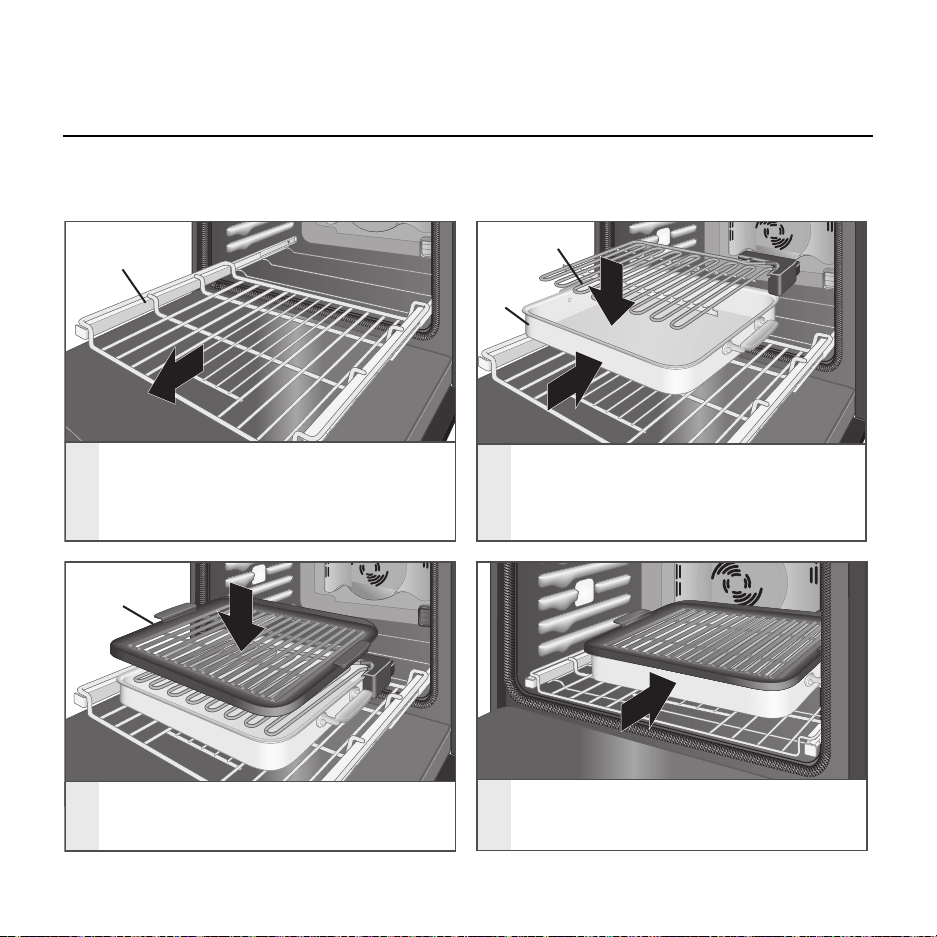
Insert the roll-out rack into the
lowest rack position. Some force is
required. Extend the rack.
Roll-out rack
Heating
Element
Base
Pan
Place the Base Pan and Heating
Element on the roll-out rack. Push
the Base Pan back and in until the
feet lock into place.
+Grill
Attachment
Place the desired +Powered
Attachment on the Heating Element.
Push the roll-out rack into the oven
fully. A tone will sound and an icon
will appear in the display.
INSTALLING THE +POWERED ATTACHMENTS | 3
Loading ...
Loading ...
Loading ...