Loading ...
Loading ...
Loading ...
Trouble shooting en
15
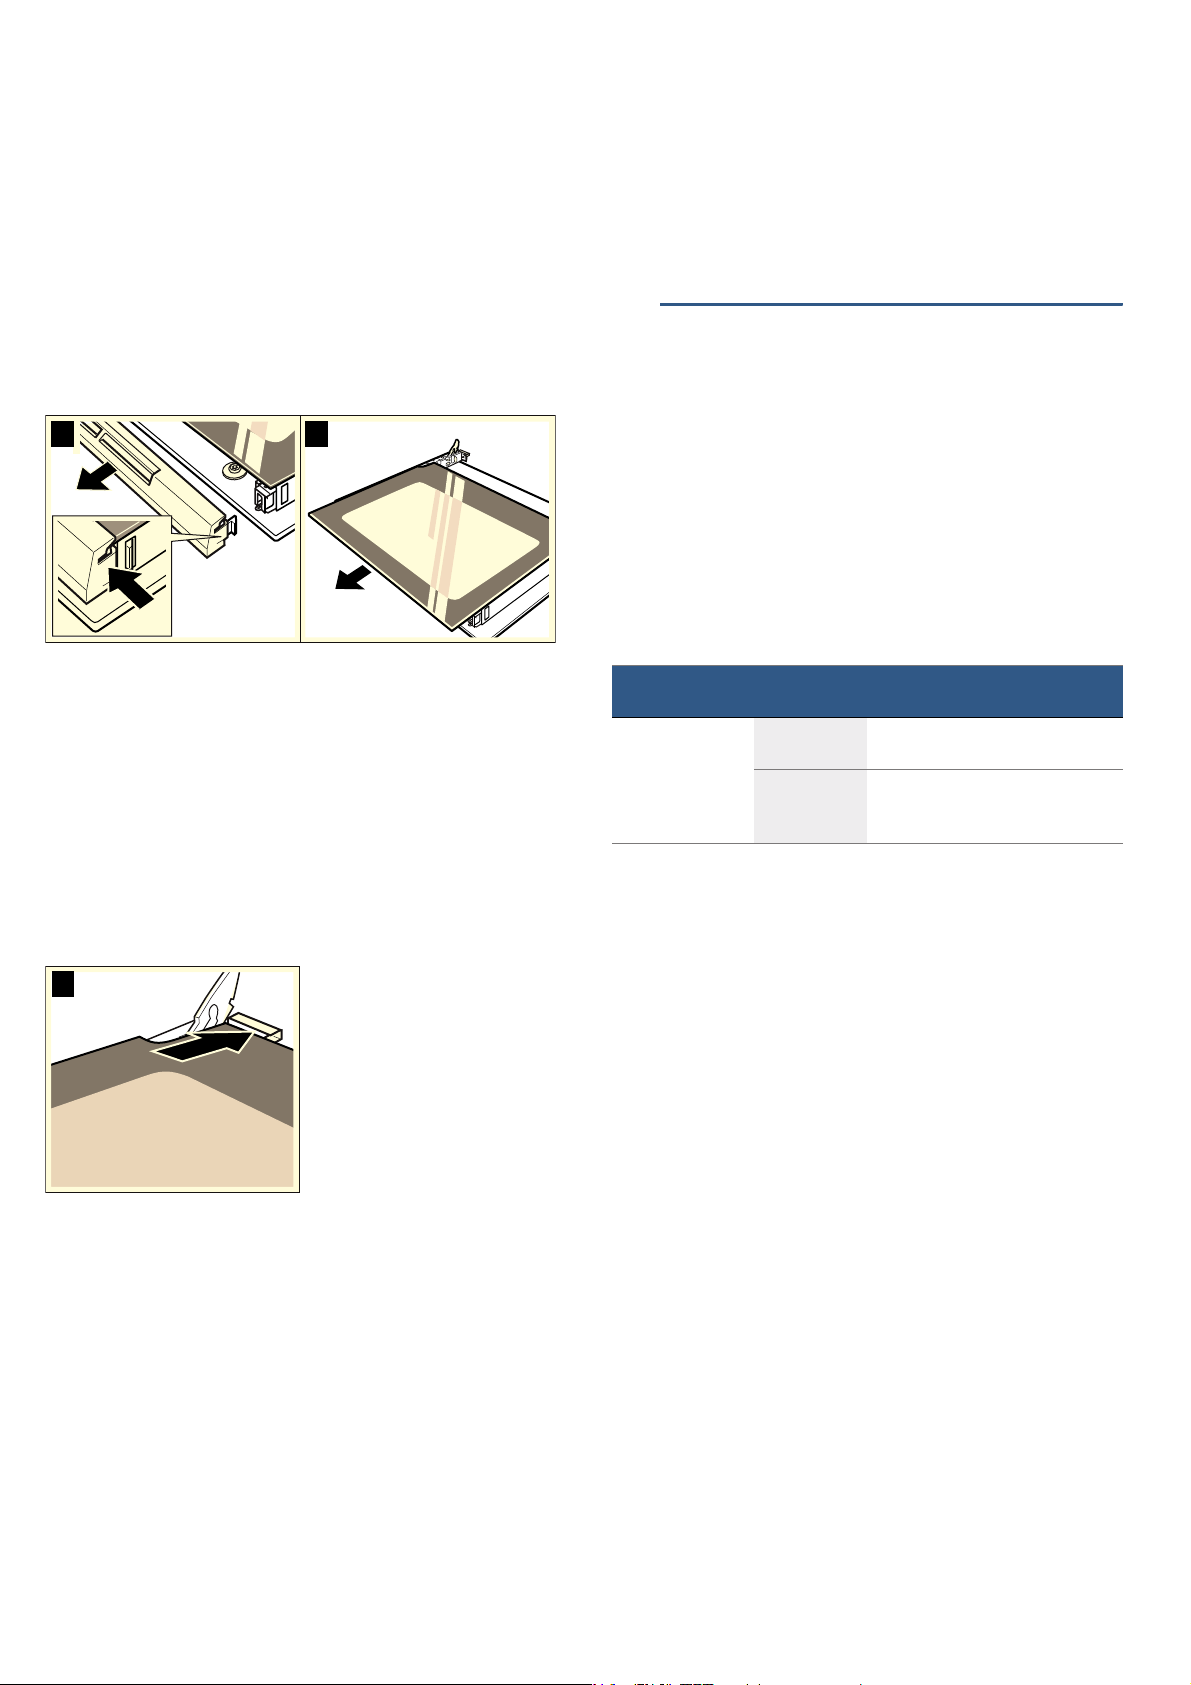
Removing and refitting the door panels
The glass panels can be removed from the oven door
to allow more thorough cleaning.
Removal
1. Removing the oven door See the section Removing
the oven door
. Lay the oven door on a cloth with the
handle facing downwards.
2. Remove the cover from the top of the oven door. To
do this, press with your fingers on the left and right-
hand side. Pull out the cover (Fig. A).
3. Raise the top panel and pull it out (Fig. B).
Clean the panels with glass cleaner and a soft cloth.
:Warning – Risk of injury!
Scratched glass in the appliance door may develop into
a crack. Do not use a glass scraper, sharp or abrasive
cleaning aids or detergents.
Fitting
1. Hold the top glass panel firmly by the sides and slide
it in towards the back at an angle. The panel must
be inserted into the openings on the lower side. The
smooth surface must face outwards, while the
roughened side must be on the inside. (Fig. A).
2. Place the cover on the top of the oven door and
press in place. Make sure that the grooves along the
sides lock into position.
3. Refitting the oven door See the section Refitting the
oven door
.
Do not use the oven again until the panels have been
correctly fitted.
Additional door safety
When preparing meals with long cooking times, the
oven door can reach very high temperatures.
Supervise small children and keep them away from the
oven when the oven is in operation.
Additional safety devices have been fitted to prevent
contact with the oven door. Always attach these safety
devices when children could come near the oven.
You can purchase this optional accessory (11023590)
from the after-sales service.
3Trouble shooting
Tr oubl e s hoot i ng
If a fault occurs, there is often a simple explanation.
Before calling the after-sales service, please refer to the
fault table and attempt to correct the fault yourself.
Rectifying faults yourself
You can often easily rectify technical faults with the
appliance yourself.
If a dish does not turn out exactly as you wanted, you
can find useful cooking tips and instructions at the end
of this instruction manual. ~ "Tested for you in our
cooking studio" on page 16
--------
:Warning – Risk of injury!
Incorrect repairs are dangerous. Do not attempt to
repair the appliance yourself. Repairs must only be
carried out by one of our trained after-sales engineers. If
the appliance is defective, call the after-sales service.
:Warning – Risk of electric shock!
Incorrect repairs are dangerous. Repairs may only be
carried out and damaged power cables replaced by
one of our trained after-sales technicians. If the
appliance is defective, unplug the appliance from the
mains or switch off the circuit breaker in the fuse box.
Contact the after-sales service.
Replacing the bulb in the top of the cooking
compartment
If the cooking compartment light bulb fails, it must be
replaced. Heat-resistant, 25 watt, 230 V halogen bulbs
are available from the after-sales service or specialist
retailers.
When handling the halogen bulb, use a dry cloth. This
will increase the service life of the bulb. Only use these
bulbs.
:Warning – Risk of electric shock!
When replacing the cooking compartment bulb, the
bulb socket contacts are live. Before replacing the bulb,
unplug the appliance from the mains or switch off the
circuit breaker in the fuse box.
%$
$
Fault Possible
cause
Notes/remedy
The appliance is
not working.
Defective cir-
cuit breaker.
Check the circuit breaker in the
fuse box.
Power failure Check whether the kitchen light
or other kitchen appliances are
working.
Loading ...
Loading ...
Loading ...