Loading ...
Loading ...
Loading ...
31
Burner Caps and Heads
Burner caps
Lift off when cool. Wash burner caps
in hot, soapy water and rinse with clean
water. You may scour with a plastic
scouring pad to remove burned-on
food particles.
Burner heads
The slits in the burner heads of your
cooktop must be kept clean at all times.
Clogged or dirty burner ports or electrodes
will not allow the burner to operate
properly.
Any spill on or around an electrode must
be carefully cleaned. Take care to not hit
an electrode with anything hard or it could
be damaged.
You should clean the burner caps, burner
heads and burner bases routinely,
especially after bad spillovers, which could
clog the openings in the burner heads.
Lift off when cool.
To remove burned-on food, soak the
burner heads in a solution of mild liquid
detergent and hot water for 20–30
minutes. For more stubborn stains,
use a toothbrush.
After cleaning
Before putting the burner caps and heads
back, shake out excess water and then
dry them thoroughly by setting in a warm
oven for 30 minutes.
NOTE: Do not use steel wool or scouring
powders to clean the burners or electrodes.
This can damage the burners and electrically
short the electrodes.
Replacement
The top sides of the Right Front, Right Rear
and Left Front burner heads are marked
with the letters “RF,” “RR” and “LF,”
respectively, to aid reassembly.
NOTE: Before removing the burner caps
and heads, remember their size and
location. Replace them in the same location
after cleaning. The top sides of the Right
Front, Right Rear and Left Front burner
heads are marked with the letters “RF,” “RR”
and “LF,” respectively, to aid reassembly.
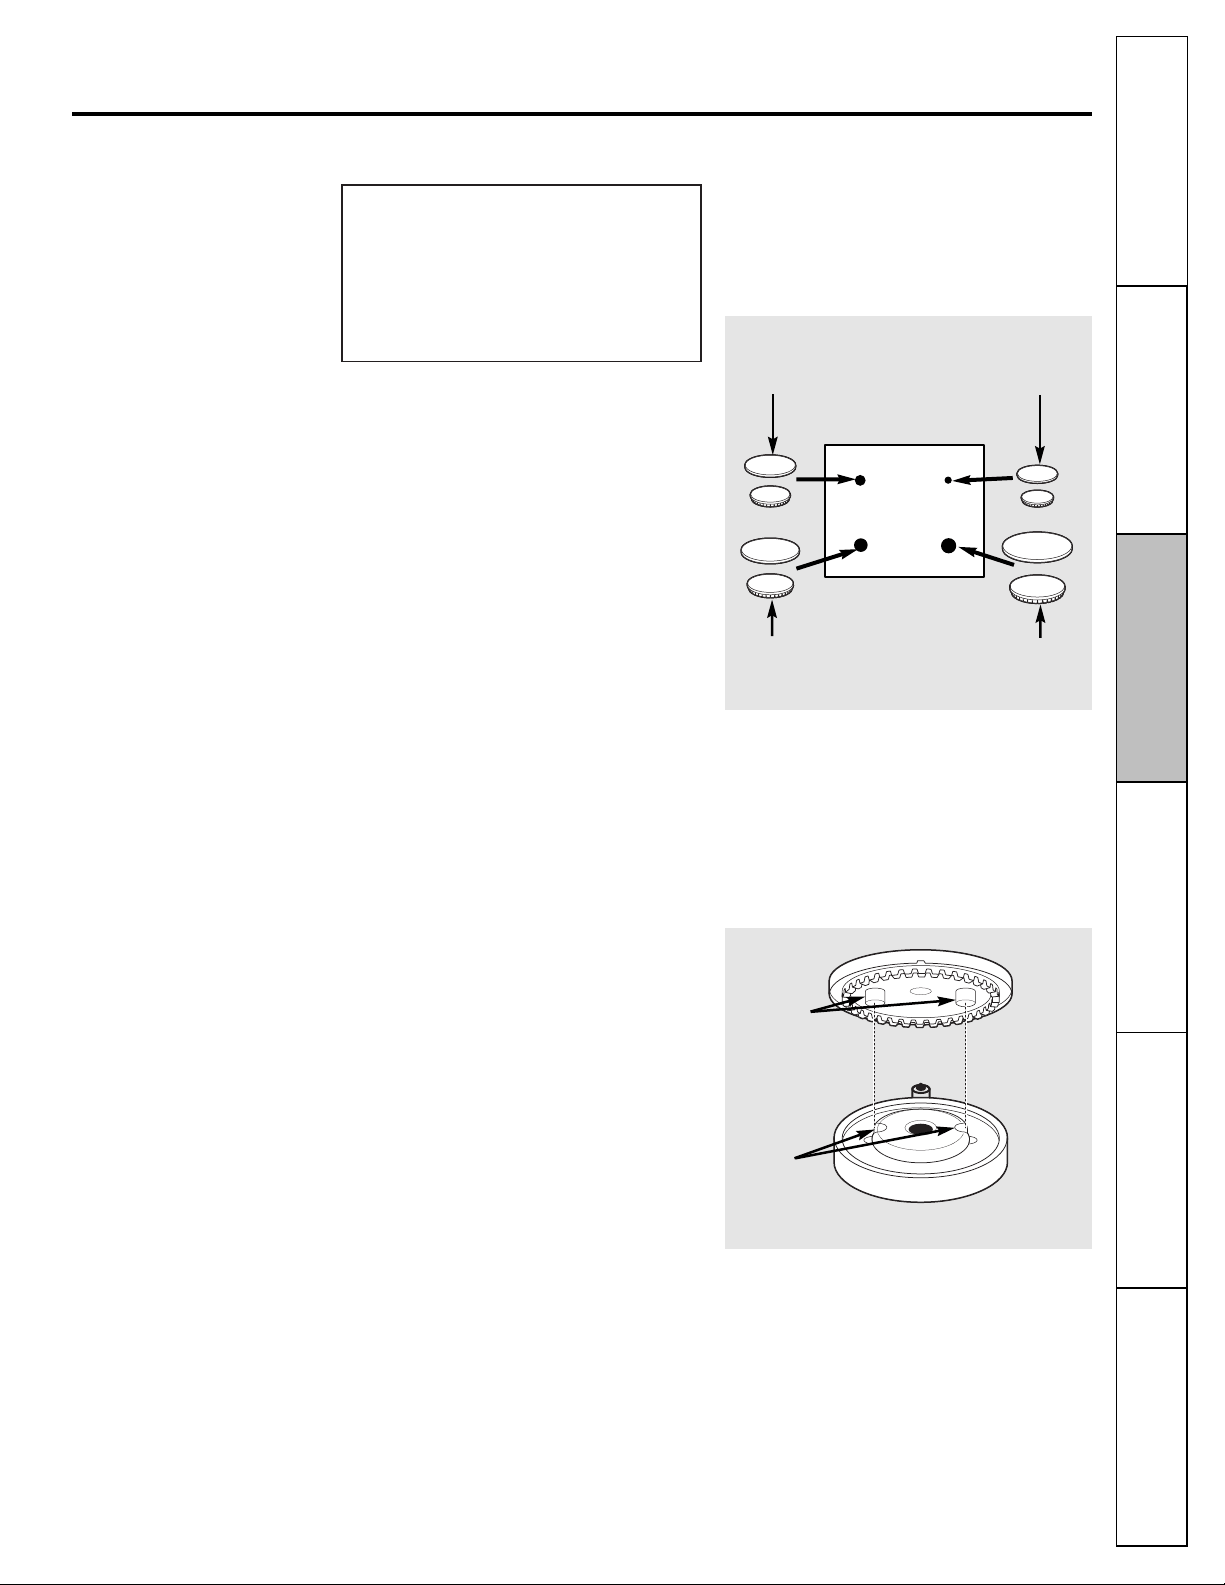
When replacing, make sure the locator pins in the
burner head are seated in the pin slots of the burner
base. Rotate the burner head around the burner base
until it is level and securely seated.
ge.com
Replace the burner heads on the bases
matching the letters. Replace the caps on
the heads. Make sure that the caps and
heads are replaced in the correct location.
There is one small, one medium, one large
and one extra large head and cap.
Medium head
(not marked)
and cap
Front of
range
Large
head and
cap
Small head
and cap
Extra large
head and
cap
Locator
pins
Pin slots
LF
RR
RF
Operating
Instructions
Care and Cleaning
Installation
Instructions
Troubleshooting
Tips
Safety Instructions
Consumer Support
Loading ...
Loading ...
Loading ...