Loading ...
Loading ...
Loading ...
27
Using the Sabbath feature.
(upper and lower ovens)
(Designed for use on the Jewish Sabbath and Holidays) (on some models)
GEAppliances.com
Touch the CLEAR/OFF pad.
If the oven is cooking, wait for a random delay
period of approximately 30 seconds to 1
minute, until only is in the display.
Touch and hold both the BROIL HI/LO and
BAKE pads, at the same time, until the display
shows SF.
Tap the DELAY START pad until 12 shdn or no
shdn appears in the display.
Choose 12 shdn, indicating that the oven will
automatically turn off after 12 hours or no
shdn, indicating that the oven will not
automatically turn off after 12 hours.
Press START when the option that you want is
in the display (12 shdn or no shdn).
NOTE: If a power outage occurred while the oven
was in Sabbath, the oven will automatically turn off
and stay off even when the power returns. The oven
control must be reset. Some models will resume
Sabbath mode; however, opening the door will
activate the oven light.
The Sabbath feature can be used for baking/roasting only. It cannot be used for convection, broiling, self-cleaning or Delay Start
cooking.
NOTE: The oven light comes on automatically (on some models) when the door is opened and goes off when the door is closed. The bulb may be removed. See
the Oven Light Replacement section. On models with a light switch on the control panel, the oven light may be turned on and left on.
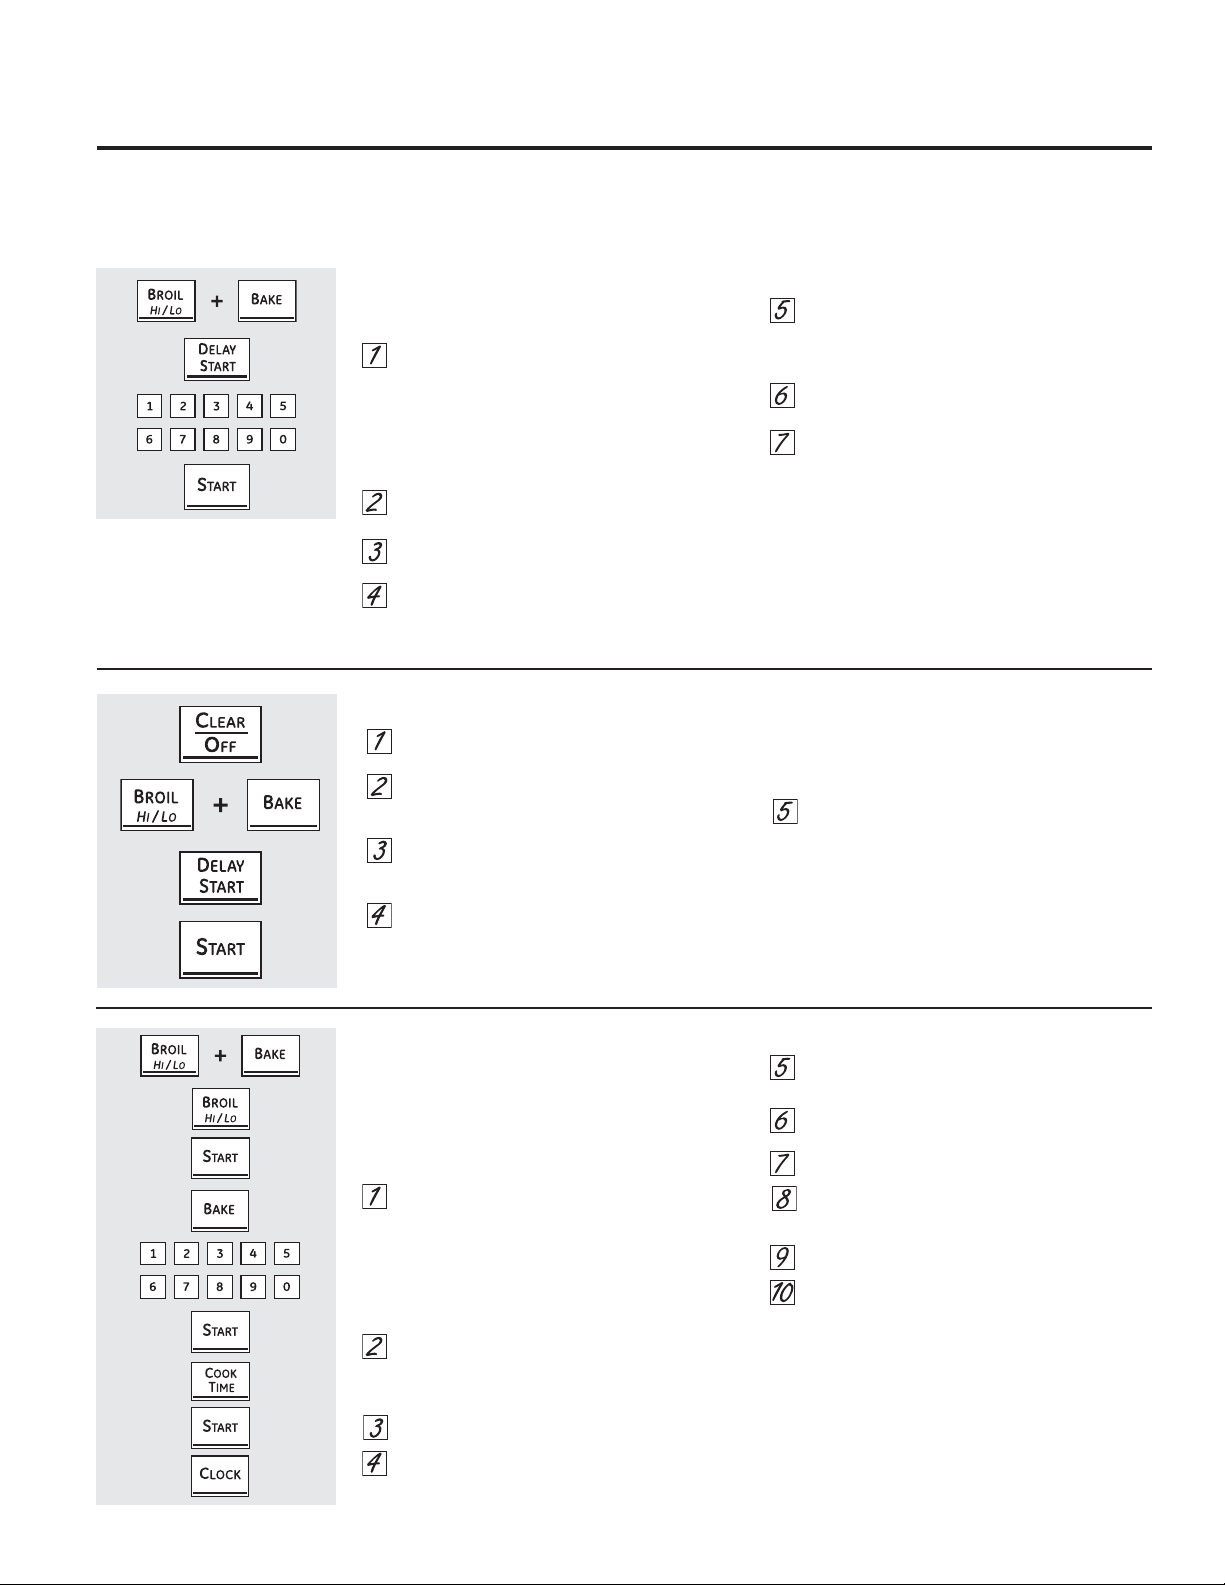
How to Set for Regular Baking/Roasting
Make sure the clock shows the correct time of day
and the oven is off.
Touch and hold both the upper oven BROIL HI/
LO and BAKE pads, at the same time, until the
display shows SF.
NOTE: If bake or broil appears in the display, the
BROIL HI/LO and BAKE pads were not touched
at the same time. Touch the CLEAR/OFF pad
and begin again.
Tap the DELAY START pad until SAb bAtH
appears in the display.
Touch the START pad and will appear in the
display. The oven is now in Sabbath mode.
Touch the BAKE pad. No signal will be given.
Using the number pads, enter the desired
temperature between 170°F and 550°F. No
signal or temperature will be given. There is no
default temperature.
Touch the START pad on the corresponding
oven.
After a random delay period of approximately
30 seconds to 1 minute, will appear in the
display indicating that the oven is baking/
roasting. If doesn’t appear in the display,
start again at Step 4.
To adjust the oven temperature, touch the BAKE pad,
enter the new temperature using the number pads
and touch the START pad.
NOTE: The CLEAR/OFF and COOK TIME pads
are active during the Sabbath feature.
How to Exit the Sabbath Feature
When the display shows , the
oven is set in Sabbath. When the
display shows ,the oven is
baking/roasting.
How to Set for Timed Baking
NOTE: This procedure must take place BEFORE the
Sabbath begins to be able to use the Timed Bake
feature during the Sabbath (the unit should NOT be
put into Sabbath mode during a Time Bake.
Make sure the clock shows the correct time of day
and the oven is off.
Touch and hold both the upper oven BROIL HI/
LO and BAKE pads, at the same time, until the
display shows SF.
NOTE: If bake or broil appears in the display, the
BROIL HI/LO and BAKE pads were not touched
at the same time. Touch the CLEAR/OFF pad
and begin again.
Press the BROIL HI/LO pad to change the
beeper setting to bEEP (the default setting is
Continuous Beep, which shows in the display as
Con bEEP).
Press the START pad to save the changes.
Press the BAKE pad.
Using the number pads, enter the desired
temperature.
Press the START pad on the corresponding
oven.
Press COOK TIME FOR the corresponding oven.
Press the number pads to set the desired length
of cooking time between 1 minute and 9 hours
and 59 minutes.
Press the START pad.
Press the CLOCK pad to display the current
time of day. This is to display the time of day
instead of the countdown cook timer. The oven
will operate at the set temperature for the set
amount of time, and then it will shut off. At the
time the oven shuts off, the beeper will beep 3
times.
Loading ...
Loading ...
Loading ...