Loading ...
Loading ...
Loading ...
8 English
WARNING
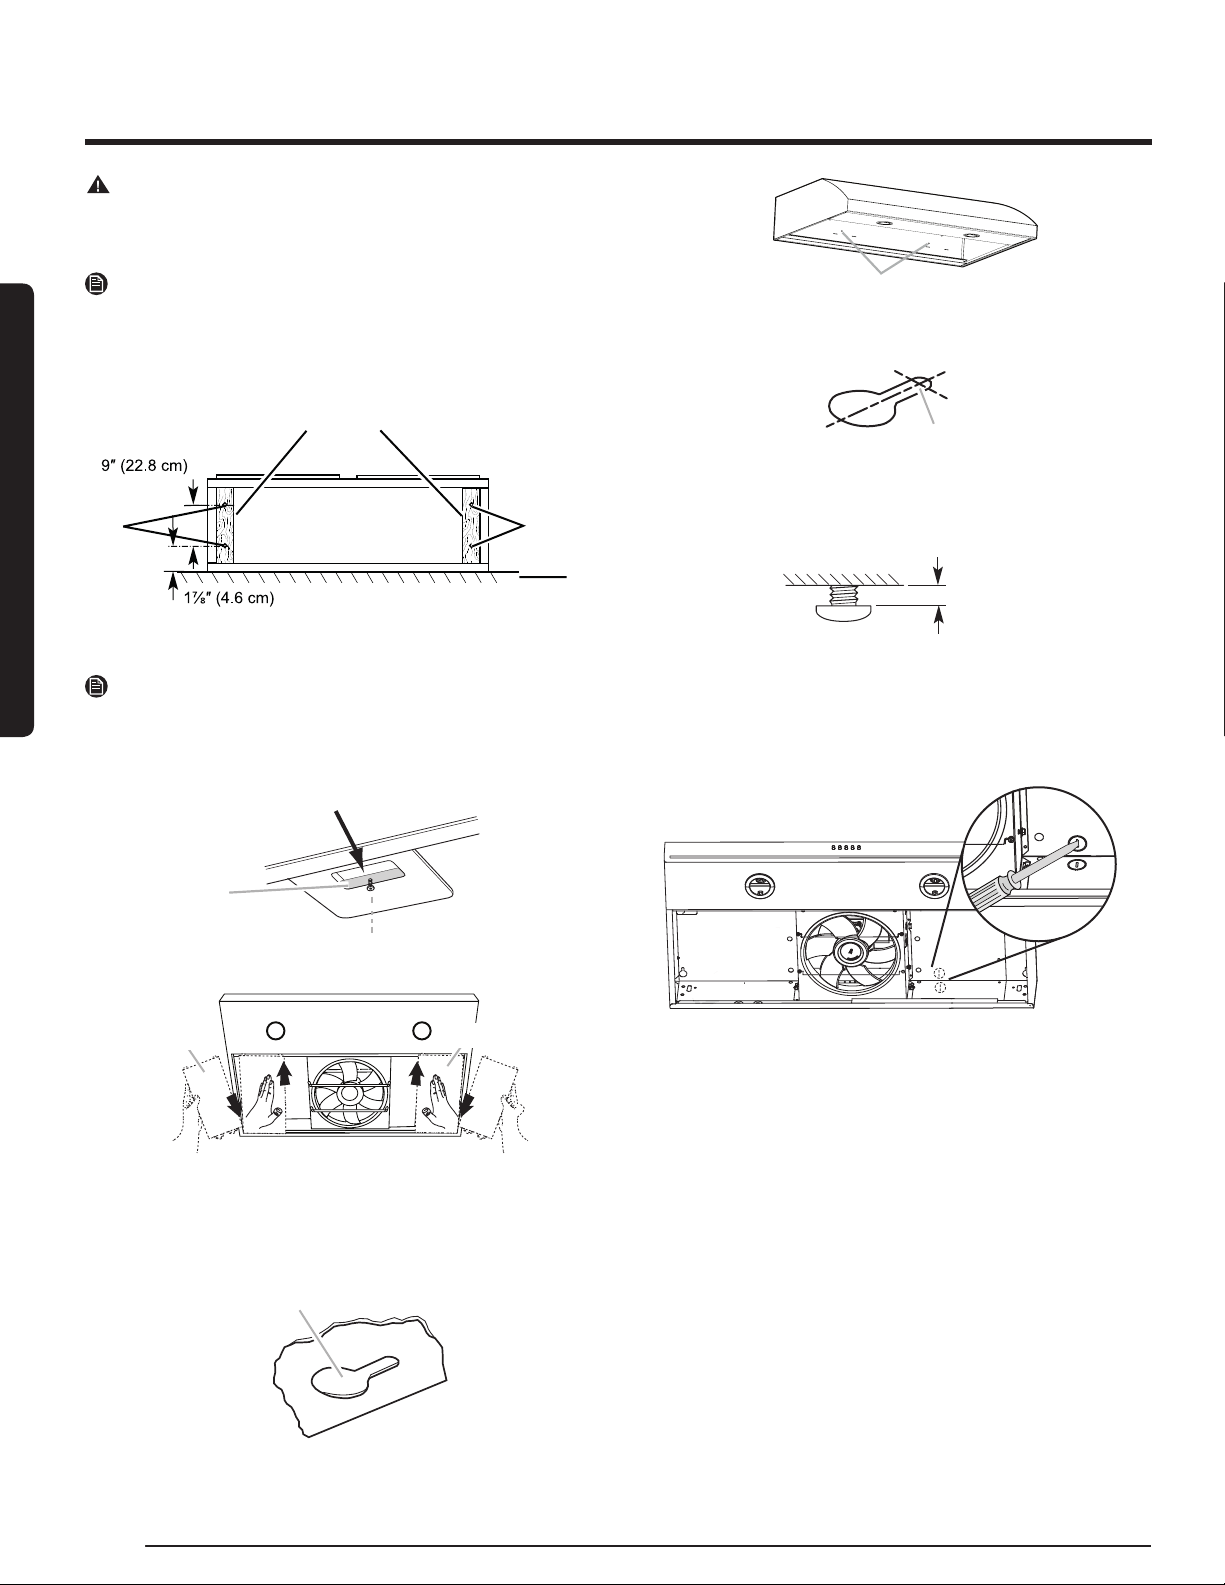
USE TWO OR MORE PEOPLE TO MOVE AND INSTALL THE RANGE
HOOD. FAILURE TO DO SO CAN RESULT IN INJURY.
NOTE
Mark the Range Hood knockouts on the wall and make the
necessary cutouts before installing the hood.
Prepare the location
Wood filler strips
(recessed cabinet
bottoms only)
Wall
Cabinet
bottom
AA
1. If cabinet has recessed bottom, add wood ller strips on each side.
Install 4 at head wood screws with washers and nuts to attach ller
strips in locations shown.
NOTE
For installations to a surface other than drywall, it is recommended that a
qualied contractor determine the anchoring method.
2. Remove the grease lter by pulling the lter latch toward the back of
the range hood and using a Torx T10 adapter, remove the screw from
the lter retainer.
A
3. Remove the lateral panels by pulling them horizontally to the back of the
hood and then release the brackets on the front.
A
A
4. Using 2 or more people, lift the range hood up under cabinet and
determine nal location by centering beneath cabinet. Mark on the
underside of cabinet the location of the 4 keyhole mounting slots on
the range hood (A) NOTE: Mark the thin area of the slot. On the back
wall mark the holes for the security screws (B). Set range hood aside
on a covered surface.
A
A. Keyhole slot
B
5. Use
1
⁄8” (3 mm) drill bit and drill 4 pilot holes. NOTE: Make the drill
holes on the thin area of the slot.
A
A. Drill pilot hole
6. Install the 4 - .45 cm x 1.3 cm mounting screws in pilot holes. Leave
about ¼” (6.4 mm) space between screw heads and cabinet to slide
range hood into place
1⁄4"
(6.4 mm)
7. Use
8
⁄25" (8mm) drill bit and drill 2 pilot holes in the marks for the secu-
rity screws, then place the drywall anchors.
Prepare Range Hood
1. Set the range hood on its back on a covered surface.
2. Using a at head screwdriver, remove the appropriate power supply
knockout.
Installation Instructions
Installation Instructions
Loading ...
Loading ...
Loading ...