Loading ...
Loading ...
Loading ...
13
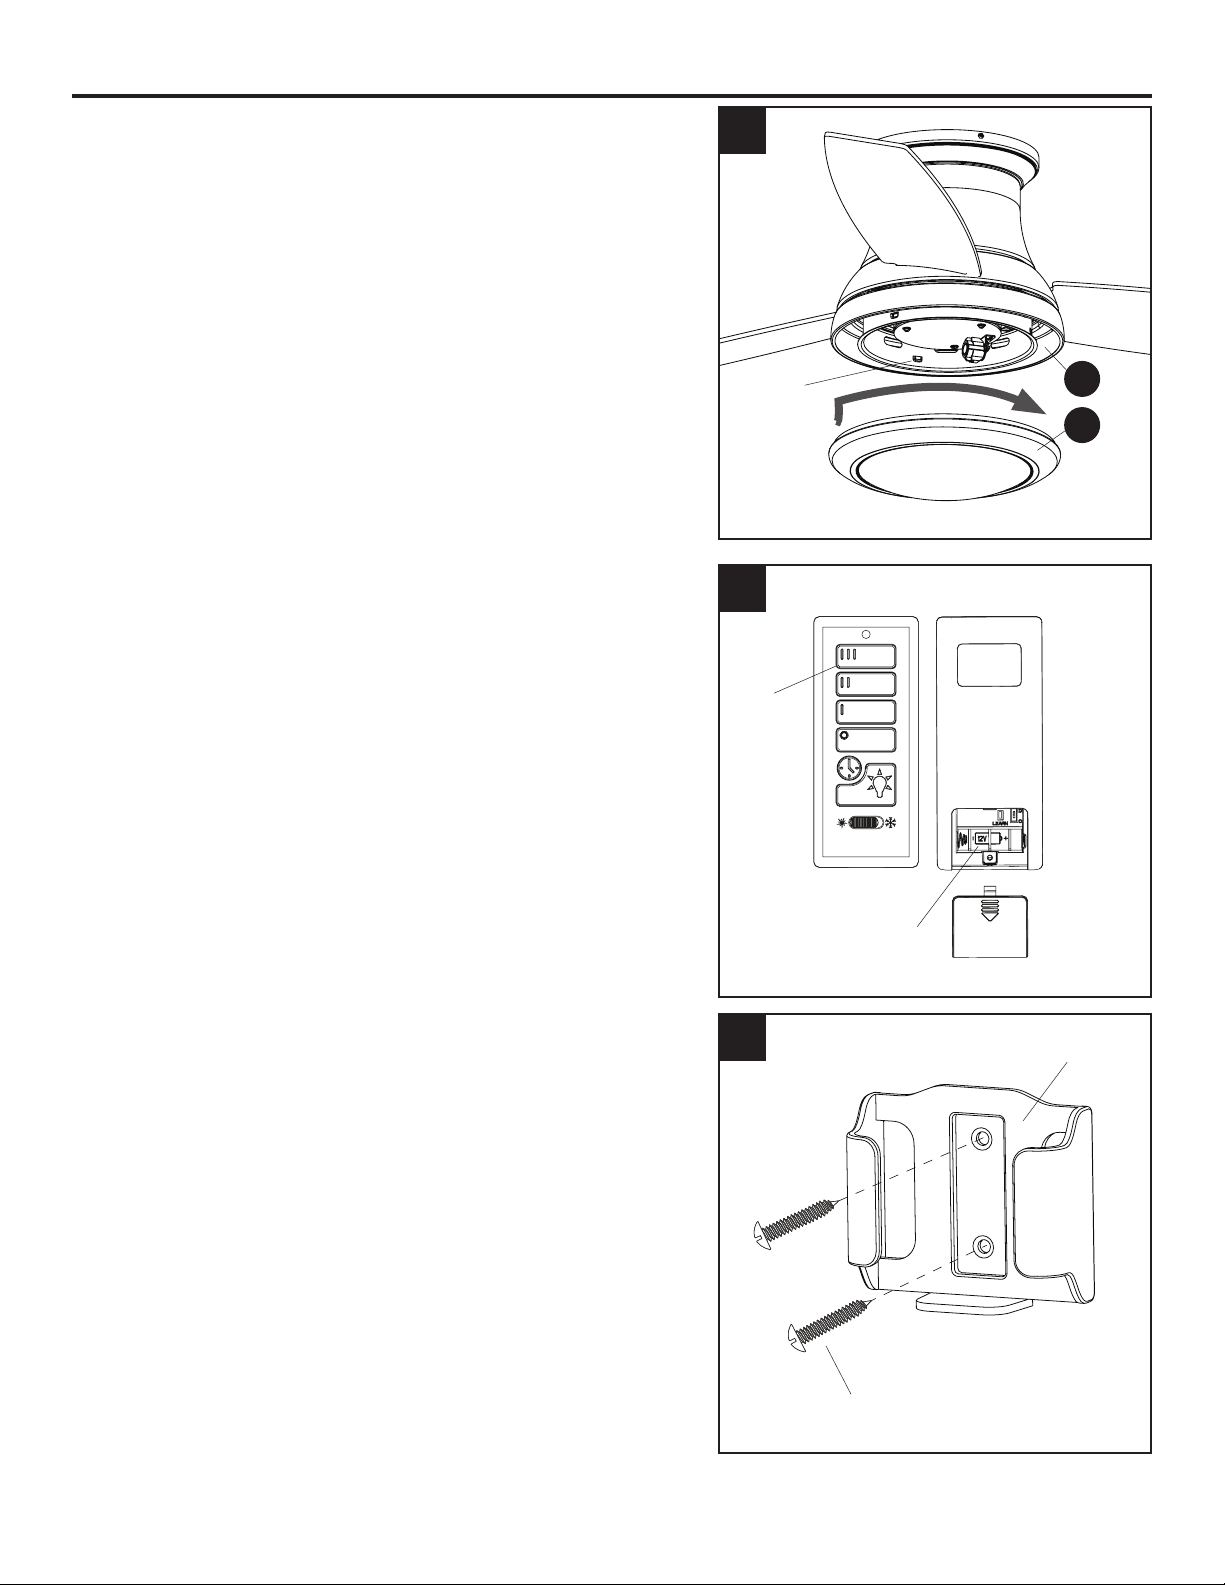
FINAL INSTALLATION
10. Align the notches in the switch hosing (E) with the
grooves in the locking ring (G) preassembled to bowl
housing (H). Then, twist the locking ring (G) tightly in
a clockwise direction until it is secure.
Turn on the citcuit breakers and the wall switch to the
fan supply lead lines.
11. Remove the battery cover from the back of the
remote found in remote pack (Q). Insert the battery
from remote pack (Q) into the remote; ensure polarity
of battery matches the polarity indicated in the
battery compartment -- positive (+) to positive (+) and
negative (-) to negative (-). Replace the battery cover
and press the high fan speed button on the remote to
ensure the remote turns on the fan.
Note: If remote does not turn on fan, see
TROUBLESHOOTING (page 16).
12. If desired, the wall bracket in remote pack (Q) can
be installed to a wall using the provided mounting
screws. Store the remote on the wall bracket when
not in use.
10
12
E
G
11
Notch
Front Back
Battery
Compartment
Battery Cover
High
Fan
Speed
Wall Bracket
Mounting Screw
Loading ...
Loading ...
Loading ...