Loading ...
Loading ...
Loading ...
12
FINAL INSTALLATION
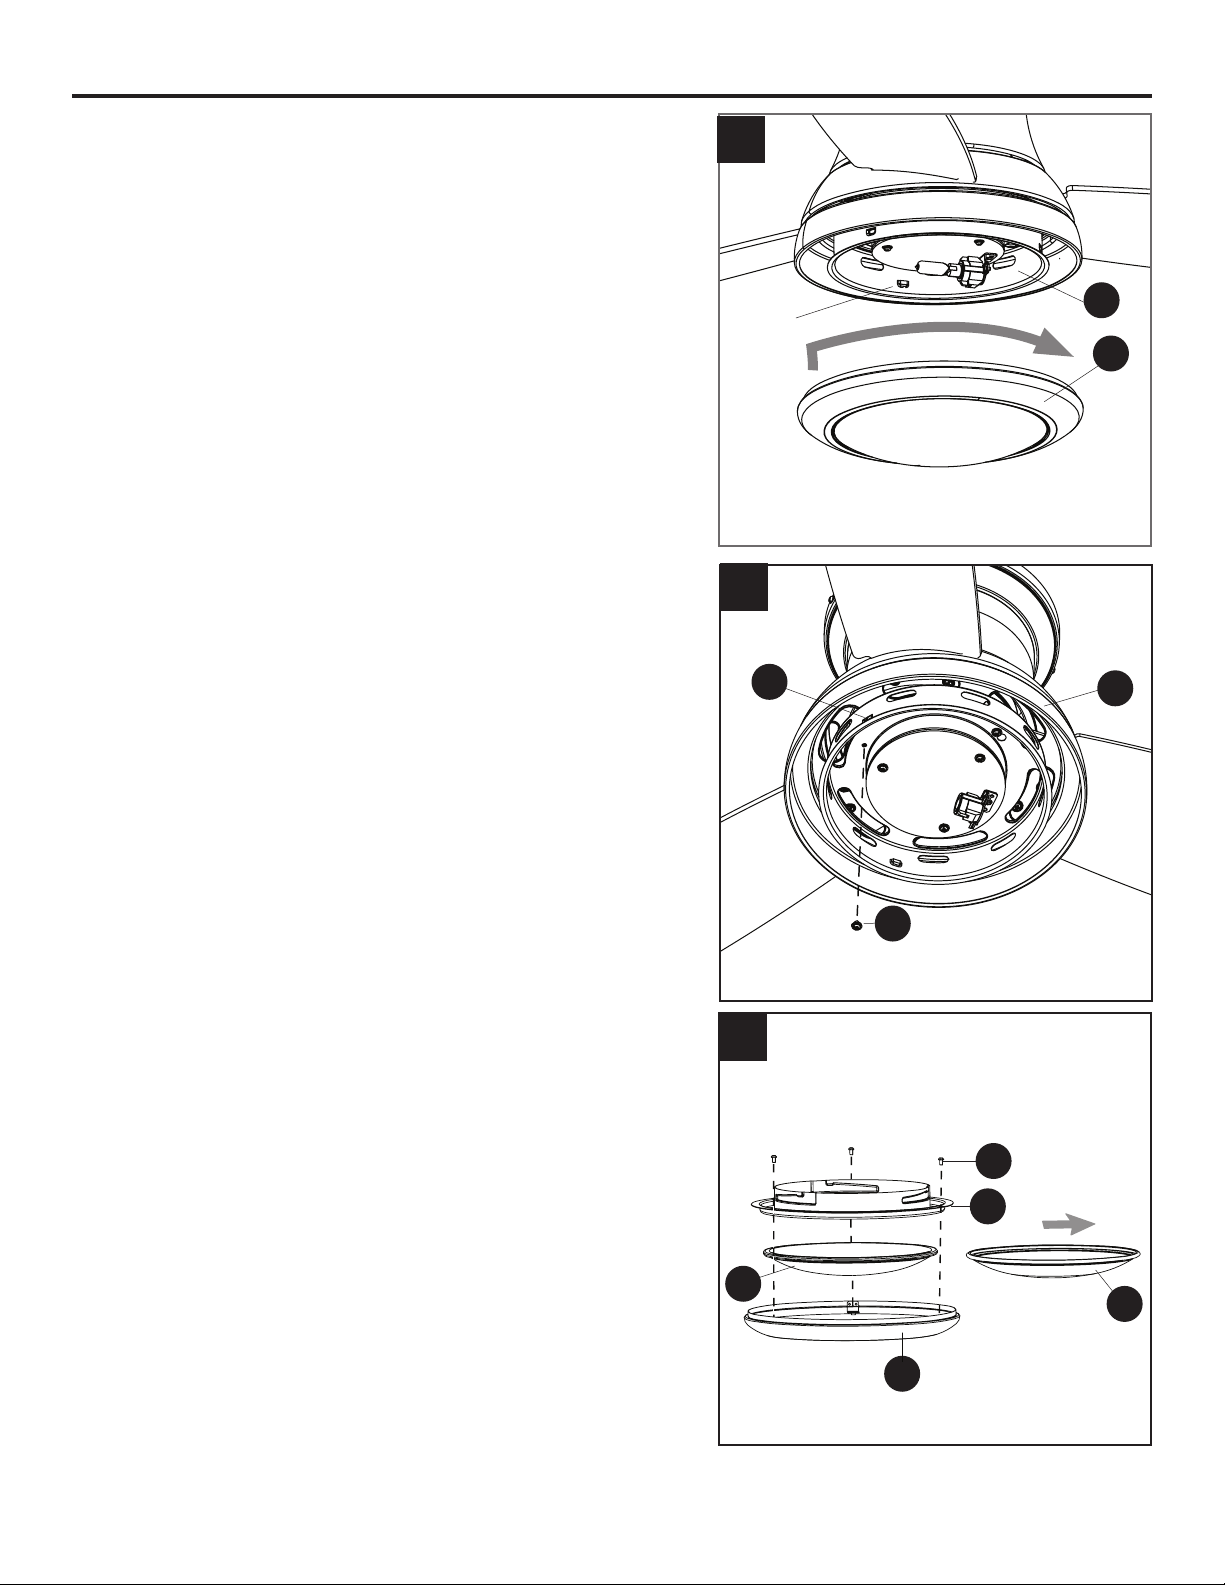
7. Align the notches in the switch housing (E) with the
grooves in the locking ring (G) preassembled to bowl
housing (H). Then, twist the locking ring (G) tightly in a
clockwise direction until it is secure.
Turn on the circuit breakers and the wall switch to the
fan supply lead lines.
Skip to step 11.
8. To install the fan without the light kit, remove one
of the switch housing screws (N) from the light pan (F),
and loosen (do not remove) the other two. Align the
switch housing (E) over the loosened switch housing
screws (N) preassembled on the switch housing (E),
then place the keyholes of the switch housing (E) onto
the switch housing screws (N) and rotate the switch
housing (E) clockwise. Secure the switch housing (E)
with the previously removed switch housing screw (N).
Tighten all three switch housing screws (N).
WARNING: Do not cut, remove or connect the 2-pin
connectors if installing without the light kit.
9. Remove the locking ring (G) from the bowl housing
(H) by removing the three locking ring screws (P) from
the locking ring (G). Then remove the preassembled
glass bowl (I) and replace with the metal bowl (L).
Reinstall the locking ring screws (P) to secure the bowl
assembly.
CAUTION: Metal bowl (L) is only suitable for
installations without the light kit.
E
G
F
E
7
8
9
Notch
N
G
I
P
L
H
Loading ...
Loading ...
Loading ...