Loading ...
Loading ...
Loading ...
34 49-1000329 Rev. 2
15
REINSTALLING THE UPPER LEFT AND RIGHT-HAND DOORS
WARNING
Follow all steps for removing
and reinstalling the door. Failure to follow these
instructions, leaving off parts, or overtightening
screws, can lead to the door falling off and result in
injury and property damage.
CAUTION
Lifting Hazard
A single person lift could cause injury. Gain
assistance when handling, moving, or lifting
refrigerator doors.
5HLQVWDOOFHQWHUKLQJHILUVWDQGWRUTXHWKHó´VFUHZWR
65 in-lbs (7.34 N-m) and small screw to 25 in-lbs
(2.82 N-m). Rotating the screw by 1/3 turn after it is
flush with mating surface will achieve these torques.
2. Lower the refrigerator door onto
the center hinge.
3. Securely tape the door shut
with masking tape or have a
second person support the
door.
4. Reinstallation is the reverse of the removal
instructions.
5. Be sure to reinstall the ground wire and strain relief
to the top hinge.
6. Reinstall hinge cover. NOTE: Ensure wires are not
pinched or under screw bosses before tightening
screws.
Installation Instructions
INSTALLING THE REFRIGERATOR (Cont.)
16
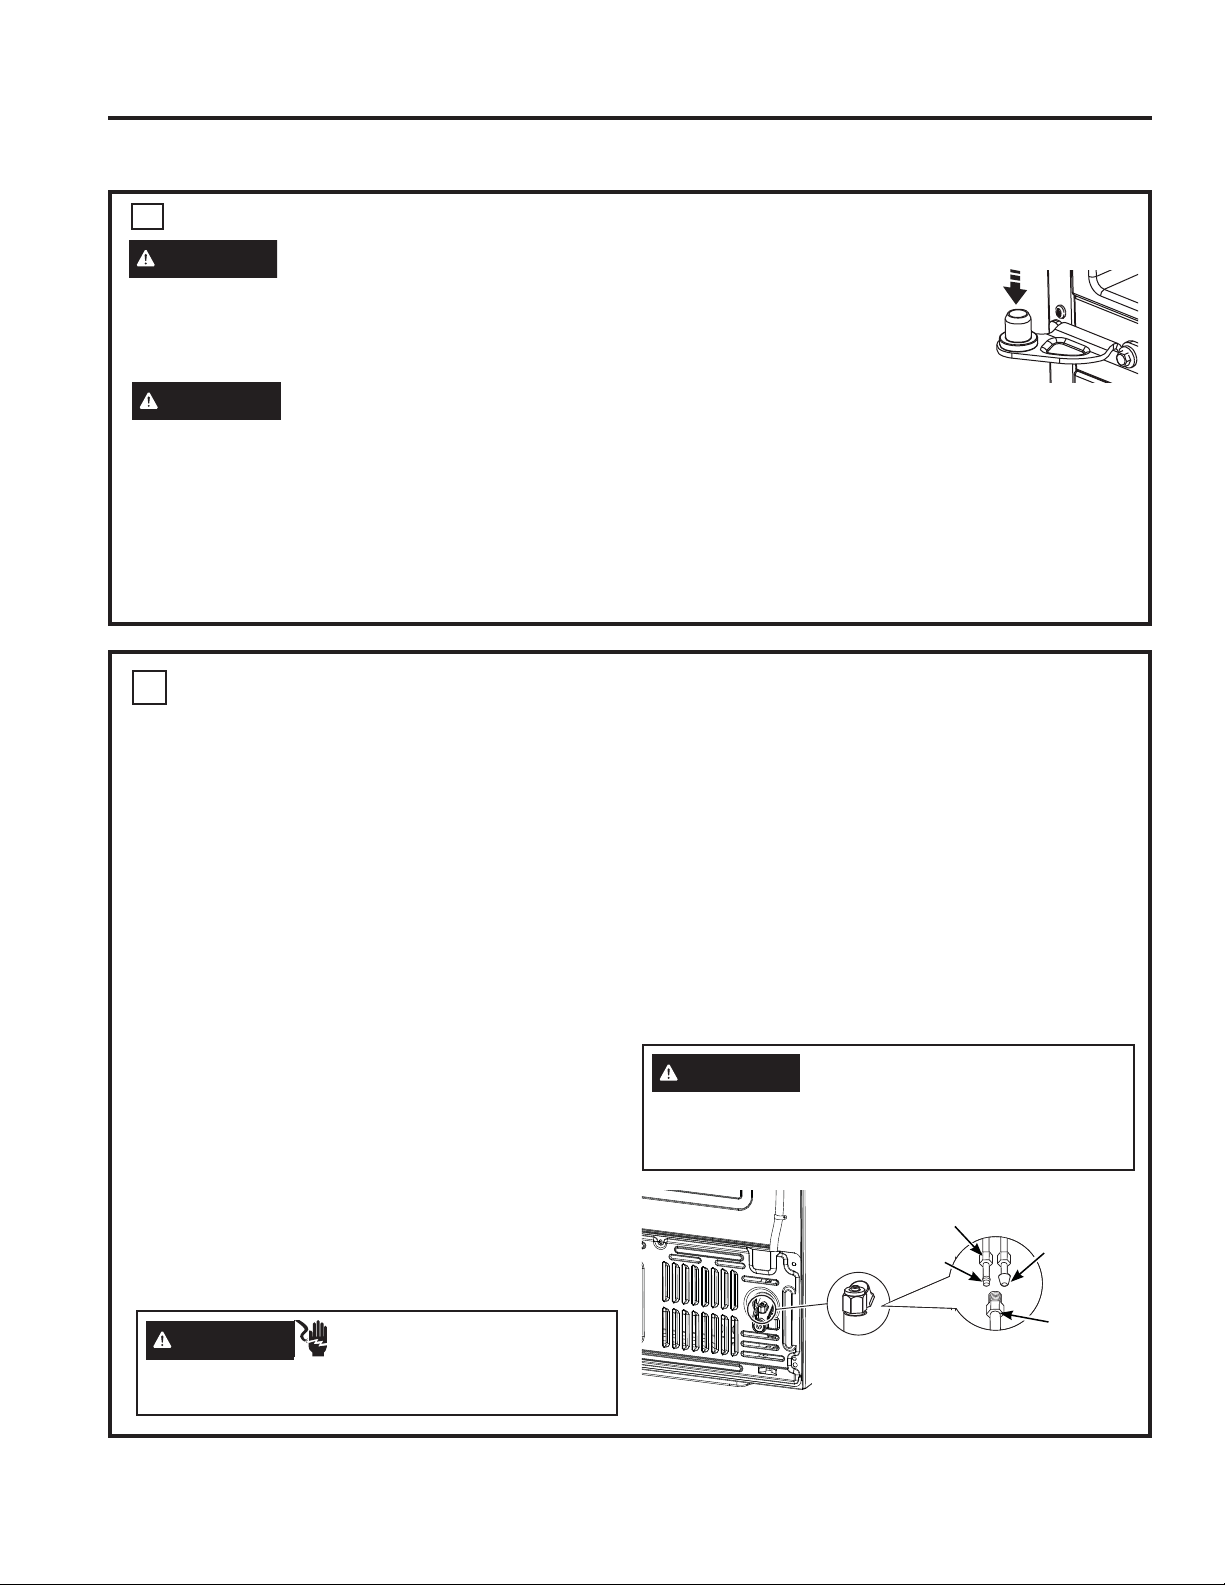
CONNECTING REFRIGERATOR TO THE HOUSE WATER LINE
A cold water supply is required for automatic
icemaker operation. If there is not a cold water
supply, you will need to provide one. See Installing
the Water Line section.
NOTES:
• Before making the connection to the refrigerator,
be sure the refrigerator power cord is not plugged
into the wall outlet.
• If your refrigerator does not have a water filter,
we recommend installing one if your water supply
has sand or particles that could clog the screen of
the refrigerator’s water valve. Install it in the water
line near the refrigerator. If using SmartConnect
™
5HIULJHUDWRU7XELQJ.LW\RXZLOOQHHGDQ
additional tube (WX08X10002) to connect the
filter. Do not cut plastic tube to install filter.
• Before connecting the water line to the house,
purge the house line for at least 2 minutes.
1. If you are using copper tubing, place a
compression nut and ferrule (sleeve) onto the
end of the tubing coming from the house cold
water supply.
If you are using the SmartConnect
™
tubing, the
nuts are already assembled to the tubing.
2. If you are using copper tubing, insert the end of
the tubing into the refrigerator connection, at the
back of the refrigerator, as far as possible. While
holding the tubing, tighten the fitting.
If you are using SmartConnect
™
tubing, insert
the molded end of the tubing into the refrigerator
connection, at the back of the refrigerator, and
tighten the compression nut until it is hand tight.
Then tighten one additional turn with a wrench.
Over tightening may cause leaks.
3. Fasten the tubing into the clamp provided to
hold it in position. You may need to pry open the
clamp.
WARNING
Electrical Shock Hazard.
Attach tubing clamp using existing hole only. DO
NOT drill into the refrigerator.
WARNING
Connect to potable water supply
only. A cold water supply is required for automatic
icemaker operation. The water pressure must be
between 40 and 120 psi (275-827 kilopascals)
SmartConnect
™
Tubing
Refrigerator
Connection
´&RPSUHVVLRQ1XW
Ferrule
(sleeve)
INSTALLATION INSTRUCTIONS
Loading ...
Loading ...
Loading ...