Loading ...
Loading ...
Loading ...
IMPORTANT: YOUR COOKER HOOD SHOULD BE CONNECTED
TO YOUR MAINS SUPPLY AFTER THE REST OF THE
INSTALLATION PROCESS HAS BEEN COMPLETED.
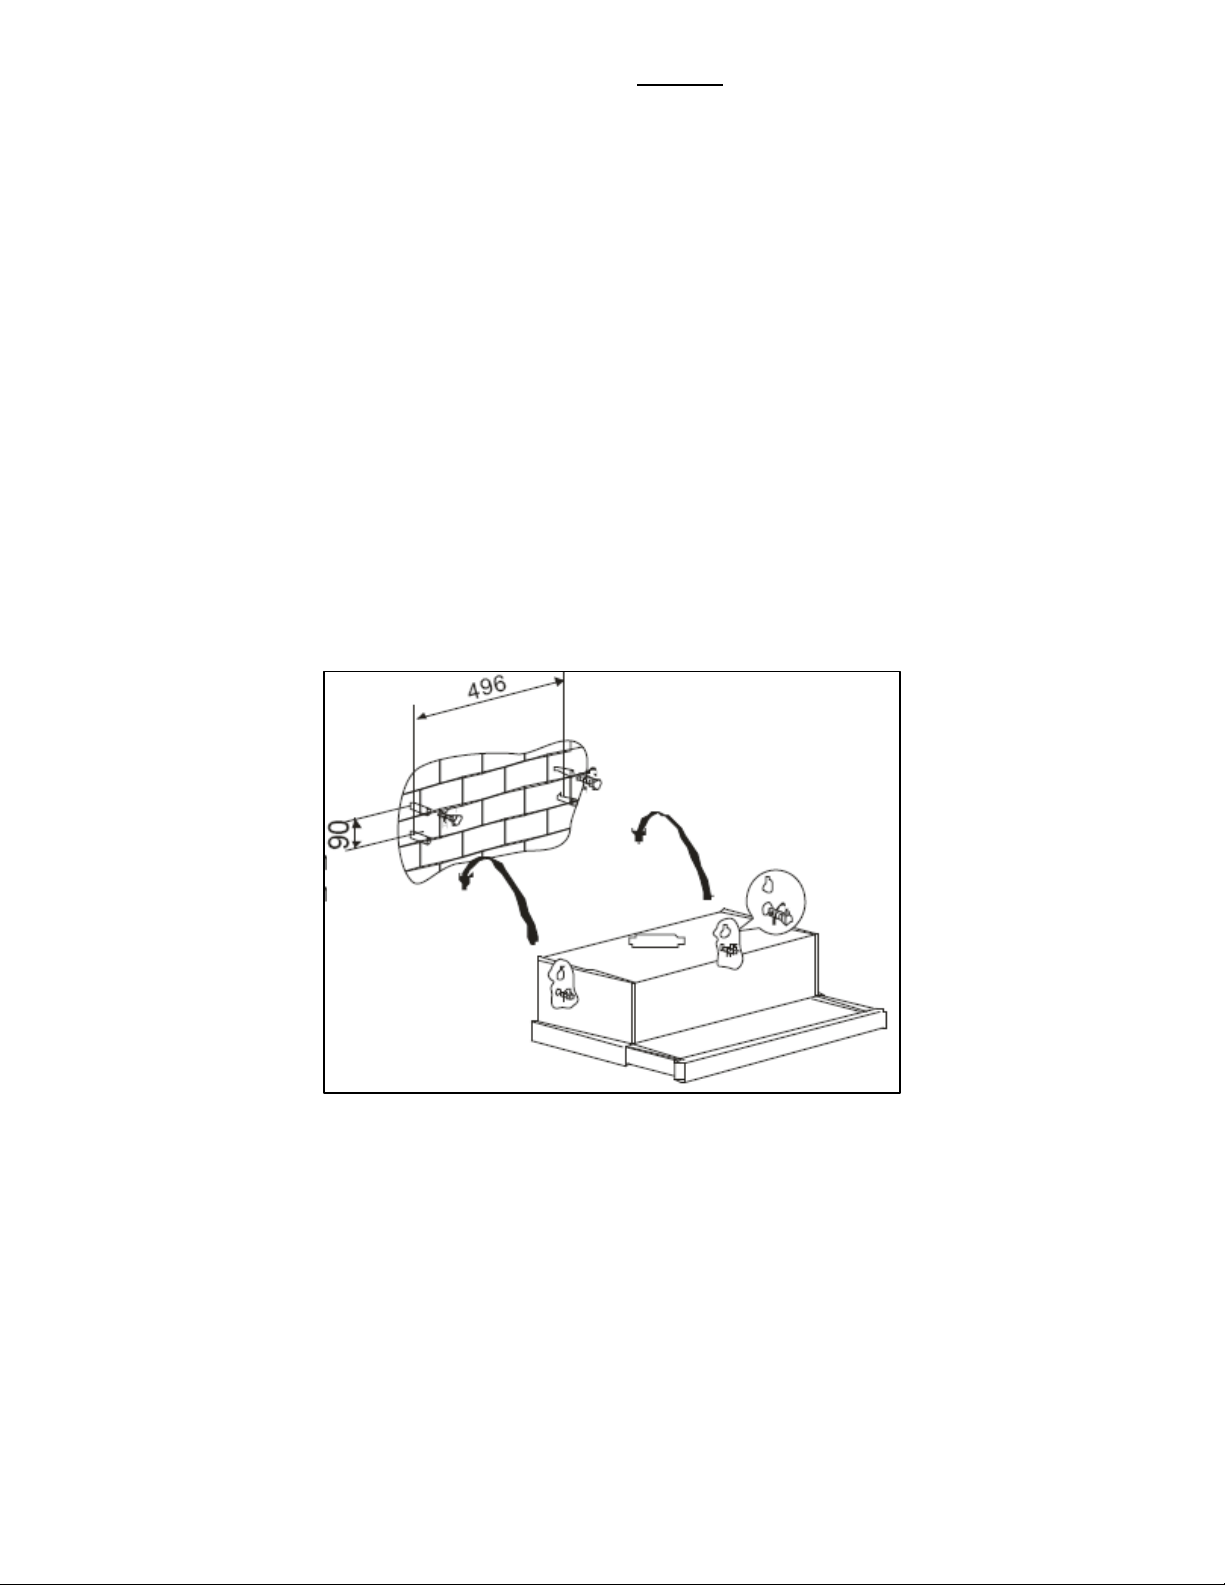
Wall installation
NOTE: All the screws mentioned in this section come with your
cooker hood.
1) Position the hood against the wall and mark the positions of 4
holes of 8 mm diameter on a suitable place and according to the
centre distance of the hole on the back of the cooker hood.
2) Drill these holes into the wall. If you intend to use your cooker
hood as an extraction fan, you will need to fit a ducting kit
through this that will connect to your appliance.
3) Insert the rawlplugs into the holes and then insert the screws
part way, so that the screws stick out by 10 mm.
4) Hang the hood up on the screws.
5) Tighten the screws the rest of the way in.
6) For the extraction function, connect the exhaust outlet pipe to
the collar strip. Find the screw holes on the top of the cooker
hood. Tighten the bolts from inside the hood.
18
Loading ...
Loading ...
Loading ...