Instruction Manual Elite Ice Cream MakerIMPORTANT SAFEGUARDS
- Do not use the product for anything other than the intended use.
- Keep the product out of the reach of children and pets. This product is not intended for use by unsupervised children.
- Close supervision is necessary when this product is used near children.
- Do not leave the product unattended while it is in use. Always unplug the product from the electrical outlet when it is not in use.
- Place the product on a flat, steady, stable, scratch-resistant surface.
- Use the product in a well-ventilated area. Do not place the product on or near gas or electric burners. Do not place the product inside or on top of a heated conventional oven, microwave oven, or other heat source.
- Keep the Power Cord and product away from heated surfaces.
- Do not submerse or expose the electrical components of this product in water or any other liquids.
- Do not use attachments not recommended or sold by the product manufacturer, as a risk of fire, electrical shock, or serious personal injury may result.
- Avoid contact with moving parts. Keep fingers, hair and clothing away during operation.
- Never operate the ice cream maker dry. Always have ice cream mixture in the container when plugged in.
- Do not use hot oil or liquids in the ice cream maker.
- Plug the product into a standard 120V AC electrical outlet.
- Do not plug or unplug the product from the electrical outlet with a wet hand.
- Never operate the product while you are standing/sitting in a damp or wet area.
- To avoid a circuit overload, do not operate another electrical product on the same electrical circuit as this product.
- Do not allow the Power Cord to hang (i.e., over the edge of a table or counter) where it may be tripped over or pulled.
- Disconnect the plug (do not pull on Power Cord) from the electrical outlet. Do not put any stress on the Power Cord where it connects to the product, as the Power Cord could fray and break.
- Never operate this product if it has a damaged Power Cord or plug, is not working properly, has been dropped or damaged, or the Power Cord or Handle exposed to water or other liquids. Do not attempt to examine or repair this product yourself. Return the product to a service center for examination and repair.
- This product is intended for indoor, non-commercial, non-industrial, household use only. Do NOT use outdoors.
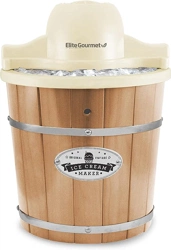
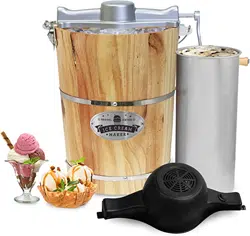
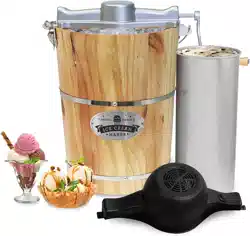
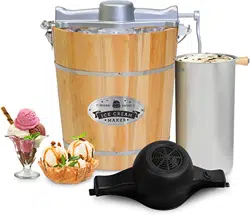
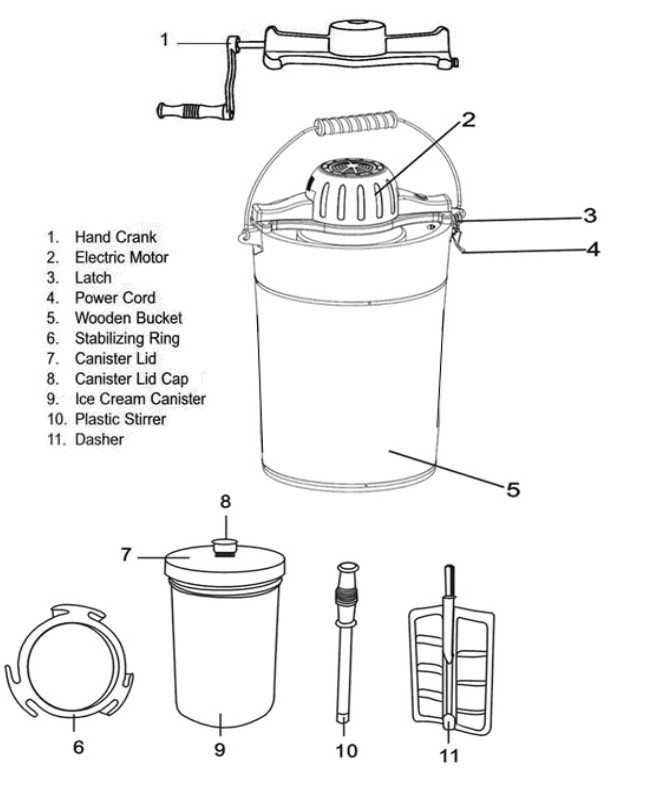
PARTS & IDENTIFICATION
SHORT CORD PURPOSE
NOTE: A short power cord is provided to reduce the risk of personal injury resulting from becoming entangled in or tripping over a longer cord.
Longer power-supply cords or extension cords are available and may be used if care is exercised in their use.
If an extension cord is used: (1) the marked electrical rating of the extension cord should be at least as great as the electrical rating of the product; (2) the extension cord should be arranged so that it will not drape over the countertop or tabletop where it can unintentionally be pulled on or tripped over by children or pets.
POLARIZED PLUG
If this appliance is equipped with a polarized plug (one blade is wider than the other), please follow the below instructions: To reduce the risk of electrical shock, this plug is intended to fit into a polarized outlet only one way. If you are unable to fit the plug into the electrical outlet, try reversing the plug. If the plug still does not fit, contact a qualified electrician. Never use the plug with an extension cord unless the plug can be fully inserted into the extension cord. Do not alter the plug of the product or any extension cord being used with this product. Do not attempt to defeat the safety purpose of the polarized plug
USING YOUR ICE CREAM MAKER
- Always read all instructions and safeguards before operation.
- Remove all packaging materials and make sure that all parts are present and in good condition before discarding packaging materials.
- Wash the lid, canister, and other plastic accessories in warm soapy water.
- Rinse and dry thoroughly.
- Use a damp cloth to wipe clean the electric motor, hand crank and wooden bucket.
- For brand new machines, please fill the wood bucket 2/3 full of water. Allow to sit for 1-2 hours. This allows the wood to expand and swell up so that the seams in between will close together keeping any ice or salt from leaking during the operation process.
WARNING: DO NOT USE ABRASIVE CLEANERS OR SCOURING PADS. DO NOT IMMERSE ANY ELECTRICAL COMPONENT OR POWER CORD IN WATER OR ANY OTHER LIQUIDS AT ANY TIME.
HOW TO USE
PREP – Chill the ice cream canister in the freezer for 2-3 hours prior to use. Do not leave the canister inside the freezer for more than 6-hours.
- Using your favorite recipe, prepare the necessary ingredients per the recipe instructions.
- Pour the prepared and chilled ice cream mixture into the chilled ice cream canister. Do not fill more than 2/3 full.
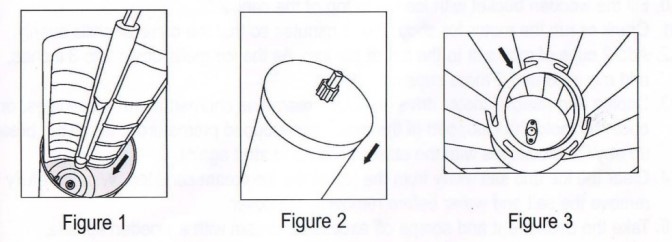
- Insert the Blending Spatula and make sure the bottom of the spatula is fixed in the center of the bottom of the canister. (Figure 1)
- Place the lid on the canister. (Figure 2)
- Place the plastic stabilizing ring into the wooden bucket. (Figure 3)
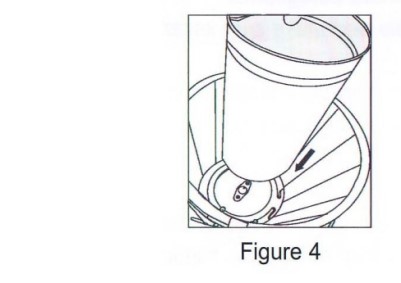
- Place the canister into the wooden bucket and make sure it engages the cone in the center of the bucket. (Figure 4)
- Slide the rectangular end of the hand crank or electric motor into the rectangular hole on the rim of the wooden bucket (Figure 5-a). The opposite end of the crank will drop into the open end where the locking latch is (Figure 5-b). Carefully lift the latch so that the wire goes over the rounded end of the hand crank or motor (you may need to rotate the canister by hand so that the lid fits into the motor/hand crank) (Figure 5-c)

- Plug the power cord into an electrical outlet if the Electric Motor is being used.
***NOTE: While using the motor during the churning process, the canister should be turning which will be churning the ice cream ingredients. The Blending Spatula will remain stationary. If the canister is not spinning, the assembly is not set up properly and will need to be re-adjusted. - Now prepare the wooden bucket by filling it with ice to the top of the canister.
- Add 1-2 cups of rock salt to the top of the ice inside the bucket.
- Run the cranking system for approximately 5 minutes so that the canister chills evenly.
- As the ice begins to melt down by 2-3 inches, add more ice and more cups of rock salt into the bucket.
- Allow the machine to churn for 45 minutes. (If the motor has stopped prematurely, turn the motor off, break up any ice blockages with the plastic stirrer and start it up again).
- Once the churning is complete (the motor will automatically shut off when the contents inside become too thick for the blending spatula), unplug and remove the motor or crank. Clear the ice and salt away from the lid of the canister to prevent it from falling into the canister of ice cream.
- Remove the cover and carefully lift out the Blending Spatula and scrape off any excess ice cream.
- The ice cream consistency is very fresh so it will be more of a soft-serve texture.
- If a harder consistency is desired, transfer the contents to a freezable container and freeze for 3-4 hours.
HOW TO USE MANUAL HAND CRANK:
Follow the instructions 1 - 7 from the Electric Motor to assemble the machine and the Hand Crank to the wooden bucket.
- The Manual Hand Crank is recommended for use to aerate the ice cream contents to help add air into the mixture to make it thicker.
- It is usually suggested to use towards the last 10-15 minutes of the freezing process. It will also help freeze the contents more.
- During the Hand Cranking process, both the Canister and the Blending Spatula will spin in opposite directions of each other.
TIPS & NOTES
- Make sure to use ice that is crushed inside the bucket. Ice should be small, coarse pieces.
- As the canister is turning, make sure to periodically mix the salt and ice together by using the plastic stirrer every 10-15 minutes while the machine is in use.
- It is recommended to store the ice cream inside the freezing canister.
- If the ice cream consistency is too soft, put the contents into a freezable container and freeze for 3-4 hours. The manual hand crank can also be used to crank the ice cream inside the canister to the desired consistency.
- For recipes that require pre-cooking, it is recommended that the ingredients be prepped several hours ahead for the mixture s will need to be allowed time to chill and expand.
CAUTION:
- Do not plug up the drainage hole on the side of the wooden bucket. This is for draining excess salt water and should be kept open at all times.
- If the electric motor stops churning before the 45-minutes is complete, check to make sure there is no blockage of ice jamming against the canister. If there is ice blocking the canister, turn off the motor and remove the jammed ice.
- The electric motor will automatically shut off if the ingredients in the canister are too thick or too hard to blend anymore. Once removed, the motor will function normally again.
CLEANING & CARE
ALWAYS UNPLUG MACHINE AND ALLOW TO COMPLETELY COOL BEFORE CLEANING OR STORING.
- Clean the electric motor with a damp cloth to remove any debris.
NEVER IMMERSE THE MOTOR IN WATER. - Clean the wooden bucket with a warm soapy sponge to remove the saltwater residue. Rinse and dry thoroughly to ensure the salt does not corrode the metal accessories or parts.
- Wash the plastic canister lid, blending spatula and other plastic parts in warm soapy water and dry thoroughly.
- Wash the freezing canister in warm soapy water and dry thoroughly. Never freeze the canister while it is still wet.
DO NOT USE ABRASIVE CLEANERS THIS MACHINE AND ITS ACCESSORIES ARE NOT DISHWASHER SAFE