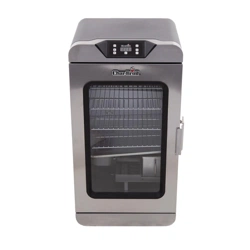
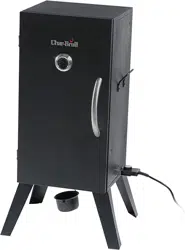
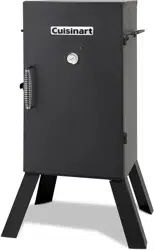
Cuisinart COS-330 30" Electric Smoker
Product's Documents
Below are documents related to this product, you can read online or download:
- Owner's manual - (English) Read Online | Download pdf
User manual Electric Smoker
 DO NOT RETURN TO RETAILER
For Assembly Assistance, Missing or Damaged Parts
Call: 1-866-994-6390

BEFORE ASSEMBLY READ ALL INSTRUCTIONS CAREFULLY
ASSEMBLE UNIT ON A CLEAN, FLAT SURFACE
TOOL NEEDED: PHILLIPS HEAD SCREWDRIVER
 CAUTION: Some parts may contain sharp edges. Wear protective gloves if necessary.
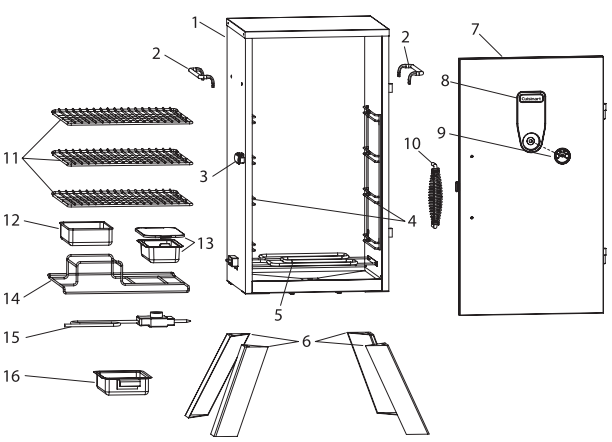
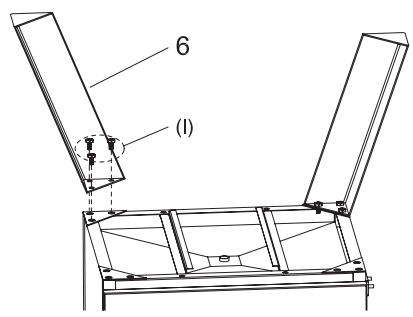
Step 1: Carefully position grill as shown. Attach leg (6) to bottom of smoker chamber body (1) using screws (I). Repeat step for remaining 3 legs.
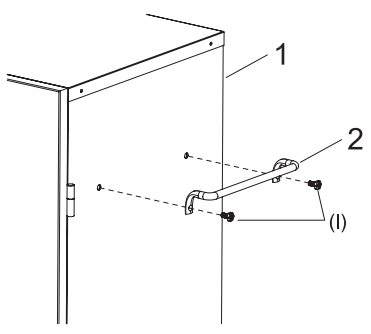
Step 2: Mount side handle (2) to smoker Chamber body (1) using screws (I). Repeat step for opposite side.
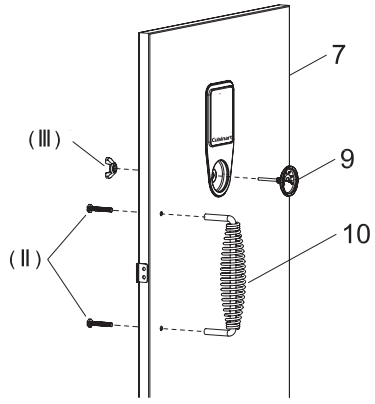
Step 3: Insert temperature gauge (9) stem through hole in smoker door (7) as shown. Secure with wing nut (Ill). Mount door handle (10) to smoker door (7) using screws (II).
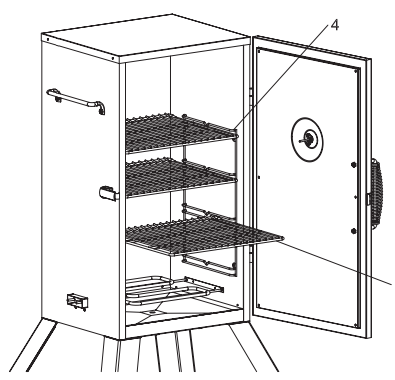
Step 4: SOME PARTS NOT SHOWN FOR CLARITY. Slide cooking grates (11) onto Cooking grate supports (4) inside smoker chamber body.
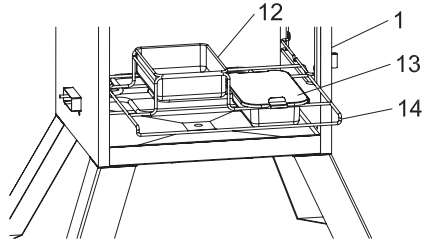
Step 5:
SOME PARTS NOT SHOWN FOR CLARITY.
Place wood chip box (13) and water pan (12) into wood chip grate (14) as shown.
Note: Wood chip bowl and water bowl MUST be in place when using smoker. This minimizes the chance of wood flare ups.
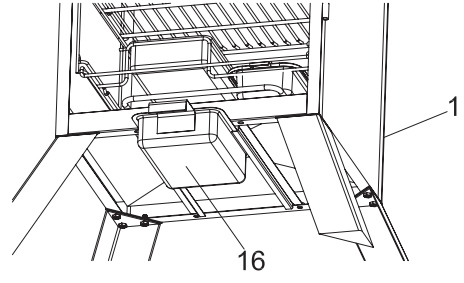
Step 6: Slide drip tray (16) onto grooves under smoker chamber body (1).
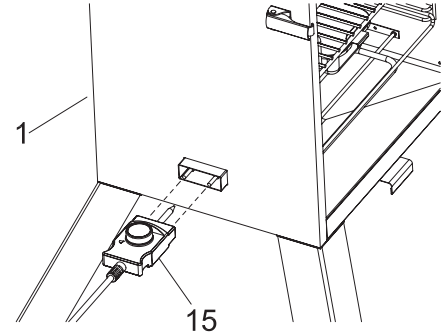
Step 7: Insert thermostat control (15) into side of smoker chamber body (1) as shown.
WARNING
PLACE THE SMOKER OUTDOORS ON A HARD, LEVEL, NON-COMBUSTIBLE SURFACE AWAY FROM ROOF OVERHANG OR ANY COMBUSTIBLE MATERIAL. NEVER USE ON WOODEN OR OTHER SURFACES THAT COULD BURN. PLACE THE SMOKER AWAY FROM OPEN WINDOWS OR DOORS TO PREVENT SMOKE FROM ENTERING YOUR HOUSE. IN WINDY WEATHER, PLACE THE SMOKER IN AN OUTDOOR AREA THAT IS PROTECTED FROM THE WIND.
READ ALL SAFETY WARNINGS AND INSTRUCTIONS CAREFULLY BEFORE OPERATING YOUR SMOKER.Before first use, cure your smoker to minimize damage to the exterior finish as well as rid the smoker of paint odor that can impart unnatural flavors to the first meal prepared.
Step 1
Remove water pan from smoker and do not use flavoring wood while curing your smoker.
Step 2
Coat all interior surfaces of the smoker cabinet, side rack and cooking grill with vegetable oil or vegetable oil spray. m WARNING: DO NOT coat the electric element and the controller.
Step 3
Plug the smoker into electric outlet.
Step 4
Cure smoker for two hours, then unplug smoker from electric outlet. Allow smoker to cool completely. It is important that the exterior of the smoker is not scraped or rubbed during the curing and cooling process.
NOTE: Cure your smoker before first use. After cleaning, apply a light coat of vegetable oil or vegetable cooking spray to the interior surfaces, smoker body, cooking grids and water pan. This simple process will help reduce interior rusting. DO NOT apply oil to electric element or controller.
Step 1
Open door and remove wire rack that supports the wood chip pan and water pan.
Step 2
To get the most smoke, soak wood chips in water for 30 minutes. Remove lid from the wood chip pan and add wood chips. We recommend the use of wood chips, not wood chunks. Replace the wood chip pan lid and slide rack into smoker.
Step 3
Carefully fill water pan with warm water or your choice of marinade to 1 inch below the rim. Do not fill completely or water may overflow during use.
WARNING: DO NOT spill water, marinade or any liquid onto the electric element and controller.
Step 4
Remove cooking grids and adjust the wire cooking grid support brackets to the desired height for the items you are smoking.
Step 5
Place food on cooking grid(s) in a single layer and leave room between each piece to allow smoke and moisture to circulate evenly. Slide cooking grid into the wire cooking grid support brackets. Repeat steps for each cooking grid that is used.
Step 6
Close door and plug the smoker into electric outlet. m WARNING: Always use a 3-wire grounded outlet wired for 120-volts that is GFCI protected at 15 or 20 amps. If you are not sure the outlet is suitable, contact a qualified electrician. Do not operate this smoker on the same circuit with any other appliance or electrical device. m WARNING: When connecting controller to smoker, plug electric controller into smoker first, make sure controller is set to OFF, then plug into outlet. When unplugging, turn controller to OFF, disconnect from outlet, then remove controller from smoker.
Step 7
Adjust the electric controller to the high position and allow the smoker to heat up. The desired temperature for smoking is between 220°F and 250°F. The heat indicator on the front of the unit will let you know when the smoker is near the desired temperature and you can adjust the controller accordingly.
Step 8
Allow food to cook approximately 30-45 minutes per pound. Check the water level periodically and add water if needed. When adding water, wear an oven mitt and slide the wood chip pan/water pan rack slightly toward the door opening, add water and slide the rack back into place. You can add additional wood chips by following the same procedure.
Step 9
Use a meat thermometer to check the temperature of your food. The heat indicator on the door will provide the approximate temperature inside the smoker but you should use a meat thermometer to ensure that your food is fully cooked.
Step 10
After you are finished smoking, turn the controller knob to the off position and always unplug the smoker from the electric out let and allow the smoker to cool. Once the smoker has cooled, follow the instructions in the “Care and Maintenance” section of this manual.
NOTE: Performance of the smoker is dependent on ambient temperature and wind conditions.
Step 1
Water pan, wood chip pan and cooking grids should be washed with hot, soapy water then rinsed and allowed to dry. Cooking grids can be lightly coated with vegetable oil or cooking spray to prevent food from sticking.
Step 2
A light coating of vegetable or cooking spray may also be applied to the inside of the smoker to prevent rusting.
Step 3
If rust appears on the exterior of the smoker, clean the affected area with steel wool and apply a high-temperature resistant paint.
Step 4
Do not apply additional paint to the interior surface of the smoker. If rust develops, use steel wool to remove and then coat with vegetable oil or cooking spray.
Step 5
After the electric element has completely cooled, clean with a damp cloth after each use.
BEFORE STORING YOUR SMOKER:
Should I use wood chips or wood chunks?
You can use wood chips or wood chunks. Wood chunks will take longer to produce smoke.
Should I presoak the wood chips or use them dry?
Both are acceptable options. The dry chips will burn faster with a more intense smoke. The pre-soaked chips will burn slower.
Is it O.K. to use the smoker with no water in the water bowl?
Yes. But, water will help control the temperature and the steam from the water will keep the food moist. Filling the water bowl with cold water will help lower the smoker temperature.
Can I use the smoker in my garage?
No. Do not use smoker in any enclosed or covered areas. Keep smoker 10+ feet from any building.