Loading ...
Loading ...
Loading ...
PREPARATIONS ➤ Connecting playback devices En 27
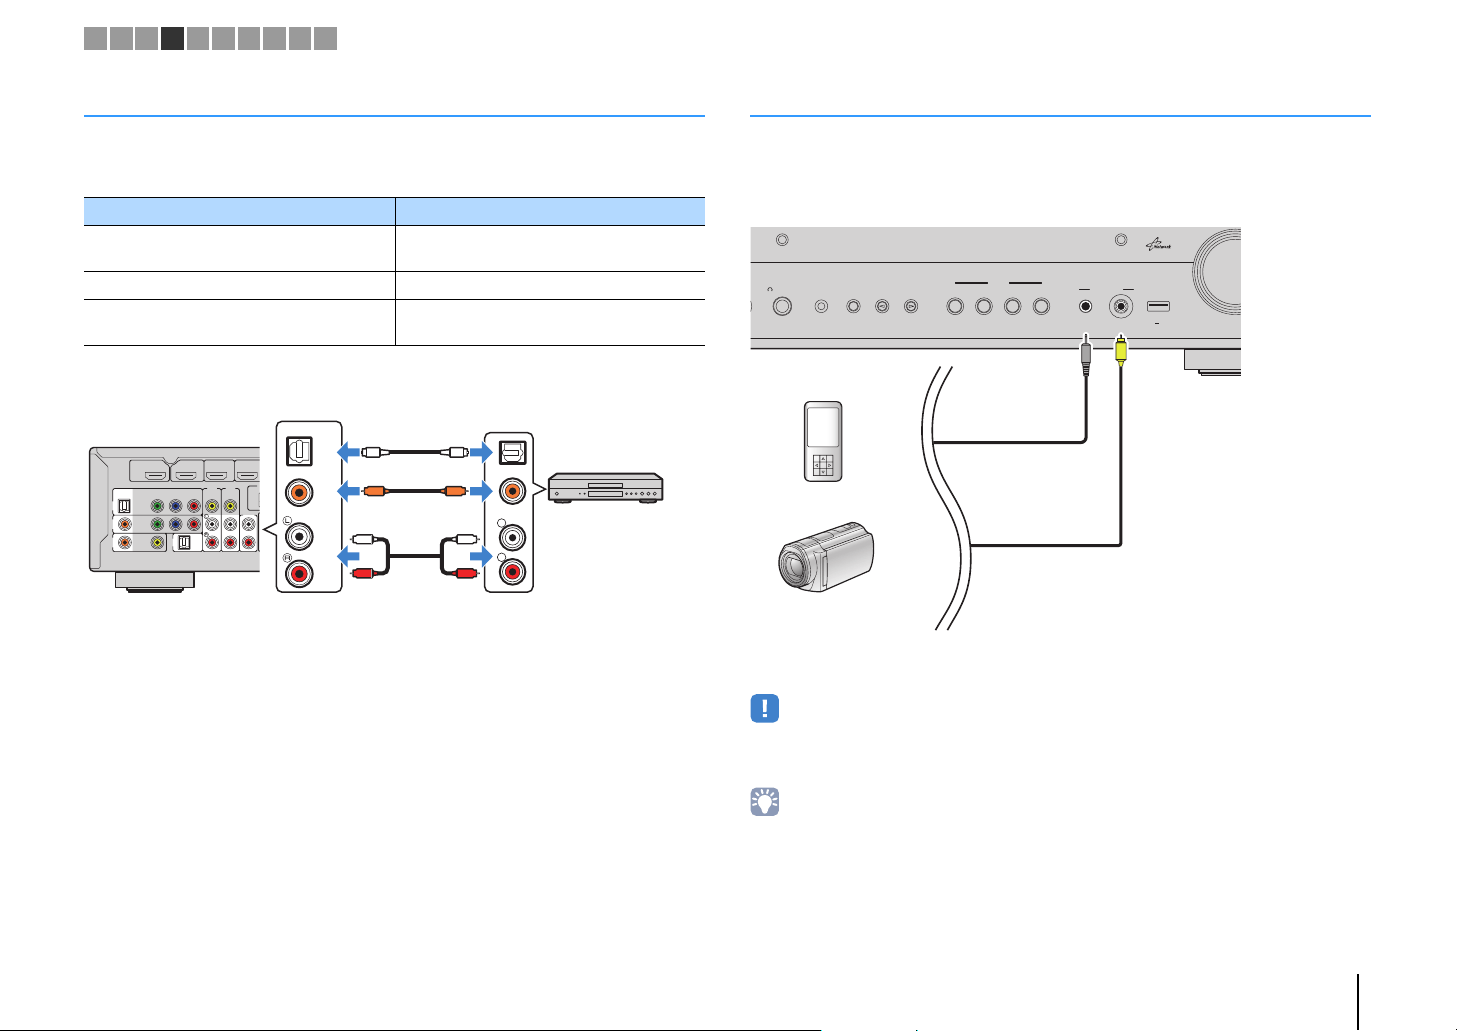
Connecting audio devices (such as CD players)
Connect audio devices such as CD players and MD players to the unit. Depending on
the audio output jacks available on your audio device, choose one of the following
connections.
If you select the input source by pressing AV 1–5 or AUDIO 1–2, the audio played back
on the audio device will be output from the unit.
Connecting to the jacks on the front panel
Use the VIDEO AUX jacks on the front panel to temporarily connect devices such as
camcorders and portable audio players to the unit.
Before making a connection, stop playback on the device and turn down the volume on
the unit.
If you select “V-AUX” as the input source by pressing V-AUX, the video/audio played
back on the device will be output from the unit.
• To watch videos input to the VIDEO AUX (VIDEO) jack, you need to connect your TV to the MONITOR OUT
(VIDEO) jack of the unit (p.23).
• You need to prepare the video/audio cables that match the output jacks on your device.
• For details on how to connect an iPod or a USB storage device, see “Connecting an iPod” (p.56) or
“Connecting a USB storage device” (p.60).
• When “USB” is selected as the input source, video signals input to the VIDEO AUX (VIDEO) jack are output
from the MONITOR OUT (VIDEO) jack.
Audio output jacks on audio device Audio output jacks on the unit
Digital optical
AV 1 (OPTICAL)
AUDIO 1 (OPTICAL)
Digital coaxial AV 2–3 (COAXIAL)
Analog stereo
AV 4–5 (AUDIO)
AUDIO 2
AV
5
AUDIO
2
AV
4
AV
1
OPTICAL
COAXIAL
AUDIO 1
(
TV
)
COAXIAL
VIDEO
VIDEO
CONPONENT
VIDEO
YPB PR
AV
2
AV
3
HDMI HDMI 2HDMI 1
HDMI
OUT
ARC
(
BD/DVD
)
A
R
L
COAXIAL
OPTICAL
CC
L
R
L
R
OO
OPTICAL
COAXIAL
Audio output
(either digital optical,
digital coaxial, or analog stereo)
AV 1–5 jacks
AUDIO 1–2 jacks
The unit (rear)
Audio device
INFO
DIRECT
PHONES
SILENT CINEMA
YPAO MIC
STRAIGHT
BD/DVD
TV NET RADIO
VIDEO AUX
SCENE
AUDI O VID EO
PROGRA
M
5V
2.1A
V
Portable audio player
Camcorder
The unit (front)
1 2 3 4 5 6 7 8 9 10
RX-S600_S600D_om.book Page 27 Tuesday, May 28, 2013 1:36 PM
Loading ...
Loading ...
Loading ...