Loading ...
Loading ...
Loading ...
82
Dubbing (TAPE y DVD)
Dubbing From a VHS Tape to
a DVD
You can easily record (dub) a VHS tape to a disc.
Before dubbing, make the necessary audio settings
on the VCR.
◆How titles and chapters are created
The recorder takes each recording on the VHS tape
and automatically divides them into titles as they
are dubbed to a disc. These titles are then further
divided into chapters at either 5 or 15-minute
intervals, according to the “DVD Auto Chapter”
setting of “Features” in the “Setup” display.
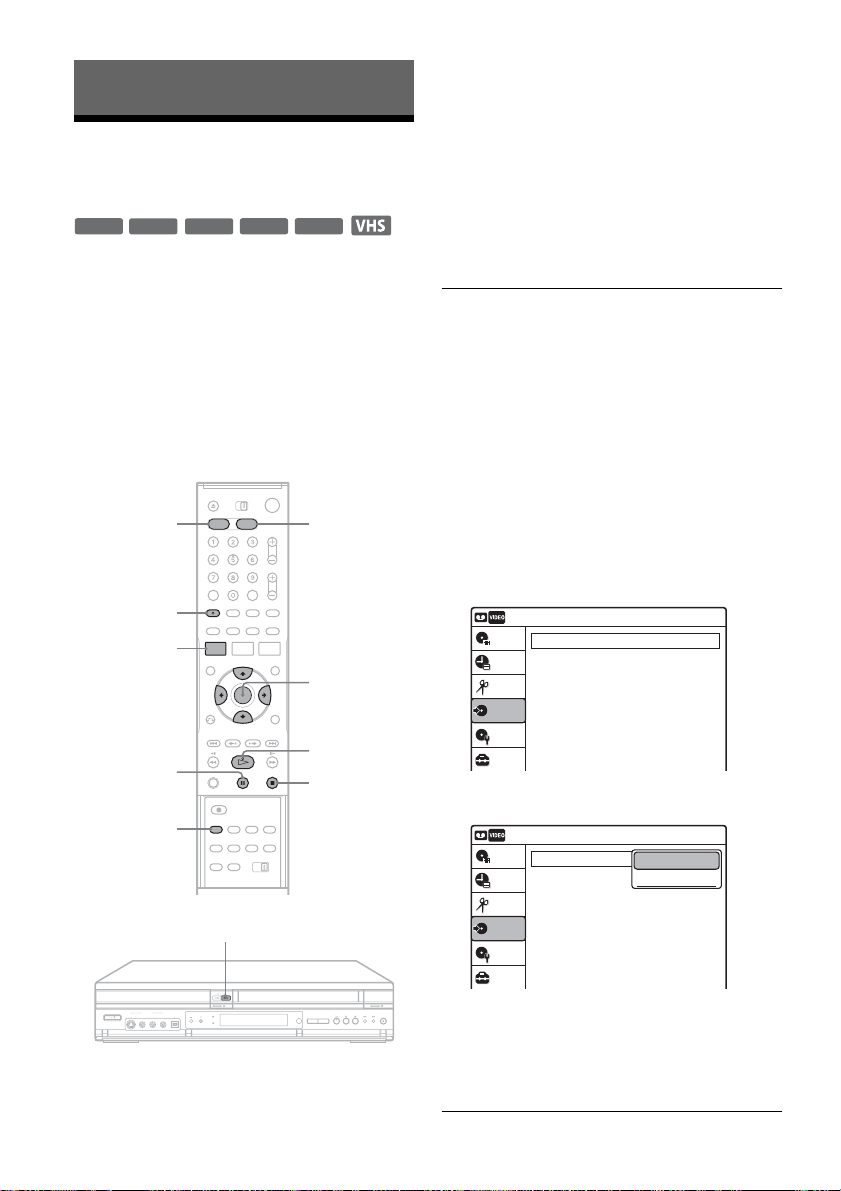
1 Press DVD and insert a recordable disc.
To select the recording mode, press REC
MODE repeatedly (see page 45).
2 Insert a source VHS tape.
3 Press VIDEO to operate the VCR.
4 Start playing the VHS tape, and then press
x STOP or X PAUSE at the point where
you want to start dubbing.
To select VCR sound, press AUDIO during
playback (see page 72).
5 Press T VIDEO on the recorder.
Dubbing starts.
To stop dubbing
Press x STOP.
Note that it may take a few seconds for the
recorder to stop dubbing.
To play discs recorded with this recorder on
other DVD equipment
Finalize the disc (see page 86).
To dub using the on-screen menu
1 After step 4 above, press SYSTEM MENU.
2 Select “Dubbing” from the System Menu, and
press ENTER.
3 Select “Simple Dubbing,” and press ENTER.
4 Select “VIDEO t DVD,” and press ENTER.
The display asks for confirmation.
5 Select “Yes,” and press ENTER.
Dubbing starts.
-
RWVR
-
RW
Video
+
RW
+
R
-
R
M/m/</,,
ENTER
REC MODE
x STOP
SYSTEM
MENU
DVD
AUDIO
VIDEO
X PAUSE
H PLAY
T VIDEO
Dubbing
10:10 AM
Simple Dubbing
Program Dubbing
DV/D8 Dubbing
Setup
Disc Setting
Edit
Title List
Timer
Dubbing
Dubbing
10:10 AM
Simple Dubbing
Program Dubbing
DV/D8 Dubbing
Setup
Disc Setting
Edit
Title List
Timer
Dubbing
VIDEO --> DVD
DVD --> VIDEO
Loading ...
Loading ...
Loading ...