Loading ...
Loading ...
Loading ...
15
Hookups and Settings
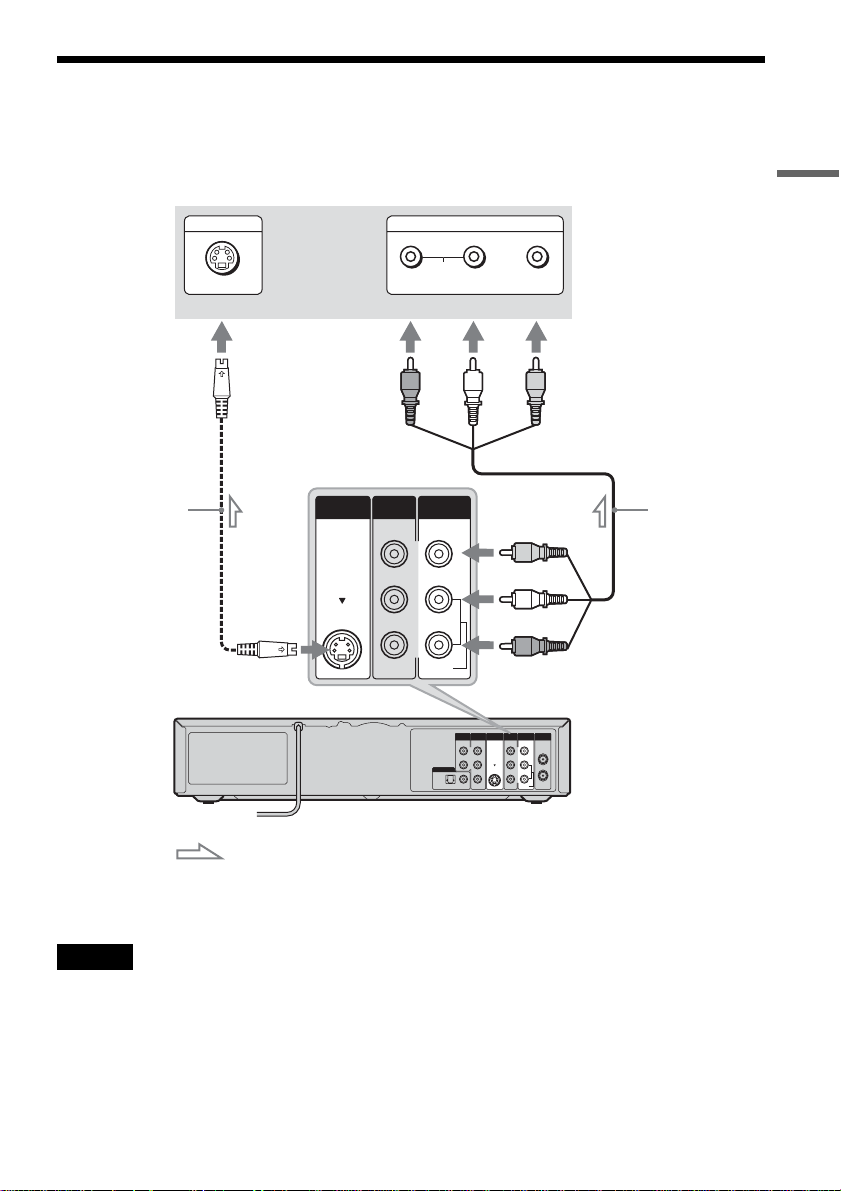
Step 3: Connecting to Your TV
Connect the supplied audio/video cord to the LINE OUT (AUDIO L/R/VIDEO) jacks of the recorder.
To enjoy higher quality images, connect an S video cord (not supplied) instead of the yellow (video) plug.
When using this connection, be sure to connect the audio cord to the LINE OUT (AUDIO L/R) jacks.
When playing “wide screen” images
Some recorded images may not fit your TV screen. To change the picture size, see page 95.
Notes
• Do not connect more than one type of video cord between the recorder and your TV at the same time.
• During DVD recording, you cannot watch VHS pictures by pressing VIDEO, as the S VIDEO OUT jack will output
DVD video signals only.
• Do not connect your TV’s audio output jacks to the LINE IN (AUDIO L/R) jacks at the same time. This will cause
unwanted noise to come from your TV’s speakers.
IN
L
R
VIDEO
AUDIO
OUT
VHF/UHFLINE OUT
VIDEO
YL
P
B
R
P
R
AUDIO
LINE 1 IN
AUDIO OUT S VIDEO OUT
COMPONENT
VIDEO OUT
DIGITAL AUDIO OUT
OPTICAL COAXIAL
L
R
VIDEO
AUDIO
LINE OUT
VIDEO
AUDIO
LINE 1 IN
S VIDEO OUT
AUDIO
INPUT
R L VIDEO
INPUT
S VIDEO
: Signal flow
VCR-DVD recorder
TV or projector
(red)
Audio/video cord
(supplied)
to LINE OUT (VIDEO/AUDIO L/R)
(white) (yellow)
(yellow)
(white)
(red)
to S VIDEO OUT
S video cord
(not supplied)
,continued
Loading ...
Loading ...
Loading ...