Loading ...
Loading ...
Loading ...
INSTALLATION
Troubleshooting
www.stiebel-eltron.com CNS S | CNS U | 17
ENGLISH
9.3 Appliance installation
Hook the appliance by its slots in the back of the appliance on
to all four tabs of the wall mounting bracket simultaneously.
Push the appliance to latch it in position.
26_07_31_0035
1
2
1 Locking bolt
2 Wall mounting bracket
Turn the locking bolt in the wall mounting bracket fully clock-
wise; this locks the appliance in place.
26_07_31_0127
1
2
3
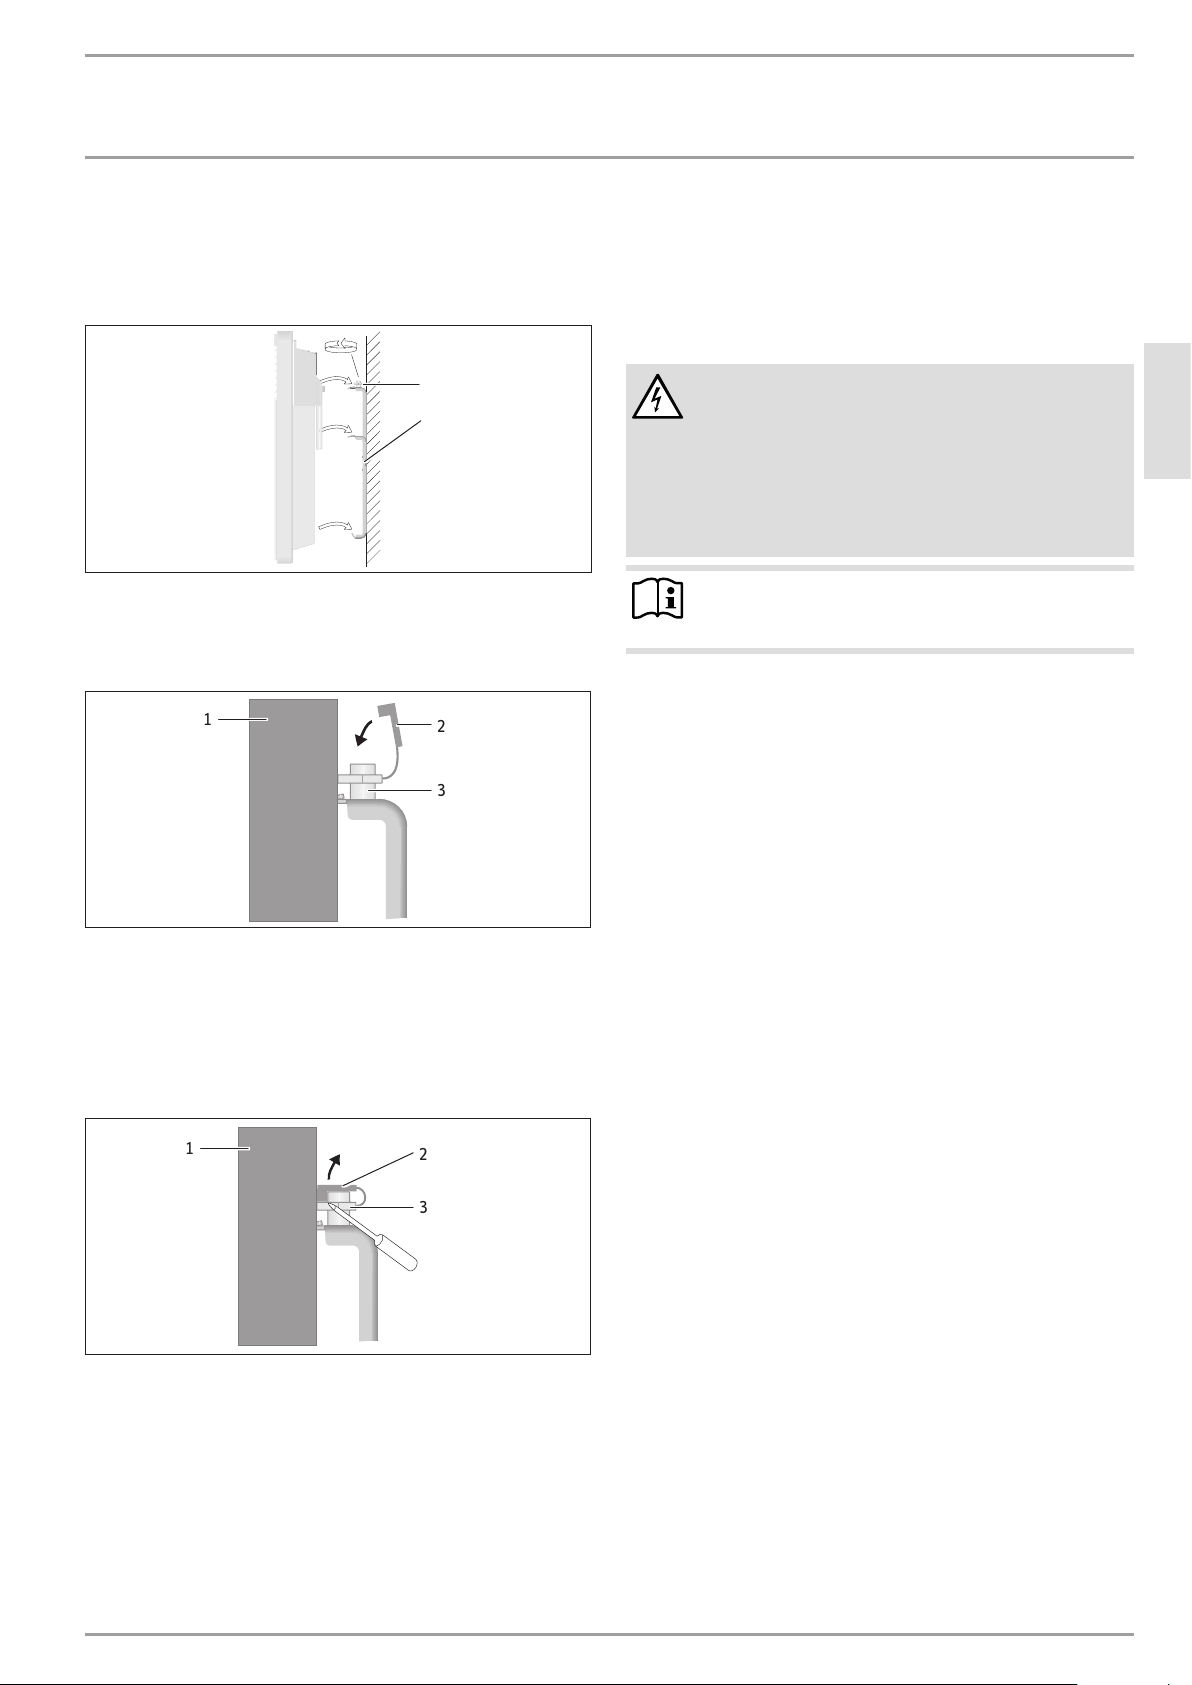
1 Appliance
2 Safety cap
3 Locking bolt
Push the safety cap onto the locking bolt to prevent it from
loosening.
9.4 Removing the appliance
26_07_31_0128
1
2
3
1 Appliance
2 Safety cap
3 Locking bolt
Remove the safety cap from the locking bolt.
Undo the locking bolt on the wall mounting bracket.
Lift the appliance up slightly and pull it forwards and away
from the wall mounting bracket.
9.5 Power supply
Ensure the on-site supply cable has an adequate
cross-section.
When connecting the appliance via a standard socket, ensure
that the socket is easily accessible once the appliance has
been installed.
WARNING Electrocution
- Carry out all electrical connection and installation
work in accordance with relevant regulations.
- Ensure the appliance can be separated from the
power supply by an isolator that disconnects all
poles with at least 3mm contact separation.
- Do not install the appliance with a fixed power
cable.
Note
Observe the type plate. The specified voltage must match
the mains voltage.
10. Troubleshooting
The power cable must only be replaced by a contractor using our
original spare parts.
11. Appliance handover
Explain the functions of the appliance to the user. Draw special
attention to the safety instructions. Hand over the operating and
installation instructions to the user.
Loading ...
Loading ...
Loading ...