Loading ...
Loading ...
English 3
Before you begin
Important note to the consumer
Keep these instructions for the local electrical inspector’s use.
• As when using any appliance generating heat, there are certain safety
precautions you should follow.
• Be sure your range is installed and grounded properly by a qualied installer
or service technician.
• For the range to ventilate properly, make sure the range’s vents are not
blocked or covered, and that there is enough clearance at the top, back, sides,
and underneath the range. The vents allow the necessary exhaust for the
range to operate properly with correct combustion and get the good cooking
result.
• Make sure the wall coverings around the range can withstand the heat
generated by the range.
• To eliminate the need to reach over the surface elements, avoid having cabinet
storage space above the cooktop.
• The range should not be placed on a base.
For your safety
WARNING
• If the information in this manual is not followed exactly, a re or electrical
shock may result causing property damage, personal injury, or death.
• Before beginning the installation, switch the power off at the service panel and
lock the service disconnecting switch to prevent power from being switched
on accidentally. When the service disconnecting switch cannot be locked,
securely fasten a prominent warning device, such as a tag, to the service panel.
• This appliance must be properly grounded.
Preparing to install the range
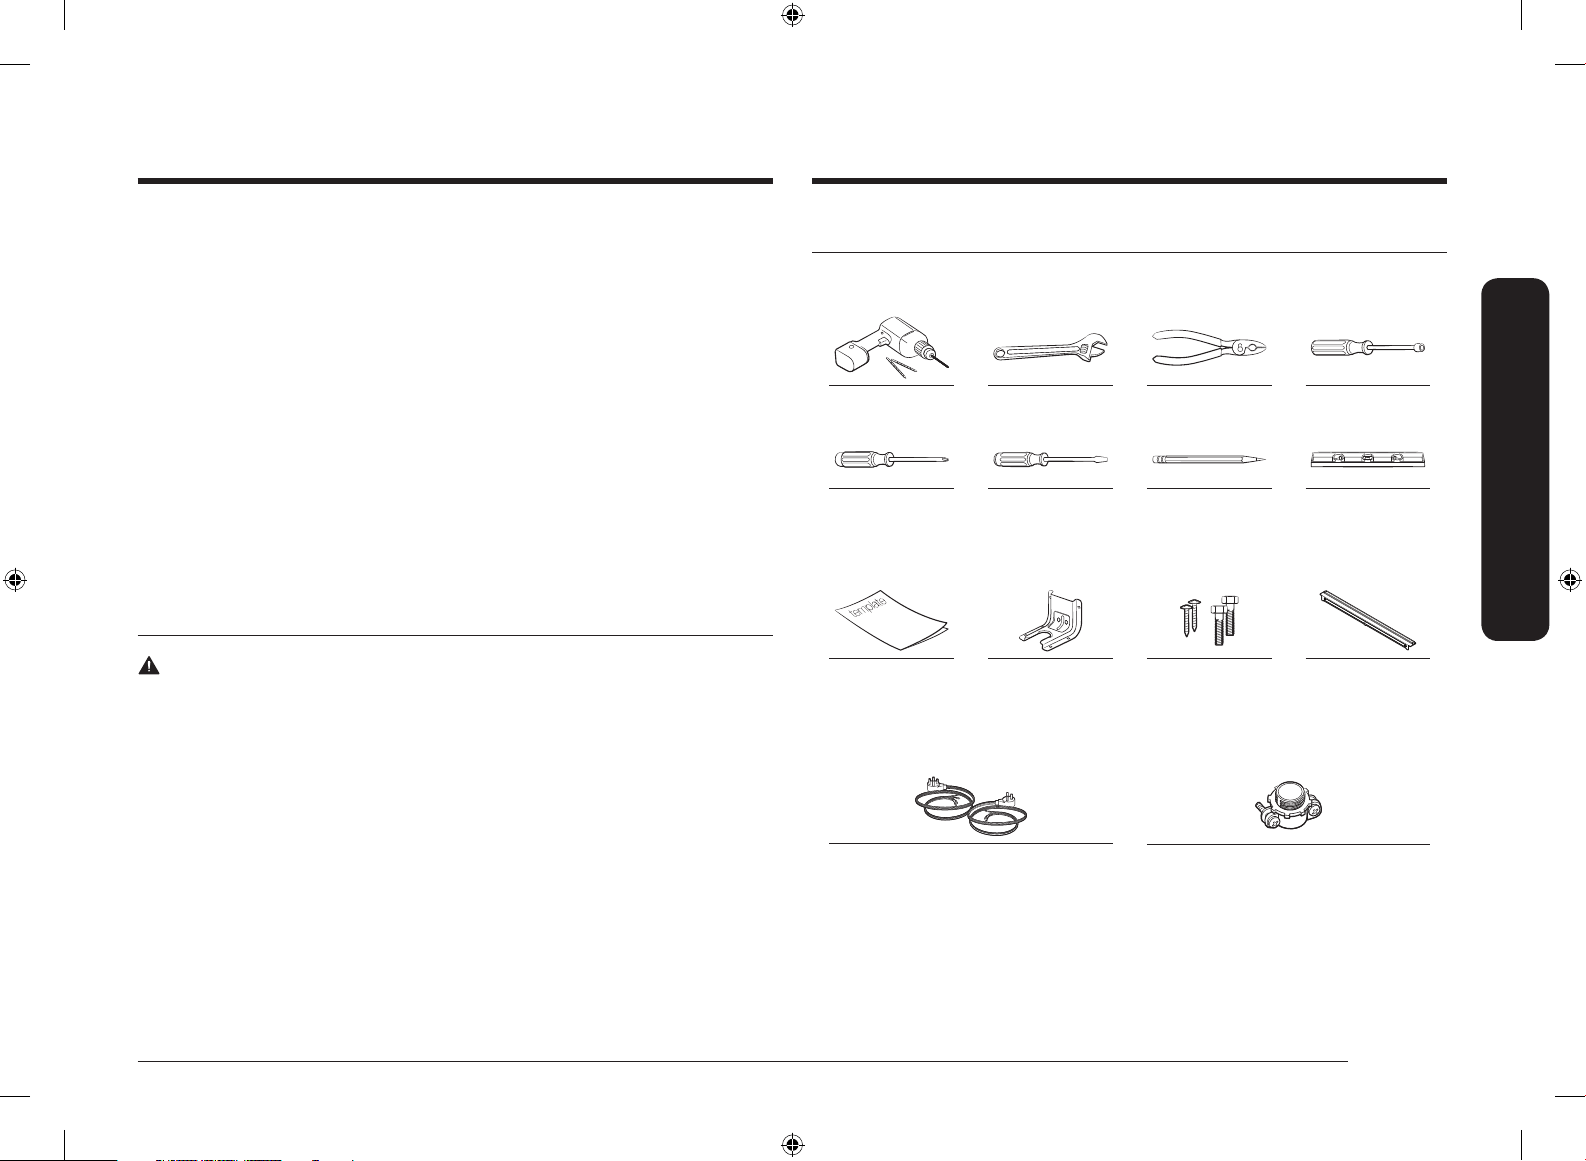
Prepare tools & Parts
The tools you will need
Drill Adjustable Wrench Pliers
1
⁄4" Nut Driver
Phillips Screwdriver Flat Screwdriver Pencil Level
What’s included with your range
Anti-tip Bracket
Template
Anti-Tip Bracket Screws (short:2 ea,
long:2 ea)
Filler Kit
Additional materials you may need
4-Wire Cord or 3-Wire Cord
(UL Approved 40 or 50 AMP)
Strain Relief
(For Conduit Installation Only)
Install_NE63T8911_AA_DG68-01257A-00_EN.indd 3 2020-03-26 6:27:50
Loading ...
Loading ...
Loading ...