Loading ...
Loading ...
Loading ...
22
SETUP IN A WINDOWS ENVIRONMENT
7
Click the [Administrator Tools] button.
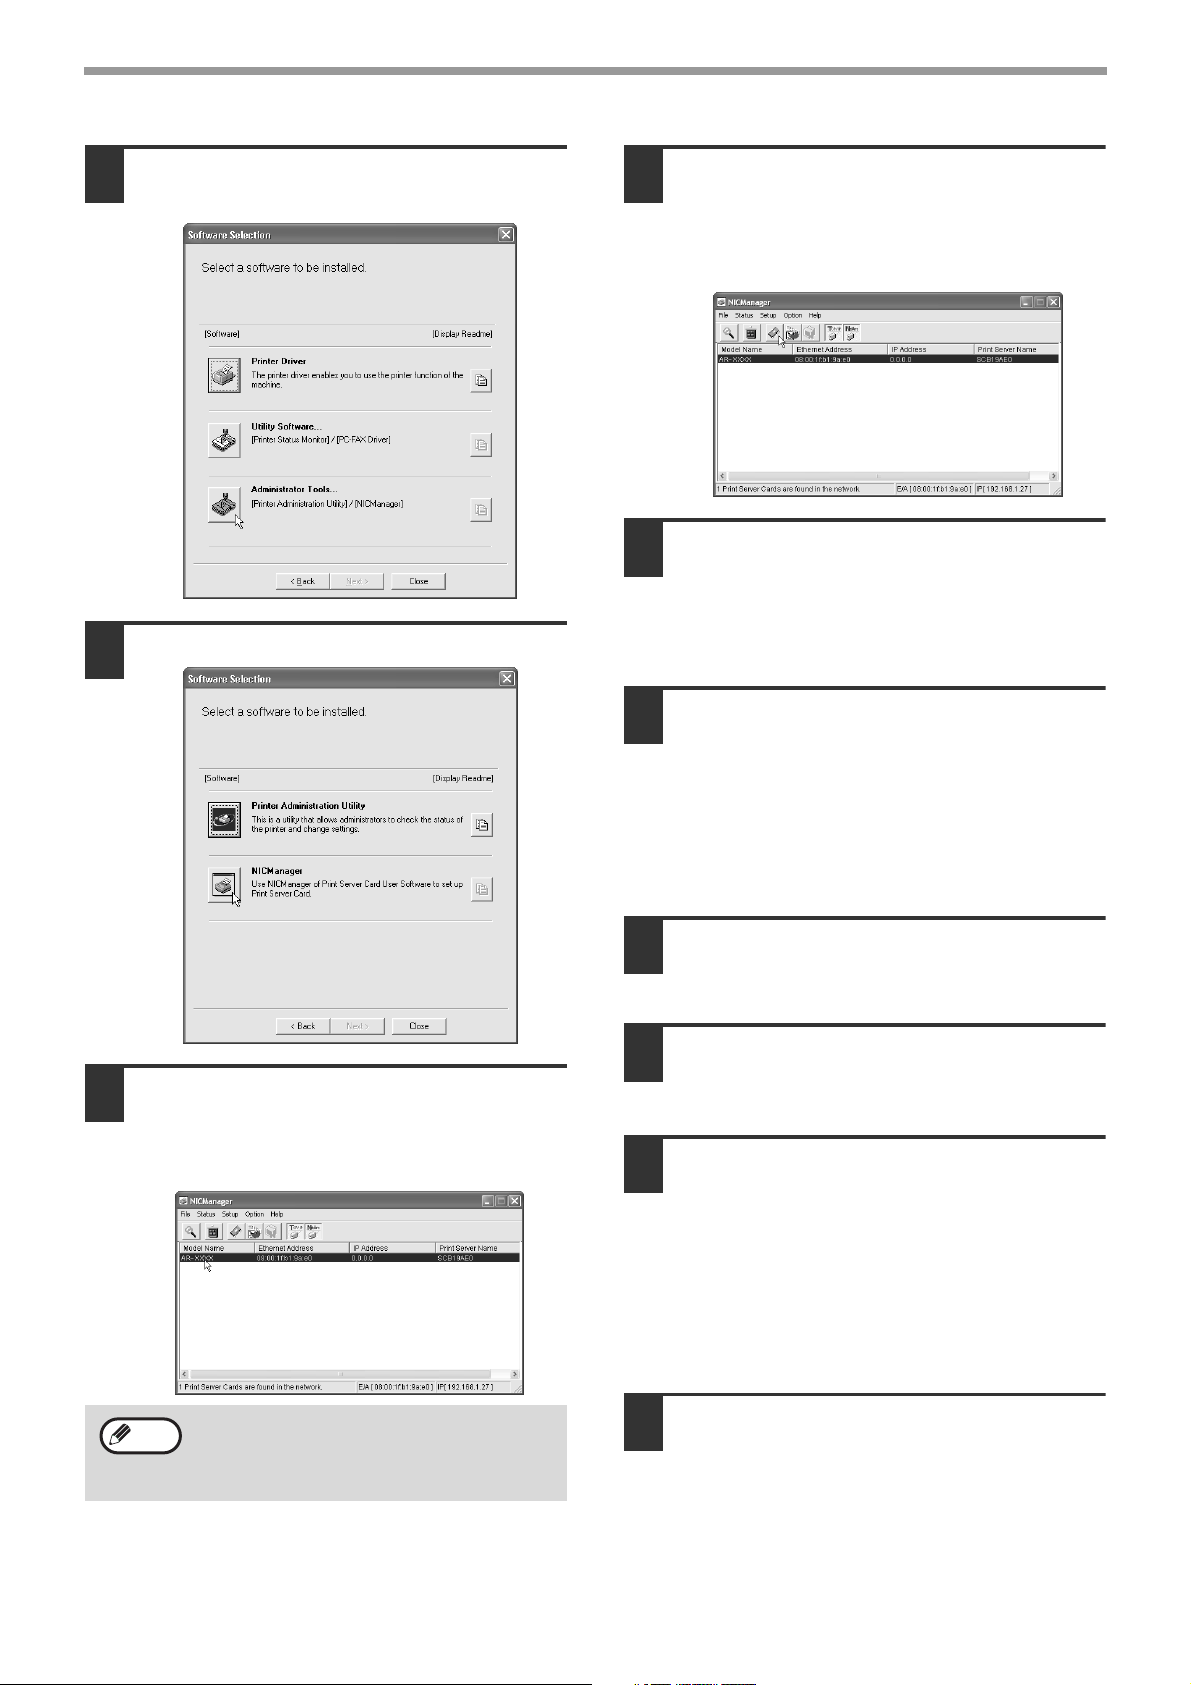
8
Click the [NICManager] button.
9
The printer or printers connected to
the network will be detected. Click the
printer to be configured (the machine).
Select [AR-XXXX] here.
10
Click the [Print Server Card Setup]
button.
If the machine is being used in a DHCP
environment or the IP address has otherwise
already been set, go to step 15.
11
If the IP address has not been set (the
IP address is set to "0.0.0.0"), a
message will appear prompting you to
set the IP address. Click the [Yes]
button.
12
Enter the IP address and click the
[OK] button.
• The machine's IP address is changed.
• If a password entry screen appears while the IP
address is being changed, enter the password
and click the [OK] button.
• The password for this machine has been
initially set to "Sharp".
13
Restart the machine.
Power off the machine and then power it back on.
14
Select [Search] from the [File] menu,
select the machine, and then click the
[Print Server Card Setup] button.
15
Enter your password in the password
entry screen and click the [OK]
button.
• The Print Server Card Setup window will
appear.
• The password for the machine has been initially
set to "Sharp".
• If the [Guest user] checkbox is selected, the
settings can be viewed but not configured.
16
Click the [TCP/IP] tab.
If the machine is not found, make sure that
the machine is powered on and that your
computer and the machine are connected to
the network, and then search again.
Note
Pegasus-E_Setup_Eng.book 22 ページ 2005年1月14日 金曜日 午前10時30分
Loading ...
Loading ...
Loading ...