Loading ...
Loading ...
Loading ...
FINISHER AND SADDLE STITCH FINISHER
3-8
■
■■
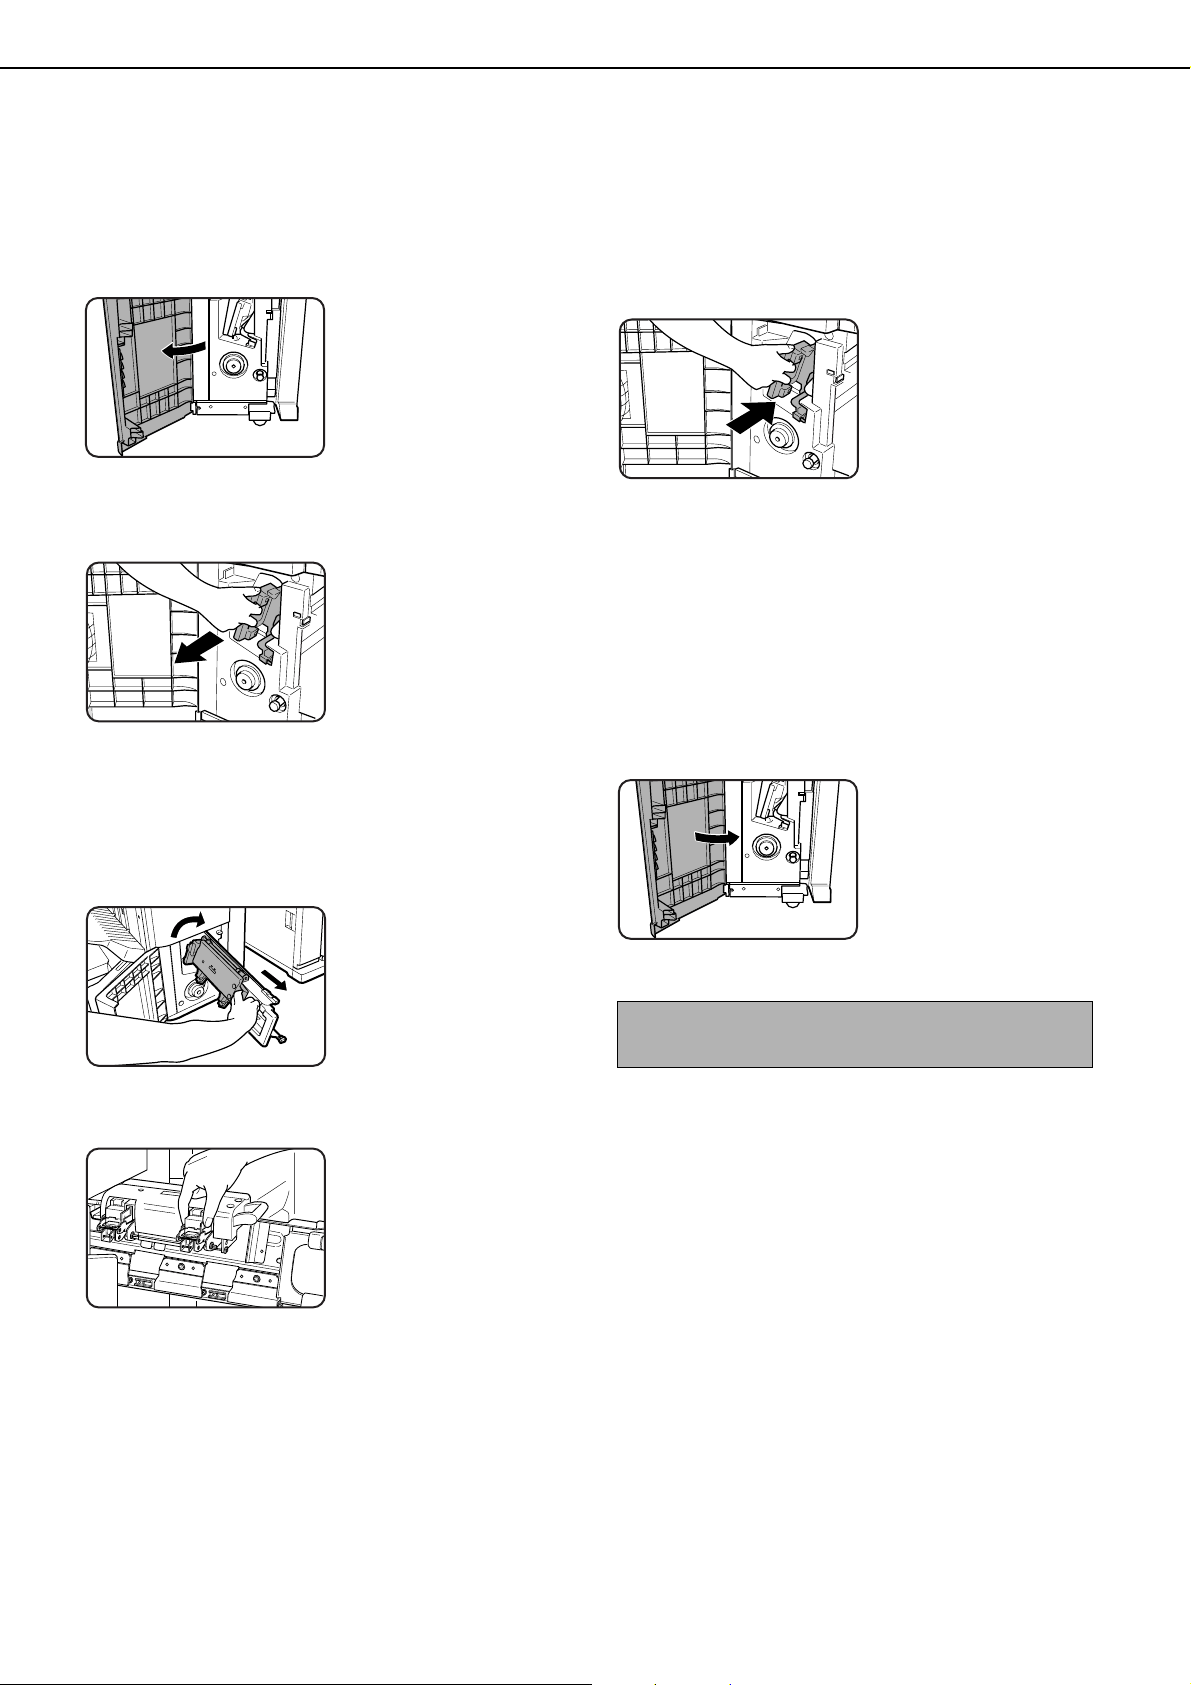
■ Replacing the cartridge in the saddle stitch finisher
Only when the saddle stitch finisher (AR-F16) is installed.
1
Open the lower cover of the saddle stitch
finisher.
When an optional
inserter is installed,
open the front cover of
the inserter before
opening the lower cover
of the finisher.
2
Slide out the saddle stitch unit carefully
toward the front.
3
(1) Grasp the grip of the saddle staple
holder and pull it out.
(2) While still grasping the grip, rotate the
saddle staple holder 90° in the direction of
the arrow (rotate to the right).
4
Remove the empty staple case and set a
new one.
Replace both staple
cases with new ones.
Remove the cover from
the staple cartridge and
then install the cartridge.
5
Return the saddle stitch holder and the
saddle stitch unit to their respective
original positions.
6
Make sure that the finisher is firmly
attached to the machine and that 11" x 17",
8-1/2" x 11"R, or 8-1/2" x 14" (A3, A4R, or
B4) size paper is loaded.
If one of the above paper sizes is not set, test
stapling cannot be performed.
7
Close the lower cover of the finisher.
Test stapling is
automatically performed
on a blank sheet.
This operation is carried
out to avoid blank
stapling.
(1)
(2)
NOTE
If test stapling fails to take place, repeat steps 1 to 7.
Loading ...
Loading ...
Loading ...