
2913907AU/ 2931802AU
G24UC/ 2910907AU
EN OPERATOR MANUALCHARGER
www.greenworksaustralia.com
Greenworks Australia
A Division Jak Max P/L
380 Foley’s Road Derrimut
Victoria, Australia 3026
1 Important Safety Instructions..........2
2 Symbols on the machine................... 2
3 Recycle................................................2
4 Operation........................................... 2
4.1 Charge procedure...............................................2
4.2 Examine the charger.......................................... 3
4.3 Mount the charger..............................................3
5 Maintenance.......................................4
5.1 Clean the machine............................................. 4
5.2 Stow the machine...............................................4
6 Troubleshooting.................................4
7 Technical data....................................4
8 Warranty............................................ 4
1
English
EN
1 IMPORTANT SAFETY
INSTRUCTIONS
• SAVE THESE INSTRUCTIONS - DANGER: TO
REDUCE RISK OF FIRE OR ELECTRICAL SHOCK
CAREFULLY OBEY THESE INSTRUCTIONS.
• Confirm the voltage available at each country location
before using the charger.
• If the sharp of the plug does not fit the power outlet, use
an attachment plug adaptor of the proper configuration
for the power outlet.
• DO NOT probe the charger with conductive materials.
• DO NOT allow liquid inside the charger.
• DO NOT try to use the charger for any other purpose than
what is presented in this manual.
• Unplug the charger before cleaning and when there is no
battery pack in the charger.
• Do not try to connect two chargers together.
• Do not use the charger in the circumstances that the
output Polarity does not match the load polarity.
• For indoor use only.
• The cover may under no circumstances be opened. If the
cover is damaged, then the charger may no longer be
used.
• Do not recharge non-rechargeable batteries.
WARNING
To avoid risk of fire, electrical shock, or electrocution:
• Do not use a damp cloth or detergent on the battery or
battery charger.
• Always remove the battery pack before cleaning,
inspecting, or performing any maintenance on the tool.
2 SYMBOLS ON THE MACHINE
You can use below symbols on the machine. Please study
them and learn their definitions. Correct interpretation of
these symbols let you operate the tool better and safer.
Symbol
Explanation
Class II
For indoor use only
Before charging, read the instructions
Fuse
3 RECYCLE
Separate collection. You must not discard
with usual household waste. If it is necessa-
ry to replace the machine, or if it is no more
use to you, do not discard it with household
waste. Make this machine available for sepa-
rate collection.
Separate collection of used machine and
packaging let you recycle materials and use
them again. Use of the recycled materials
helps prevent environmental pollution and
decreases the requirements for raw materi-
als.
At the end of their useful life, discard batter-
ies with a precaution for our environment.
The battery contains material that is danger-
ous to you and the environment. You must
remove and discard these materials separate-
ly at a equipment that accepts lithium-ion
batteries.
4 OPERATION
4.1 CHARGE PROCEDURE
NOTE
Before use charge the battery pack fully to make sure that
the battery pack can get the maximum run time. This battery
pack does not have a memory. You can charge it all the
time.
1. Connect the plug of charger (2) to an AC power outlet.
2. Put the battery pack (1) into the charger (2).
2
English
EN
3
12
1
2
3
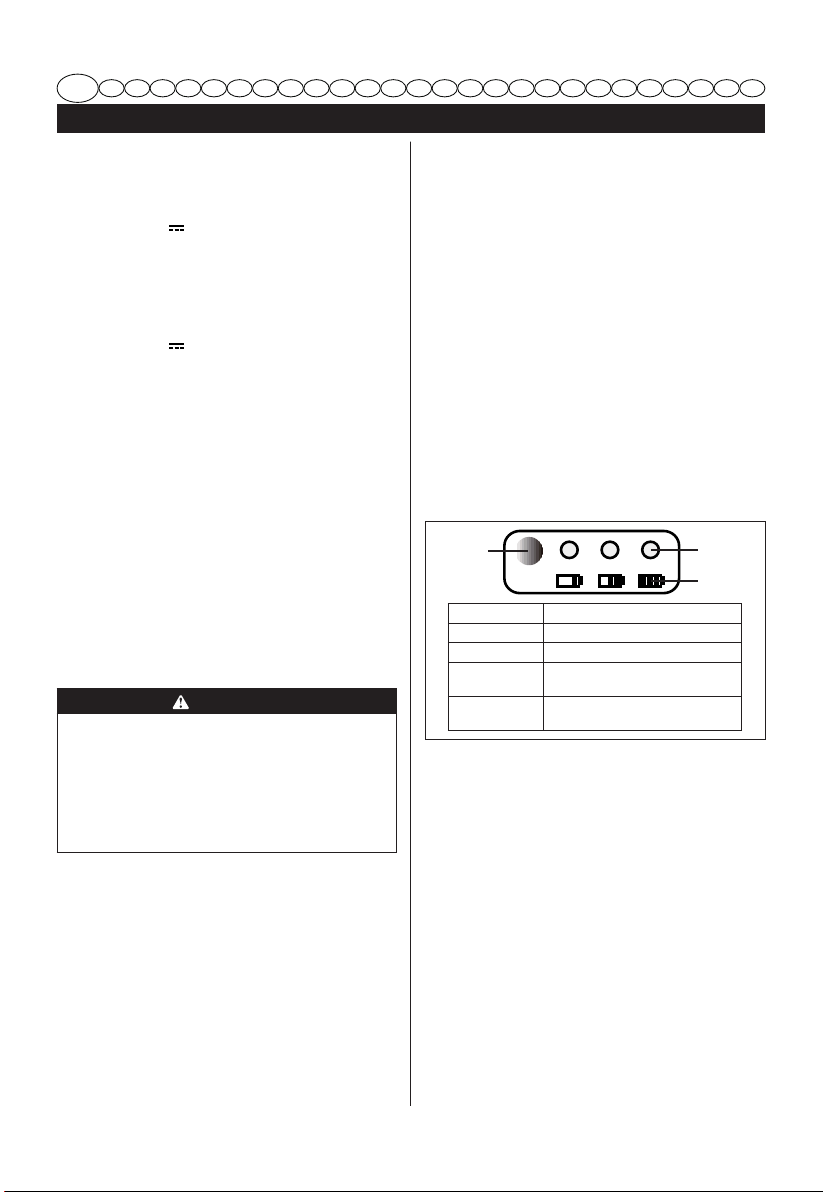
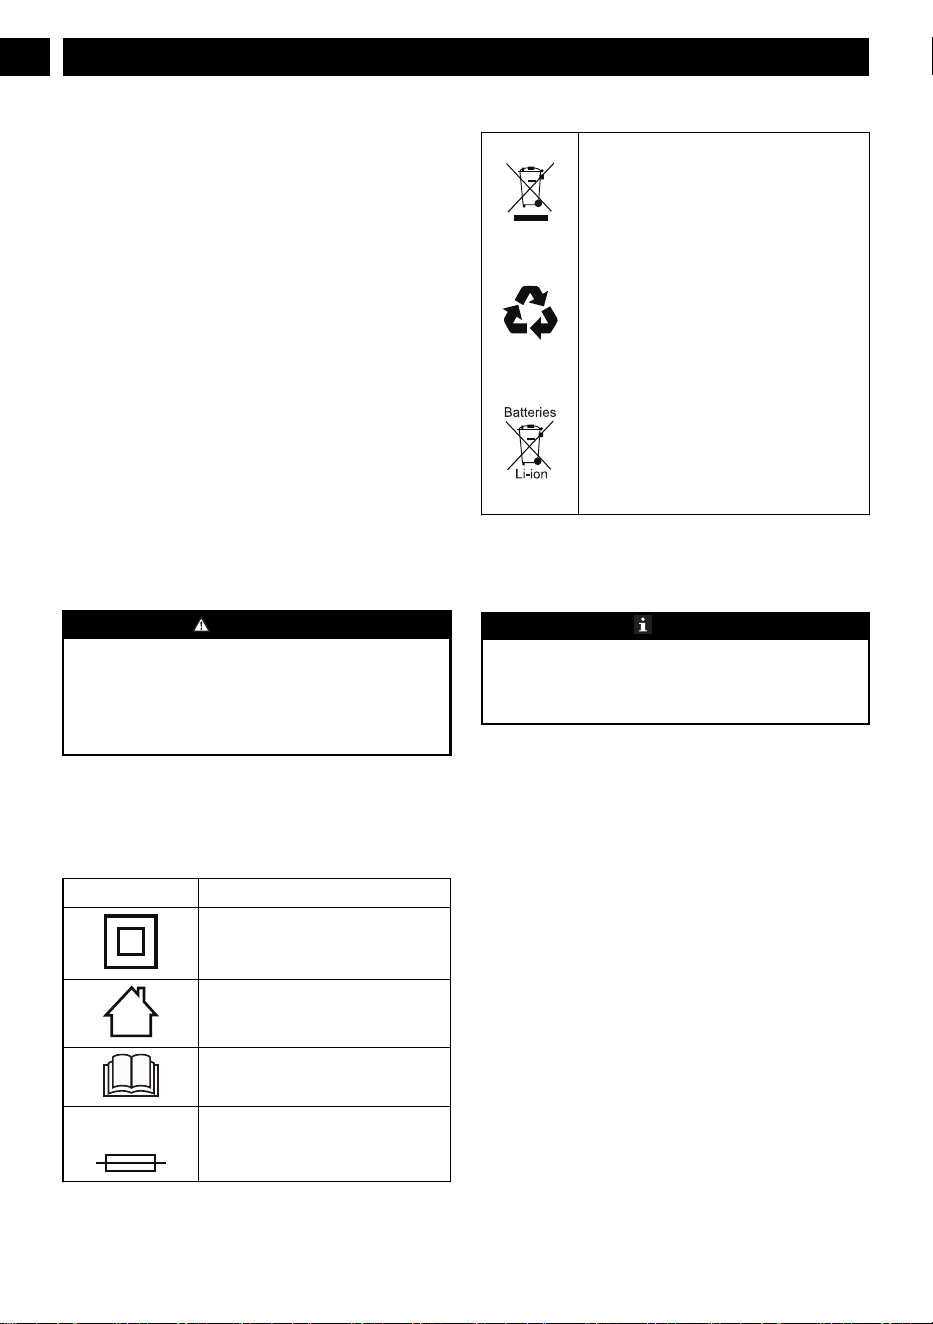
This is a diagnostic charger. The Charger LED Light (3)
illuminates in a specified order to show the current battery
status. They are as follows:
CHARGING PROCEDURE (LED INDICATOR)
BATTERY IS CHARGING
RED RED
FULLY CHARGED
RED GREEN
BATTERY IS TOO
WARM (REMOVE FOR
APPROX. 30 MINUTES TO
ALLOW TO COOL)
RED
OR-
ANGE
NO BATTERY PRESENT
RED
OFF
DEFECTIVE BATTERY
(REMOVE AND REPLACE
WITH A NEW BATTERY)
RED
RED
BLINKING
Incorrect Defect Note:
1. Put the battery pack into the charger.
• If the status LED flashes, remove the battery pack
from the charger for 1 minute.
2. Put the battery pack into the charger again.
• If the status LED shows correct, the battery pack is
good.
• If the status LED stays blinking, remove the battery
pack and disconnect the charger.
3. Wait for 1 minute and put the battery pack into the
charger again.
• If the status LED shows correct, the battery pack is
good.
• If the status LED stays blinking, the battery pack is
defective and it is necessary to replace the battery
pack.
4.2 EXAMINE THE CHARGER
If the battery pack does not charge correctly:
1. Examine the current of the power outlet with different
machines. Make sure that the outlet works.
2. Examine that the charger contacts are not short-circuited.
3. If the charger is not under usual room temperature, move
the charger and battery pack to a location where the
temperature is between 6 ˚C and 40˚C .
WARNING
If you put the battery pack into the charger in warm or hot
environment, the charger LED light is red. Pull out the
battery pack and let the battery cool for approximately 30
minutes.
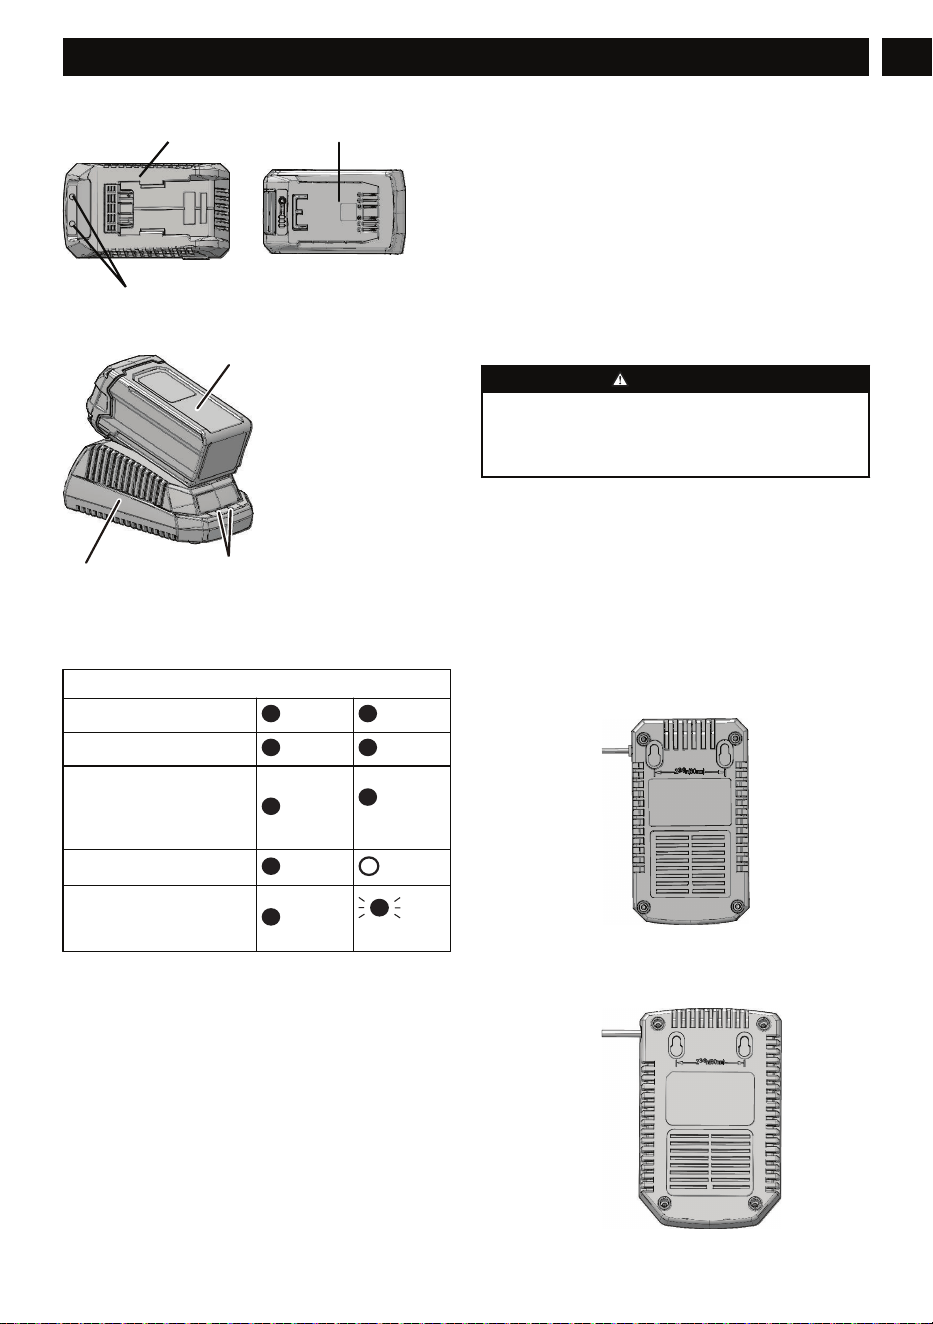
4.3 MOUNT THE CHARGER
1. Get the location of the wall to attach the charger.
2. Use 2 wood screws to attach the charger on the wood
studs.
3. Drill two paralleled holes 2 3/8” (60 mm) on center.
4. Use wall anchors and screws to attach the charger to the
drywall.
3
English
EN
For charger: 2931802AU
For charger: 2931802AU
For charger: 2913907AU
For charger: 2913907AU
NOTE
If you do not use the battery pack and charger for a long
time, please remove the battery from the charger and pull
out the AC power plug.
5 MAINTENANCE
5.1 CLEAN THE MACHINE
NOTE
Keep the air vent free of blockage, saw dust, and wood dust.
Do not spray, wash, or put the air flow in water.
• Clear the unwanted material out of the air vent with a
vacuum.
• Clean housing and the plastic components with a dry and
soft cloth.
IMPORTANT
Do not use strong solvents or detergents on the plastic
housing or components.
5.2 STOW THE MACHINE
• Remove the battery pack before you store the charger or
disconnect the charger.
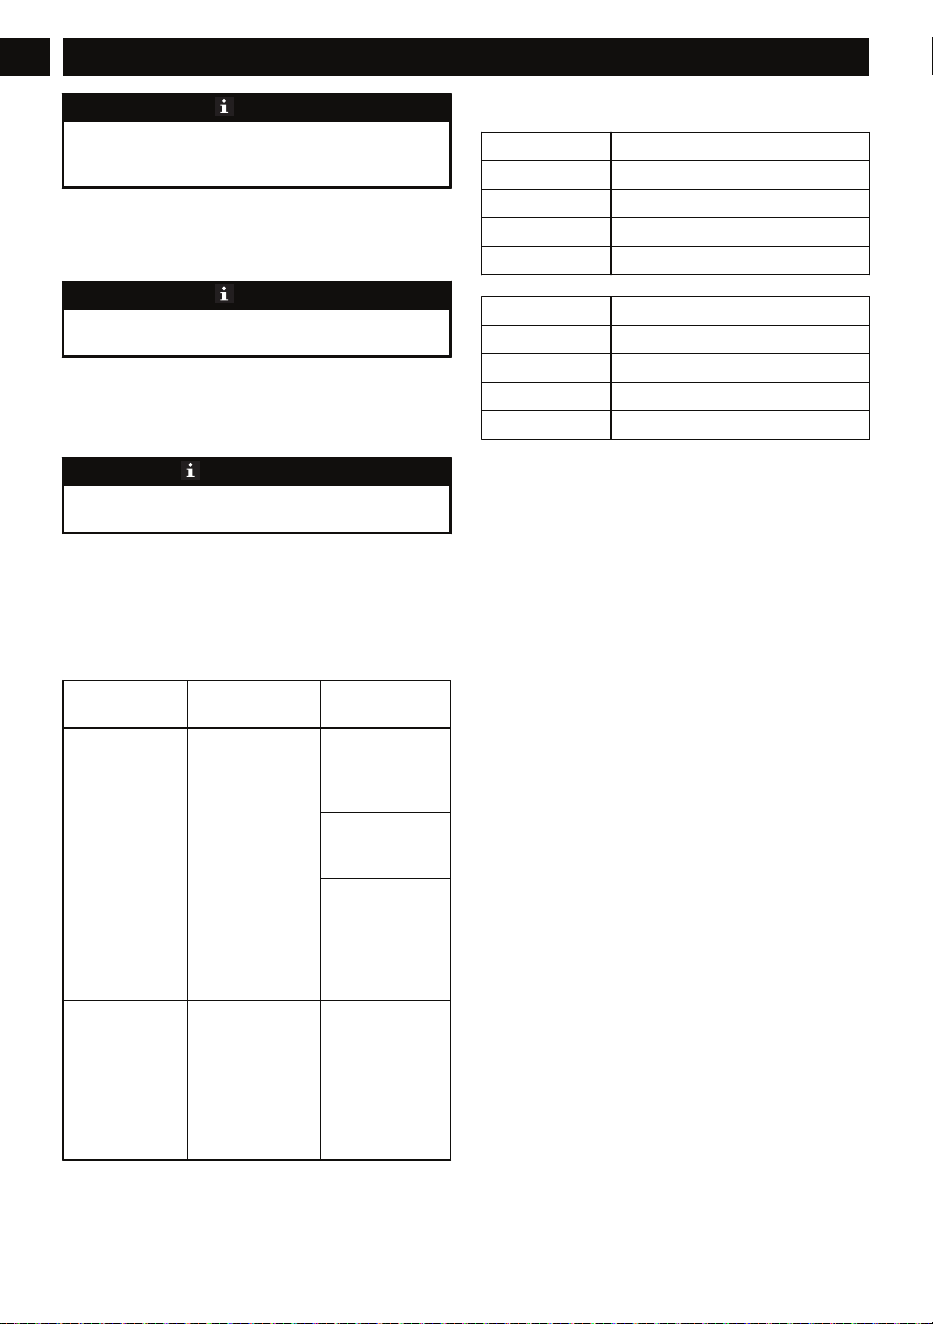
6 TROUBLESHOOTING
PROBLEM POSSIBLE
CAUSE
SOLUTION
Charger doesn't
work. Charger
shows defective
mode. (LED
flashes Red)
Battery pack or
charger is defective
or there is a bad
connection be-
tween the battery
pack and charger.
Try to remove and
reinsert the battery
pack in the charg-
er.
Try charging a dif-
ferent battery
pack.
Unplug the charg-
er and wait until
the red LED goes
out, then reconnect
the plug to the
power supply.
Charger doesn't
work. Charger
shows evaluation
mode (LED indi-
cates Red solid
ON).
Battery pack is ei-
ther too hot, or too
cold.
Allow the battery
pack to reach nor-
mal temperature.
Charging will be-
gin when the bat-
tery pack returns
to 3°C-47°C
(37°F-117°F).
7 TECHNICAL DATA
Model G24UC
Voltage 24 V
Input 230V AC 50/60Hz, 1.5A Max
Output 24V DC 3A
Class Class 2 Battery Charger
Model 2910907AU
Voltage 40 V
Input 230V AC 50/60Hz, 1A Max
Output 40V DC 2A
Class Class 2 Battery Charger
8 WARRANTY
(The full warranty terms and conditions can be found on
Greenworks webpage)
The Greenworks warranty is 4 years on the product, and 2
years on batteries (consumer/private usage) from the date of
purchase. This warranty covers manufacturing faults. A faulty
product under warranty might be either repaired or replaced.
A unit that has been misused or used in other ways then
described in the owner’s manual might be rejected for
warranty. Normal wear, and wear parts are not considered as
warranty. The original manufacturer warranty is not affected
by any additional warranty offered by a dealer or retailer.
A faulty product must be returned to the point of purchase in
order to claim for warranty, together with the proof of
purchase (receipt).
4
English
EN