
Loading ...
Loading ...
Loading ...
5
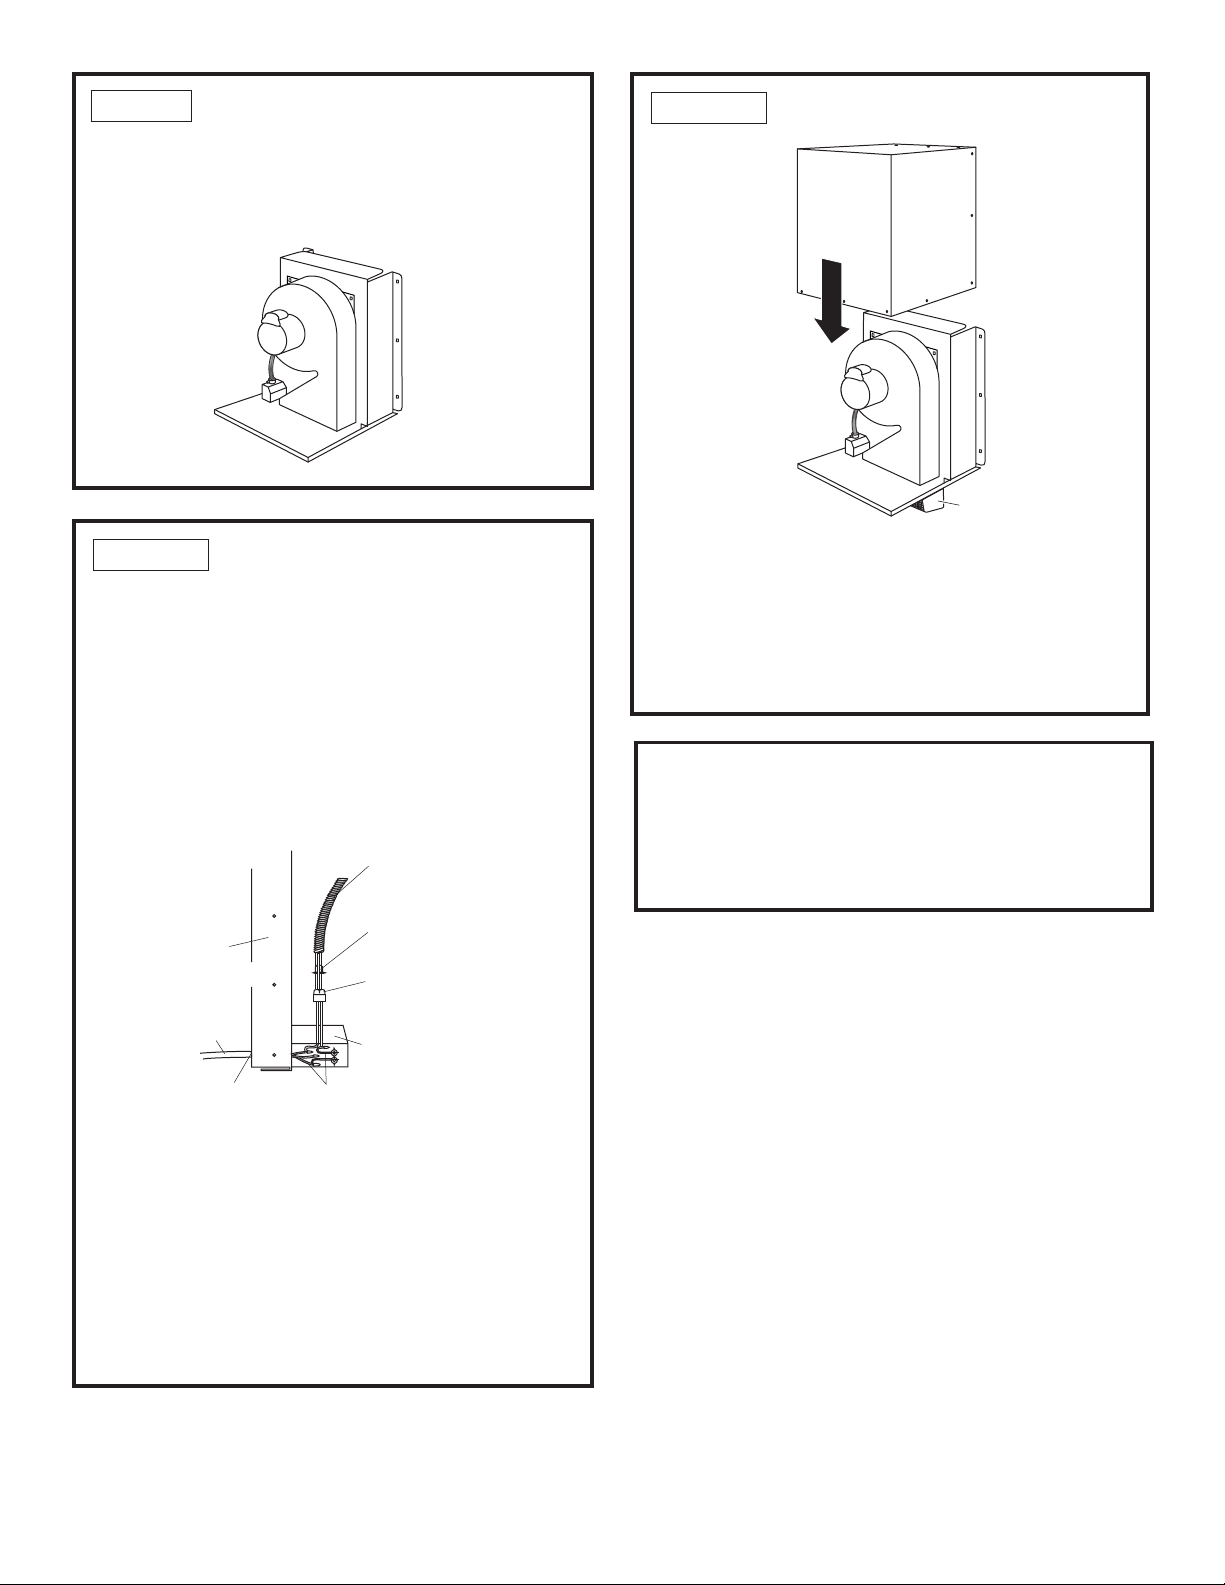
STEP 11 FINALIZE INSTALLATION
STEP 9 MOUNT BLOWER
• Mount the blower onto the base assembly. The studs
on the motor will mate with holes on the assembly.
Secure with 4 nuts from the hardware bag.
STEP 10 CONNECT BLOWER
WIRES
• Check that the red plastic anti-short bushing is
secured in the end of the conduit. Install the blower
conduit into the conduit connector on the junction
box and tighten the screw.
• Run the electrical wiring from the downdraft vent to
the wire compartment. Install a liquid tight service
connection where the wire enters the compartment.
The fitting should be sized to fit wire being used.
• Attach the green ground leads from the wire
compartment, connecting one to the green ground
lead on the blower and the other to the ground lead
of the wiring from the downdraft vent.
• Connect the neutral (white) and power lead (black)
from the blower to the leads from the downdraft
vent.
• Use wire nuts to connect wires.
TEST OPERATION
• Turn power on at the circuit breaker. Plug power
cord into a properly grounded receptacle.
• Refer to the Downdraft Vent Owner’s Manual for
operating instructions.
Install
Damper
• Place the cover over the assembled kit and secure
with 16 screws.
• Install damper to outlet on the bottom with 4 sheet
metal screws. Reach inside the damper to be sure it
moves freely.
Blower
Conduit
Red Anti-
Short Bushing
Conduit
Connector
Wire
Compartment
Green Ground
Leads
Base
Assembly
Wire From
Vent
Install
Liquid Tight
Connection
Loading ...
Loading ...
Loading ...