
Loading ...
Loading ...
Loading ...
4
STEP 7 CONNECT DUCTWORK
• Install a section of 6" round duct through the cabinet
floor.
• Connect the plenum to the ductwork with 90° elbow.
Secure the joint with sheet metal screws. Tape to
seal all joints.
• Install 6" round duct to reach the outdoor motor
assembly.
STEP 8 CONNECT VENT WIRES
• Use electrical cable and connectors that conform to
local codes (14 gauge min. is recommended). Use a
length to reach between the vent and the blower/
motor location.
• Attach the wire box removed from the blower
conduit to the end of new wiring.
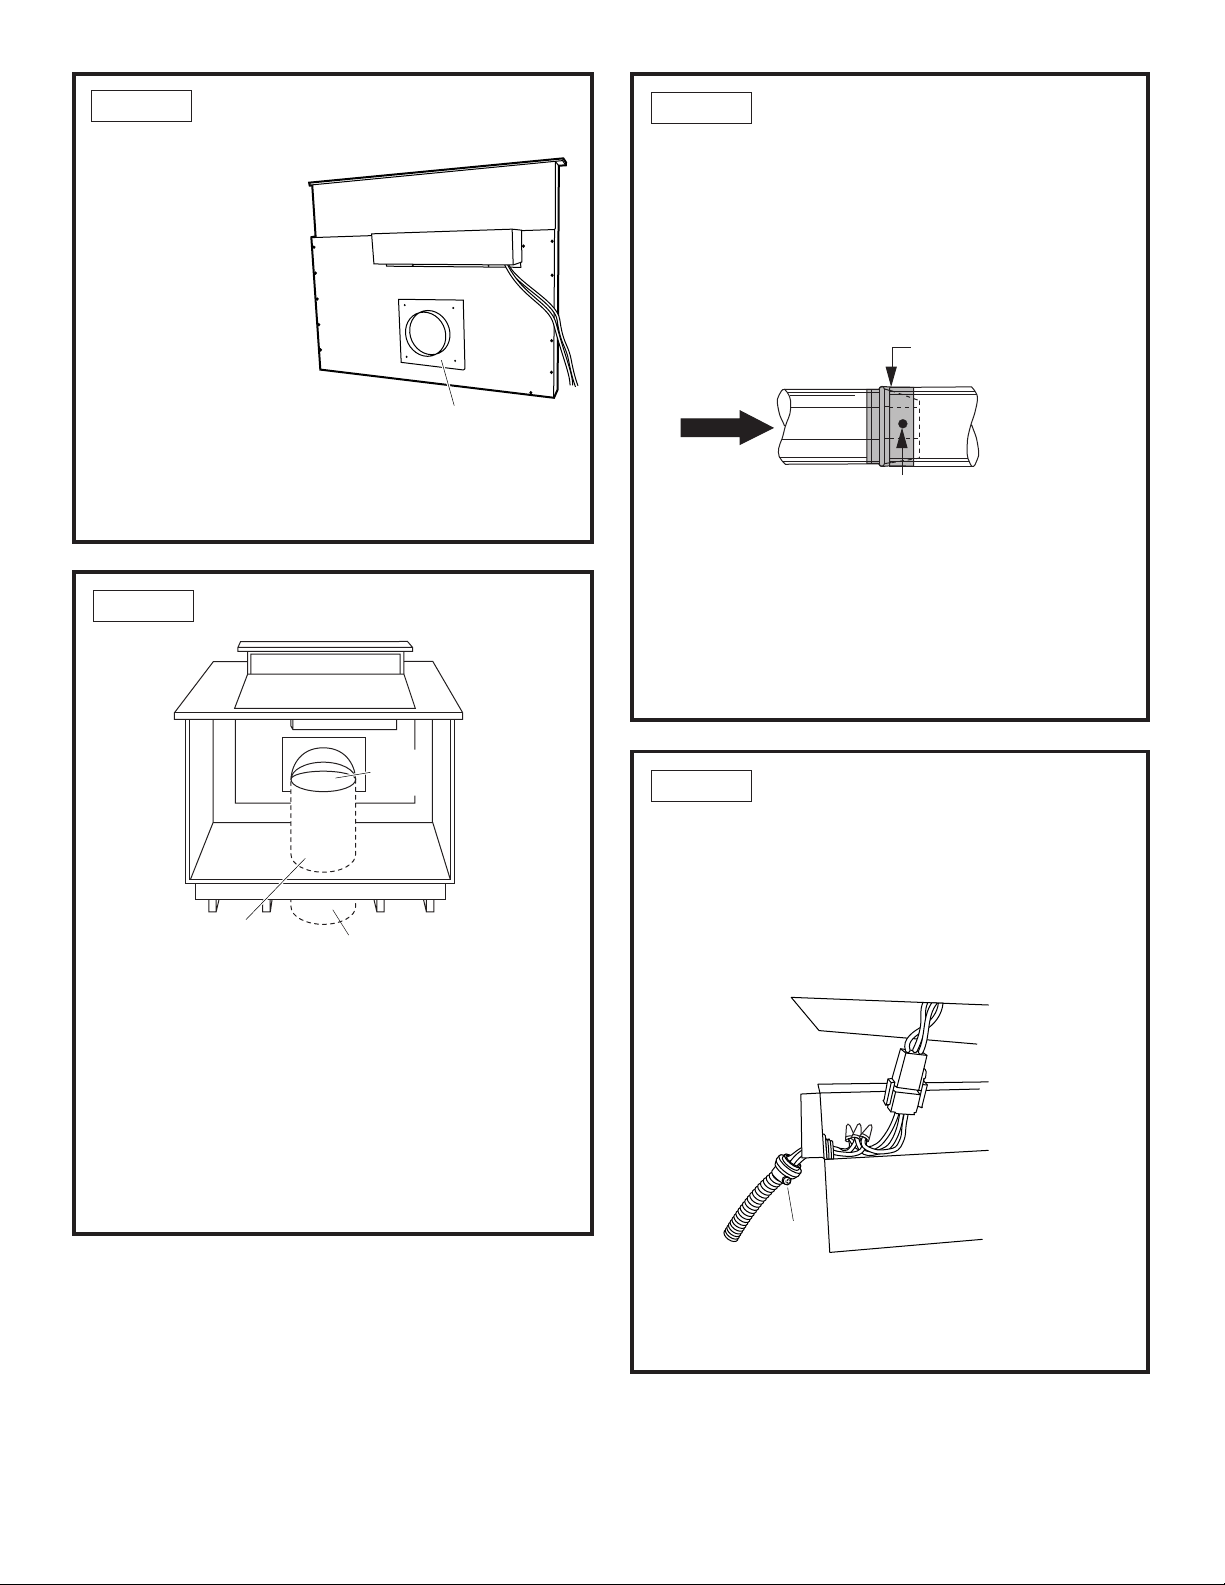
STEP 5 INSTALL ADAPTER PLATE
• Install the adapter
plate over the
mounting plate on
the plenum with the
flange towards the
outside. Use 4
screws provided.
STEP 6 CUT DUCTWORK HOLES
• Install the vent into the cabinet according to the
installation instructions packed with the vent.
• Place the 90° elbow over the adapter plate.
• Mark the location for a 6-1/2" round hole in the floor
of the cabinet.
NOTE: Check to be sure there is no interference
below the cabinet floor. The mounting plate on the
plenum can be shifted 3-1/2" to the left or right sides.
• Cut the hole through the cabinet and another hole
through the floor below.
Check for
Interference
Below Floor
90°
Elbow
Cut a
6-1/2" Dia.
Hole
• Use wire nuts to secure the wire to the 3” remaining
wires with plug.
• Reinstall wire box with original screws.
Control Box
Tighten
Screw
• DO NOT USE flexible plastic ducting.
• Use the straightest duct run possible.
• For satisfactory performance the duct run should not
exceed 150 ft. Refer to the table of equivalent lengths.
• Install ductwork so the piece of duct nearest the
downdraft unit slots INTO the next piece of the duct.
Secure the joints with self-tapping screws and apply
duct tape around the joints to ensure an airtight seal.
Duct Tape
Over Seam and Screw
Screw
Air
Flow
Install Adapter
Plate
Loading ...
Loading ...
Loading ...