Loading ...
Loading ...
Loading ...
ENGLISH
6
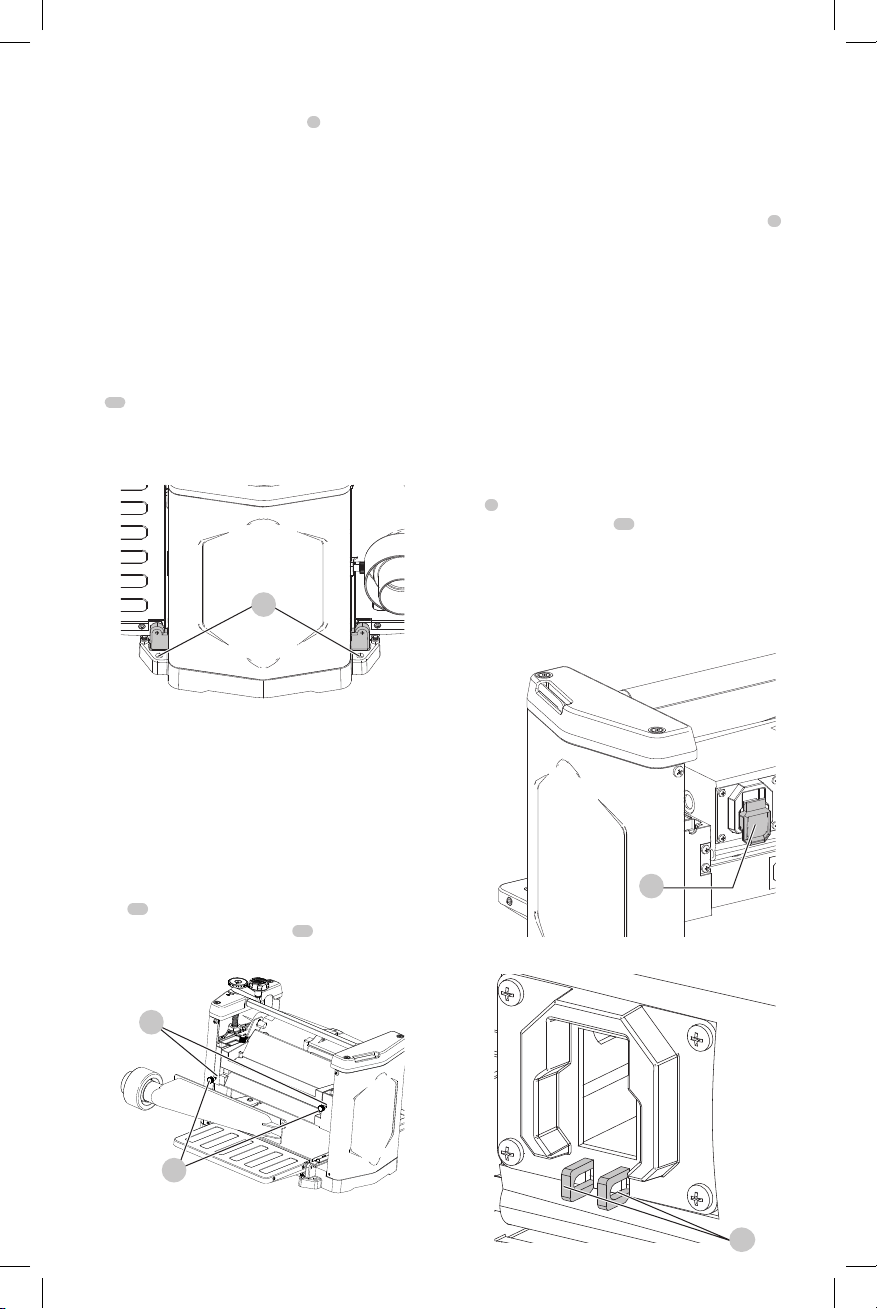
Lowering Extension Tables (Fig. A)
The infeed and outfeed extension tables
7
are
shipped attached to the machine in the raisedposition.
Lower the tables on both sides of the planer. The top
surface of extension tables should be level with the
planer table. To check and adjust, refer to the section
Leveling Extension Tables in this manual.
Fastening Planer to Supporting Surface
(Fig. E)
WARNING: The mounting surface should not be
warped or otherwise uneven.
During operation, if there is any tendency for the planer to
tip over, slide or "walk" across the supporting surface, the
planer must be secured to the supporting surface. Four
holes
12
two of which are shown at Fig.E are provided for
this purpose.
Fig.E
12
OPERATION
WARNING: To reduce the risk of serious personal
injury, turn unit off and disconnect it from
power source before making any adjustments or
removing/installing attachments or accessories.
An accidental start-up can causeinjury.
WARNING: Make sure that the cutterhead guard
2
is properly secured with the knobs before operating
thismachine.
Starting and Stopping Planer (Fig. G, H)
WARNING: Keep hands away from outlet of
cutterhead guard. Do not try to use hand to clean dust
from outlet.
WARNING: Make sure that the switch is in the "OFF"
position before plugging cord into outlet. Do not
touch the plug’s metal prongs when unplugging or
plugging in the cord.
Locking Switch in the "OFF" Position
IMPORTANT: When the machine is not in use, the
switch
4
should be locked in the "OFF" position to prevent
unauthorized use. Two holes
27
are provided in the
bottom of the switch housing for locking off the planer with
a padlock.
WARNING: In the event of a power outage (such as
a breaker or fuse trip), always move the switch to the
"OFF" position until the main power is restored.
Fig.G
4
Fig.H
27
Attaching the Optional Dust Chute (Fig. F)
NOTE: The dust chute is to be attached only when
connecting the planer to a dust collection system. Remove
the dust chute if the planer is to be used alone to allow for
the dust to fall freely out of the planer exhaust.
NOTE: Do not use this planer with a vacuum cleaner or
shop vac because the small hose can clog. Only use with a
dust collection system using a 4” (100 mm) hose.
1. Align the holes on the dust chute with the threaded
holes
28
on the planer housing.
2. Insert the provided thumb screws
29
into the holes
and tighten securely.
Fig.F
28
29
Loading ...
Loading ...
Loading ...