Loading ...
Loading ...
Loading ...
26 27
PAGE HEADER..... PAGE HEADER.....
OPERATING YOUR BREVILLE PRODUCT
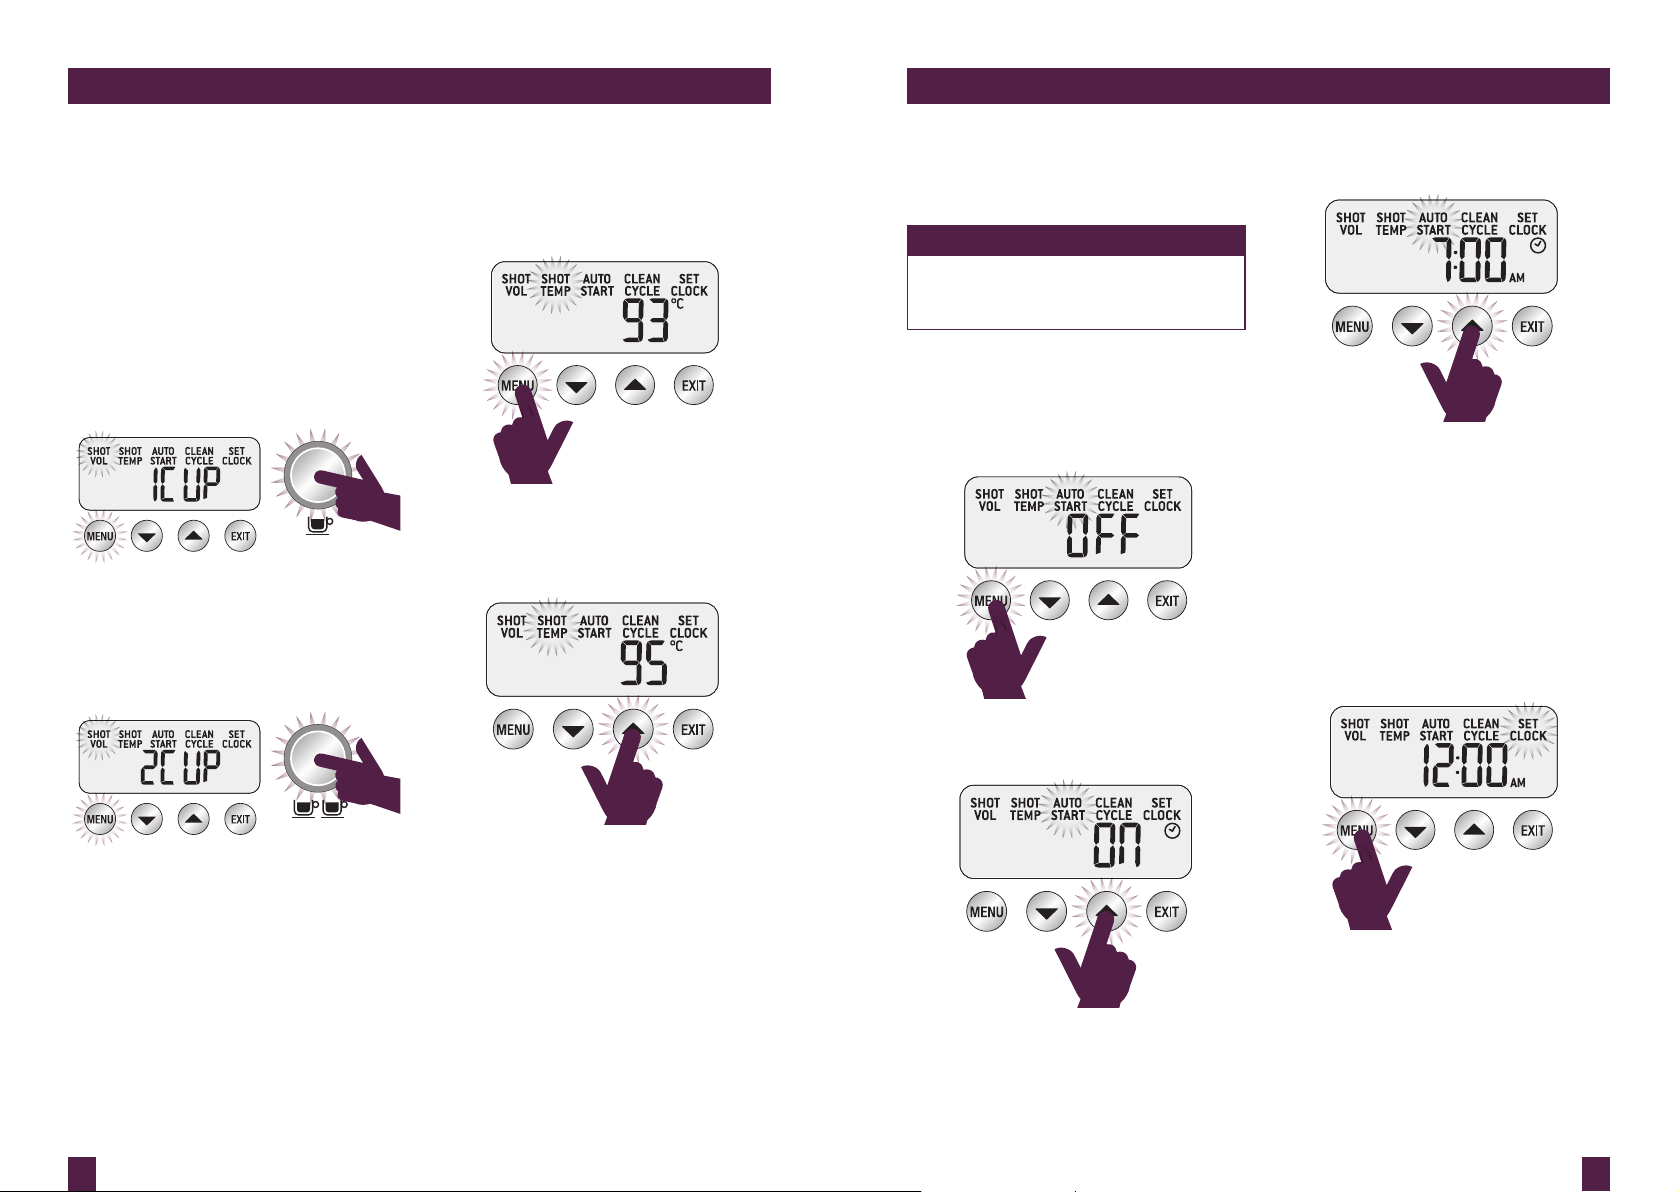
SHOT VOLUME
1 CUP Volume Programming
Press MENU button until SHOT VOL
icon flashes and 1 CUP is displayed on
the LCD screen.
Dose & tamp the portafilter with ground coffee.
Press 1 CUP button to start espresso extraction.
Press 1 CUP again once desired volume of
espresso has been extracted.
The machine will beep twice to indicate the
new 1 CUP volume has been set.
2 CUP Volume Programming
Press MENU button until SHOT VOL
icon flashes and 2 CUP is displayed on
the LCD screen.
Dose & tamp the portafilter with ground
coffee. Press 2 CUP button to start espresso
extraction. Press 2 CUP again once desired
volume of espresso has been extracted. The
machine will beep twice to indicate the new
2 CUP volume has been set.
EXTRACTION TEMPERATURE
Press MENU button until SHOT TEMP icon
flashes. The LCD will display the current shot
temperature setting.
Press UP or DOWN arrow to adjust
SHOT TEMP to the desired setting
(range 86°C – 96°C).
The new SHOT TEMP setting will
be displayed on the LCD screen.
The optimum temperature will depend on the
origin of the coffee beans, their freshness and
degree of roast.
We recommend a temperature range of
between 90°C-95°C for optimal flavour.
Press EXIT button. Machine will beep once to
confirm setting.
OPERATING YOUR BREVILLE PRODUCT
AUTO START
To use AUTO START, first ensure clock
has been set.
NOTE
Clock must first be set prior to activating
the auto start feature. Refer to Set Clock
on this page.
Auto Start ON/OFF
Press MENU button until AUTO START icon
flashes and the current Auto Start setting (ON
or OFF) is displayed on the LCD screen.
Press UP or DOWN arrow to set the
AUTO START to ON or OFF.
If AUTO START is ON, the LCD will
display a Clock icon.
Press MENU button and the current Auto Start
time will be displayed on the LCD screen.
Press UP or DOWN arrow to adjust
AUTO START to the desired time.
(default AUTO START time set at 7:00am).
Press EXIT button. Machine will beep once to
confirm setting.
SET CLOCK
Press MENU button until SET CLOCK icon
flashes. The current Clock Time will
be displayed on the LCD screen.
Press UP or DOWN arrow to adjust the time.
Loading ...
Loading ...
Loading ...