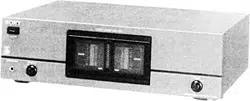
User Manual Sony TA-N721 Power Amplifier

Documents for Sony TA-N721

The following documents are available:
User Manual Photos
TA-N721 photo
Loading ...
Loading ...
Loading ...

Specifications

Sony TA-N721 Questions and Answers

Find answers or Ask a question.


  • Total questions: 1
  • Questions unAnswered : 1

#1 How to troubleshoot low sound or no audio from the rear surround sound speakers.

IMPORTANT: If model-specific information is needed to complete any of these steps, refer to the instructions supplied with the product. Manuals are posted on your model support page.

NOTE: Because each of these steps represents a possible solution to this issue, check the surround sound for the rear speakers after completing each step.

Verify that the rear surround speakers are properly connected to the Audio/Video (A/V) receiver.
IMPORTANT: If applicable to your model, verify that the A/B speaker selector is set to the appropriate position. If the speakers are connected to the A speaker connection on the rear of the A/V receiver, then the A/B speaker selector must be set to the A position.

Perform a test tone operation to check if the speakers are functioning correctly
Increase the rear speaker volume or surround speaker settings to maximum.
Try selecting a different size (small or large) for the rear surround speakers in the menu.
Verify that the A/V receiver is set to a surround sound mode.
IMPORTANT:

For Dolby® ProLogic surround sound, the center-channel mode must be set to NORMAL or WIDE.
If your source is a DVD or Blu-ray Disc® player, verify that the surround sound is enabled in the menu for the player itself.
The audio being received must be multi-channel.
Try setting the A/V receiver to a different surround sound mode.
Verify the source that you are playing is encoded in surround sound.
NOTE: Surround sound is not present at all times. During periods of mainly dialog, most of the sound may come from the center speaker only, with audio coming out of the rear speakers when there is background or ambient noise.

Reset the unit back to factory default settings.
NOTE: Consult the operating instructions for model-specific steps to reset your unit back to factory settings.

After resetting the unit, if applicable to your model, follow the steps for Calibrating the appropriate settings automatically.
IMPORTANT: After connecting the calibration microphone device, make sure to set the microphone down on a flat surface and move away from the device so there are no obstructions between the speakers and the microphone while the calibration is taking place.

Replace the speaker wires.
Try connecting a different pair of speakers.

#2 How to troubleshoot if there is no sound or intermittent sound from the speakers.?

Follow these steps to troubleshoot if there is no sound or intermittent sound from the speakers.

IMPORTANT: Not all of these features and/or functions are available on all products. Consult the instruction manual that came supplied with your unit to verify if your particular unit has these features, or if more detailed information is required to perform any of the steps below. Manuals are posted on your model support page.

NOTES: Click on the appropriate link below if the issue is occurring with a particular device or connection.

If you are connecting a computer to the audio system follow this general information about connecting an A/V component to a computer .
If the sound issues are occurring when using a Bluetooth wireless device, refer to this additional information.
If the sound issues are only occurring when using the audio device with a TV, refer to this additional information.
Make sure that the software version of the product is updated.
Because each of these steps represents a possible solution to this issue, check the sound status after completing each step.
Make sure the MUTE function has not been activated.
Try turning up the volume level.
Check that there are no headphones connected.
Check if the issue also occurs to other device connected to the TV. You may try to changing the TV channel or play back a movie on a DVD player.
Try different cables to verify this is not a bad set of cables.
Try setting the Audio/Video (A/V) receiver to a different Surround Sound mode.
IMPORTANT: Verify that the source you are playing is encoded with Surround Sound audio. If not, the audio will be very difficult to hear using a Surround Sound setting. Set Surround Sound to OFF when playing a source that is not encoded with a Surround Sound signal.

Check each speaker to make sure they are properly connected to the A/V receiver.
Perform a Test Tone function to verify if the speakers are working correctly.
Verify all external audio sources are securely connected to the appropriate inputs on the A/V receiver.
NOTE: If the audio is being sent from a television to the A/V receiver, then it may be necessary to disable the internal speakers of the TV or set the audio output of the TV to FIXED or VARIABLE. If the audio output of the TV is set to VARIABLE, then you will need to increase the volume level of the TV.

Make sure the correct audio input is selected on the A/V receiver.
Confirm what type of HDMI® devices are connected to the A/V receiver and then check the following:
Test each one of the HDMI inputs on the A/V receiver to confirm that all of the inputs for the A/V receiver are working.
Try a couple of different HDMI cables to verify there is not a bad set of cables.
Unplug the video source from the A/V receiver and connect the source directly to the television. If there is still a problem with the audio, continue to the next step. If connecting the source to the TV corrects the sound issue, service will be needed on the A/V receiver.
NOTE: Additional troubleshooting steps are available to troubleshoot instances when the audio, video, or both goes out when using an HDMI connection.

Verify the DEMO (demonstration) mode is not active.
Change the ATT (attenuate) setting.
NOTE: The procedure to change the ATT feature varies by model.

Reset the A/V receiver back to factory specifications.

#3 What is the difference between an active subwoofer and a passive subwoofer?

A subwoofer (sub) is speaker, that is dedicated to the reproduction of low-pitched audio frequencies most commonly referred to as bass.

Passive Sub:

Passive subs are called passive because they need to be powered by an external amplifier or Audio/Video (A/V) receiver . This is similar to traditional speakers. The important thing to remember about a passive sub is that since the sub needs more power to reproduce low frequency sounds, the amplifier or A/V receiver needs to be able to send enough power to sustain bass effects reproduced by the sub without draining the power supply in the A/V receiver or amplifier.

Active or Powered Sub:

This type of sub is a self-contained speaker and amplifier. The speaker and amplifier are matched to for optimal performance and both are housed in the same enclosure. This takes a lot of the power load away from the A/V receiver and allows the receiver or amplifiers to just power the mid-range and tweeter speakers.

#4 How do I hear TV sound through the A/V Receiver or Home Theater System speakers?

The two most common connections used to hear TV sound from the A/V receiver or home theater system speakers are:

Option 1: HDMI® connection using the ARC feature
Option 2: Connection using an HDMI cable, Coaxial Digital, Optical Digital, or Audio cable
Which option you use will depend on the connection ports on your products. If your TV and audio system both support the ARC feature, we recommend using Option 1 to connect your products, otherwise use Option 2.

Note: For other possible connections and model-specific information about system settings, check the manuals supplied with your products. Manuals are posted on your model support page.

#5 What is the difference between Pulse-Code Modulation (PCM) and Dolby Digital® technology?

Pulse-Code Modulation (PCM) and the Dolby Digital® technology refer to different types of digital audio recordings. PCM is the conventional method for converting analog audio into digital audio. The PCM audio recorded on DVD is a two-channel digital, stereo audio track.

The Dolby Digital® technology, which was originally called AC3, was developed specifically for multi-channel applications, including film sound and digital surround sound in the home. Dolby Digital® technology uses a 5.1 or six channel format. The 5 channels include the Stereo left and right front channels, Stereo left and right surround channels, and the center channel. There is also, a Low Frequency Effects (LFE) channel for the subwoofer, which is counted as the 0.1 channel since it functions only when a deep base effect is needed.

#6 How to use the Audio Return Channel (ARC) feature

Most devices that support the ARC feature will have one or more HDMI inputs labeled (ARC). Not all TVs and receivers are supplied with the ARC feature. To verify that the receiver and the TV support the ARC feature, check the product specifications. Manuals are posted on your model support page.

Note: Make sure the A/V receiver has the latest software version installed before using the ARC feature. Downloads are posted on your model support page.
Connect one end of a high quality, high-speed HDMI® cable to the TV Out ARC connection of the receiver.
Note: Low quality cables that are not labeled high-speed won't be able to provide the ARC function.
Connect the other end of the HDMI cable to the HDMI ARC input on the TV.
Set the HDMI Control setting on the receiver to ON.
On the receiver remote control, press the Menu or Home button.
The menu should appear on the TV screen. If not, check your connections.
Select Settings.
Press Enter.
Select HDMI Control or CTR.HDMI.
Press Enter.
Select ON or CTRL ON.
Press Enter.
Set the Control for HDMI setting on the TV to ON.
On the TV remote control, press the Home or Menu button.
Select Settings or Setup
Select HDMI.
Select Control for HDMI.
Select ON.