49-85224-2 02-16 GE
For a full manual in English and Spanish visit • Para un manual complete en inglés y español
www.GEAppliances.com
Or call to order a paper copy • O llame para pedir una copia de papel
800.626.2000
You will need to have your model number ready before you call.
Thank You! ... for your purchase of a GE Brand appliance.
Register Your Appliance: Register your new appliance online at your convenience!
www.geappliances.com/service_and_support/register/
Timely product registration will allow for enhanced communication and prompt service under the terms of your warranty, should
the need arise. You may also mail in the pre-printed registration card included in the packing material.
READ AND SAVE THESE INSTRUCTIONS
IMPORTANT SAFETY INFORMATION
Read all safety instructions before using the product.
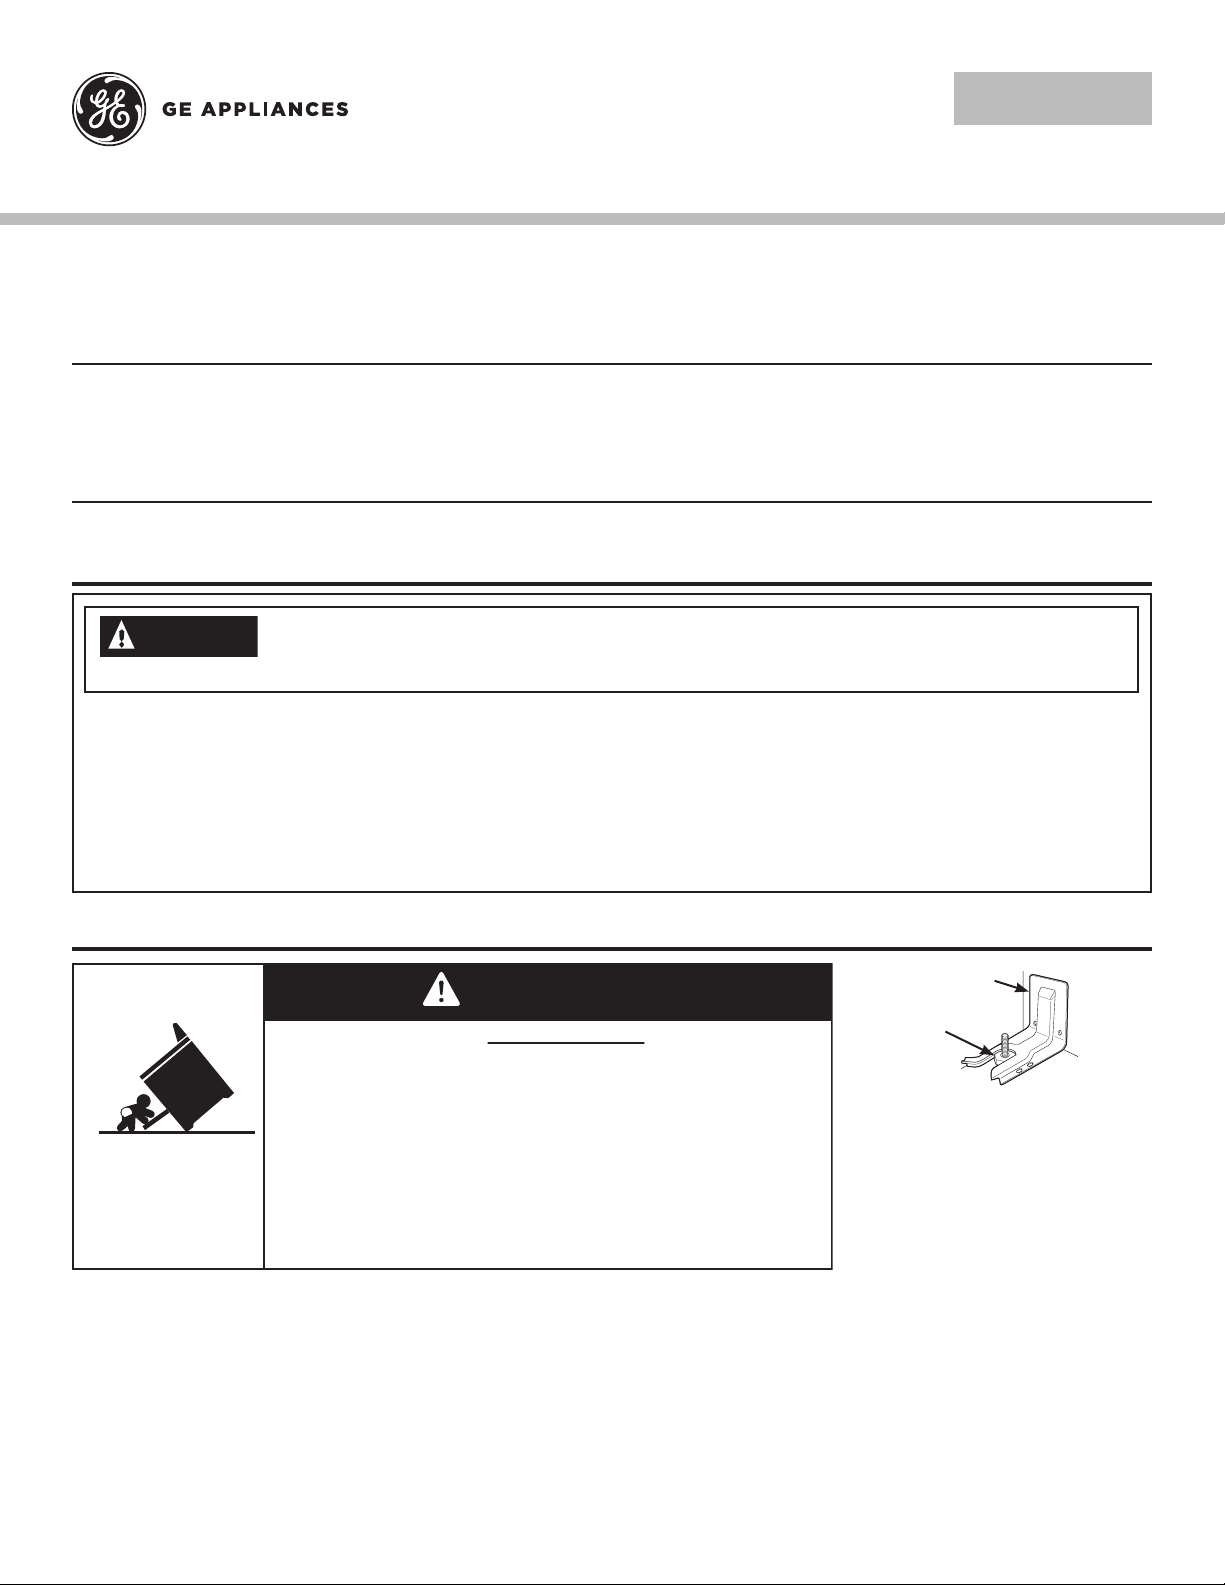
ANTI-TIP DEVICE
- Do not store or use gasoline or other flammable vapors and liquids in the vicinity of this or any other appliance.
- WHAT TO DO IF YOU SMELL GAS
■ Donottrytolightanyappliance.
■ Donottouchanyelectricalswitch;donotuseanyphoneinyourbuilding.
■ Immediatelycallyourgassupplierfromaneighbor’sphone.Followthegassupplier’sinstructions.
■ Ifyoucannotreachyourgassupplier,callthefiredepartment.
-Installationandservicemustbeperformedbyaqualifiedinstaller,serviceagencyorthegassupplier.
WARNING
If the information in this manual is not followed exactly, a fire or explosion may
result, causing property damage, personal injury or death.
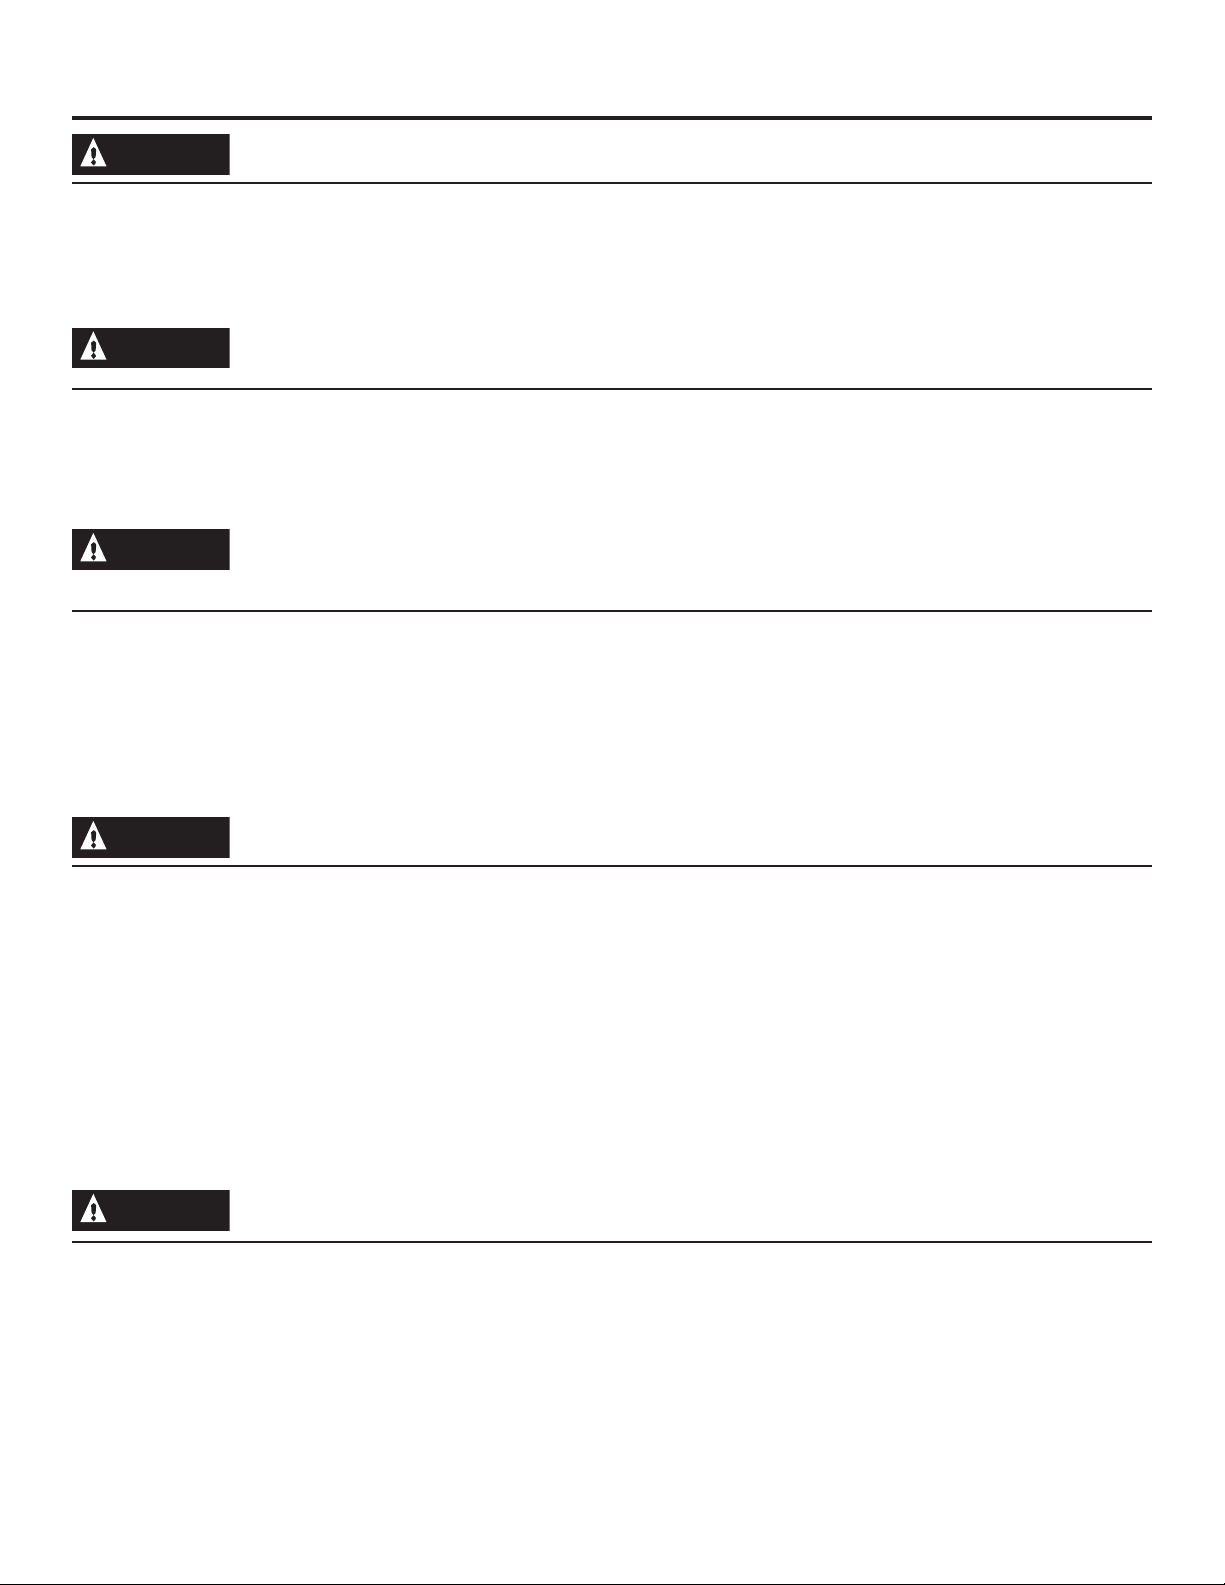
To reduce the risk of tipping
therange,therangemustbe
secured by a properly installed
anti-tip bracket. See installation
instructionsshippedwiththe
bracket for complete details before
attempting to install.
Tocheckifthebracketisinstalledandengagedproperly,lookunderneaththerangetoseethattherearlevelinglegis
engagedinthebracket.Onsomemodels,thestoragedrawerorkickpanelcanberemovedforeasyinspection.Ifvisual
inspectionisnotpossible,slidetherangeforward,confirmtheanti-tipbracketissecurelyattachedtothefloororwall,
and slide the range back so the rear leveling leg is under the anti-tip bracket.
Ifyourrangeisremovedforcleaning,servicingoranyreason,besuretheanti-tipdeviceisreengagedproperlywhenthe
rangeisreplaced.Failuretotakethisprecautioncouldresultintippingoftherangeandcanresultindeathorserious
burns to children or adults.
Nevercompletelyremovethelevelinglegsortherangewillnotbesecuredtotheanti-tipdeviceproperly.
A child or adult can tip the range and be killed.
Verify the anti-tip bracket has been properly installed
and engaged.
Ensure the anti-tip bracket is re-engaged when the range
is moved.
Do not operate the range without the anti-tip bracket in
place and engaged.
Failure to follow these instructions can result in death or
serious burns to children or adults.
Tip-Over Hazard
WARNING
Anti-Tip
Bracket
Leveling
Leg
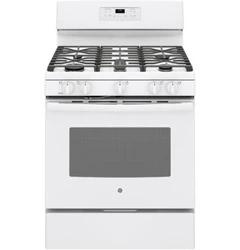
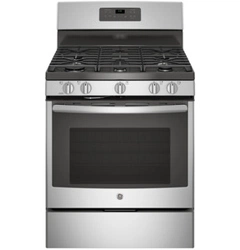
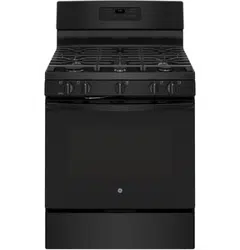
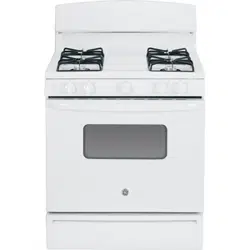
Gas Ranges
Quick Guide
2
49-85224-2
READ AND SAVE THESE INSTRUCTIONS
IMPORTANT SAFETY INFORMATION
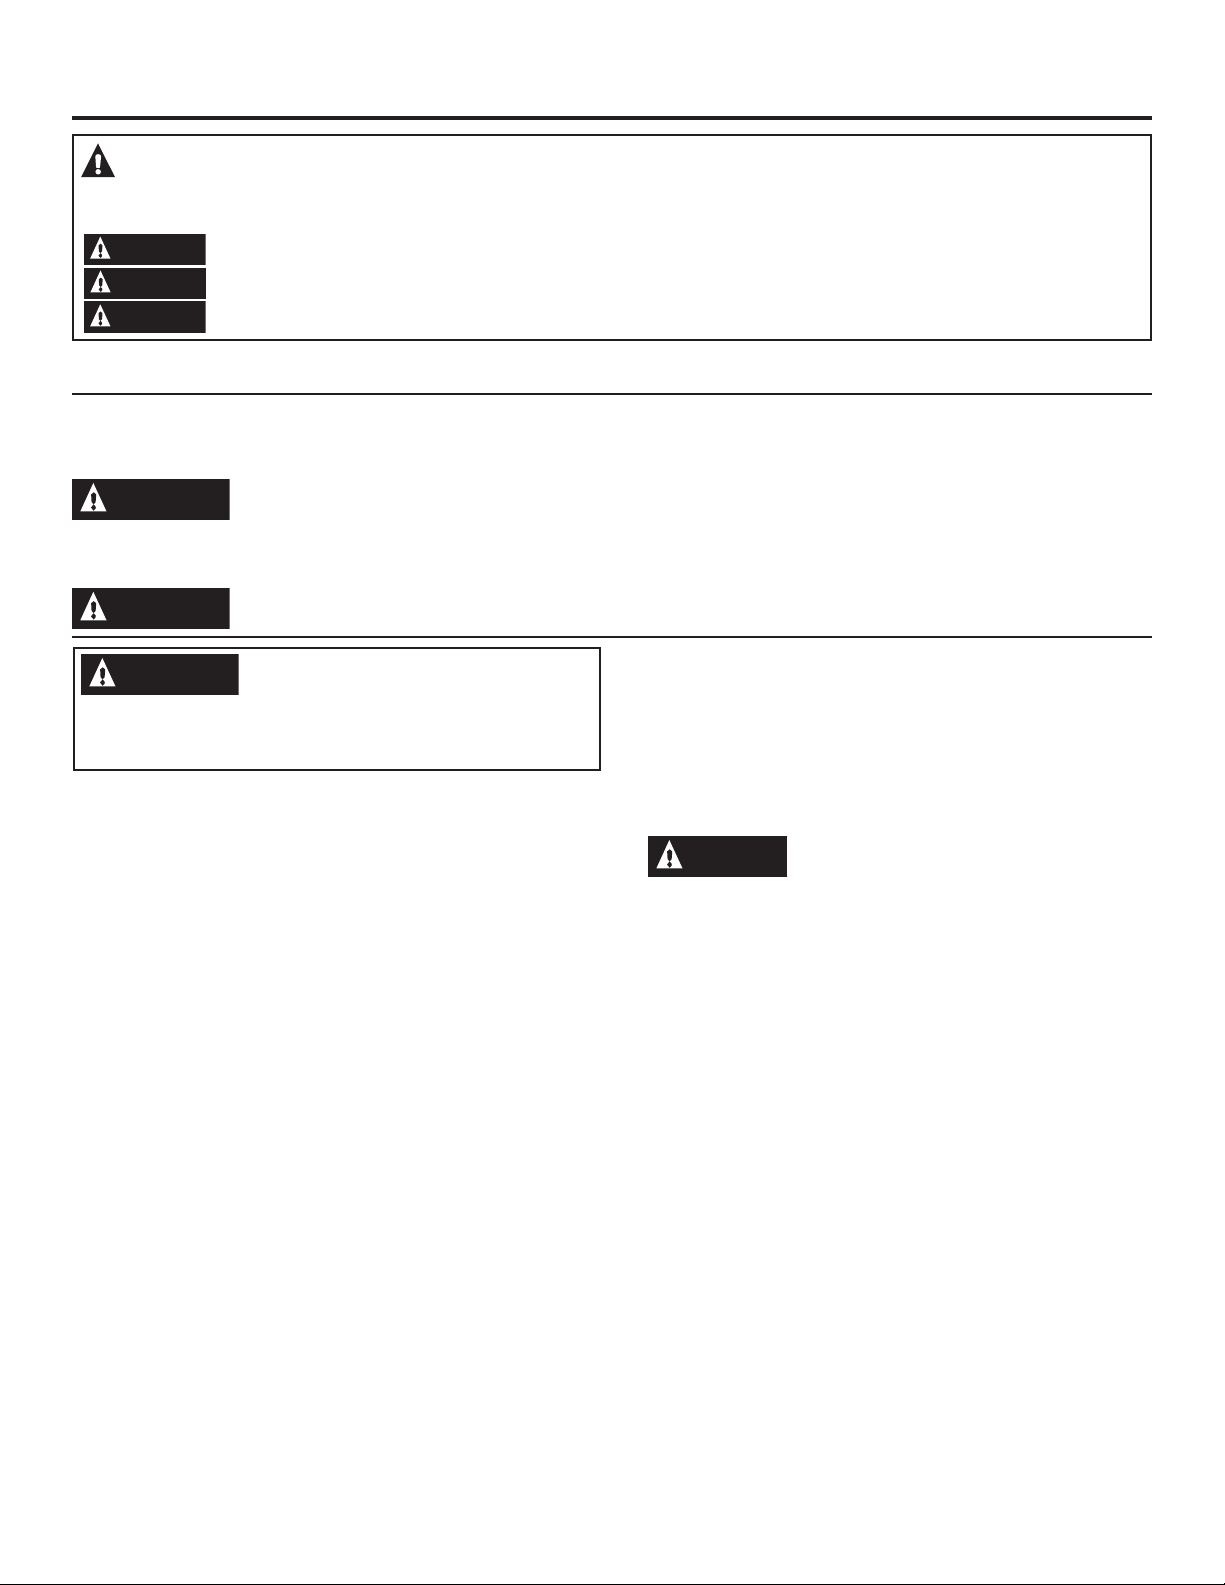
This is the safety alert symbol. This symbol alerts you to potential hazards that can kill or hurt you and others. All
safetymessageswillfollowthesafetyalertsymbolandtheword“DANGER”,“WARNING”,or“CAUTION”.Thesewords
are defined as:
Indicatesahazardoussituationwhich,ifnotavoided,will result in death or serious injury.
Indicatesahazardoussituationwhich,ifnotavoided,could result in death or serious injury.
Indicatesahazardoussituationwhich,ifnotavoided,could result in minor or moderate injury.
WARNING
DANGER
CAUTION
STATE OF CALIFORNIA PROPOSITION 65 WARNING
TheCaliforniaSafeDrinkingWaterandToxicEnforcementActrequirestheGovernorofCaliforniatopublishalistof
substancesknowntothestatetocausecancer,birthdefectsorotherreproductiveharm,andrequiresbusinessesto
warncustomersofpotentialexposuretosuchsubstances.
ThisproductcontainsoneormorechemicalknowntotheStateofCaliforniatocausecancer,birth
defects or other reproductive harm.
Self-cleanovenscancauselow-levelexposuretosomeofthesesubstances,includingcarbonmonoxide,duringthe
cleaningcycle.Exposurecanbeminimizedbyventingwithanopenwindoworusingaventilationfanorhood.
WARNING
WARNING
GENERAL SAFETY INSTRUCTIONS
WARNING
NEVER use this appliance as a
space heater to heat or warm the room. Doing so may
result in carbon monoxide poisoning and overheating
of the oven.
■ Usethisapplianceforitsintendedpurposeasdescribed
inthisowner’smanual.
■ Haveyourrangeinstalledandproperlygroundedby
aqualifiedinstallerinaccordancewiththeprovided
installation instructions.
■ Anyadjustmentandserviceshouldbeperformedonlyby
a qualified gas range installer or service technician. Do
not attempt to repair or replace any part of your range
unless it is specifically recommended in this manual.
■ Yourrangeisshippedfromthefactorysetforusewith
naturalgas.Itcanbeconvertedforusewithpropane
gas.Ifrequired,theseadjustmentsmustbemadebya
qualifiedtechnicianinaccordancewiththeinstallation
instructions and local codes. The agency performing this
workassumesresponsibilityfortheconversion.
■ Havetheinstallershowyouthelocationoftherange
gasshut-offvalveandhowtoturnitoffifnecessary.
■ Plugyourrangeintoa120-voltgroundedoutletonly.Do
notremovetheroundgroundingprongfromtheplug.Ifin
doubtaboutthegroundingofthehomeelectricalsystem,it
is your responsibility and obligation to have an ungrounded
outletreplacedwithaproperlygrounded,threeprong
outletinaccordancewiththeNationalElectricalCode.Do
notuseonextensioncordwiththisappliance.
■ Beforeperforminganyservice,turnoffthegassupply
andunplugtherangeordisconnectthepowersupplyat
the household distribution panel by removing the fuse or
switchingoffthecircuitbreaker.
■ Besureallpackingmaterialsareremovedfromtherange
before operating to prevent ignition of these materials.
■ Avoidscratchingorimpactingglassdoors,cooktopsor
control panels. Doing so may lead to glass breakage.
Donotcookonaproductwithbrokenglass.Shock,
fireorcutsmayoccur.Contactaqualifiedtechnician
immediately.
■ Donotleavechildrenaloneorunattendedinanarea
whereanapplianceisinuse.Theyshouldneverbe
allowedtoclimb,sitorstandonanypartoftheappliance
■
CAUTION
Do not store items of interest to children
above a range or on the backguard of a range - children
climbing on the oven to reach items could be seriously
injured.
■ Neverblockthevents(airopenings)oftherange.They
provide the air inlets and outlets that are necessary for
therangetooperateproperlywithcorrectcombustion.
Airopeningsarelocatedattherearofthecooktop,at
thetopandbottomoftheovendoor,andatthebottom
oftherangeunderthewarmingdrawer,loweroven
drawerorkickpanel.
■ Useonlydrypotholders—moistordamppotholderson
hot surfaces may result in burns from steam. Do not let
potholderstouchsurfaceburners,burnergrate,oroven
heatingelement.Donotuseatowelorotherbulkycloth
in place of pot holders.
■ Donottouchtheheatingelementsortheinteriorsurface
of the oven. These surfaces may be hot enough to burn
even though they are dark in color. During and after
use,donottouch,orletclothingorotherflammable
materialscontactanyinteriorareaoftheoven;allow
sufficient time for cooling first. Other surfaces of the
appliance may become hot enough to cause burns.
Potentiallyhotsurfacesincludetheburners,grates,
ovenventopening,surfacesneartheopeningand
crevices around the oven door.
49-85224-2
3
READ AND SAVE THESE INSTRUCTIONS
IMPORTANT SAFETY INFORMATION
WARNING
GENERAL SAFETY INSTRUCTIONS (Cont.)
■ Donotheatunopenedfoodcontainers.Pressurecould
buildupandthecontainercouldburst,causinganinjury.
■ Cookfoodthoroughlytohelpprotectagainst
foodborne illness. Minimum safe food temperature
recommendationscanbefoundatwww.IsItDoneYet.gov
andwww.fsis.usda.gov.Useafoodthermometertotake
food temperatures and check several locations.
■ Donotallowanyonetoclimb,standorhangonthe
ovendoor,drawerorcooktop.Theycoulddamagethe
range or tip it over causing severe injury or death.
■ Donotstoreoruseflammablematerialsinanovenor
nearthecooktop,includingpaper,plastic,potholders,
linens,wallcoverings,curtains,drapesandgasolineor
other flammable vapors and liquids.
■ Neverwearloose-fittingorhanginggarmentswhile
using the appliance. These garments may ignite if they
contact hot surfaces causing severe burns.
■ Donotletcookinggreaseorotherflammablematerials
accumulateinorneartherange.Greaseintheovenor
on the cooktop may ignite.
The self-cleaning feature operates the oven at
temperatureshighenoughtoburnawayfoodsoilsinthe
oven.Followtheseinstructionsforsafeoperation.
■ Donottouchovensurfacesduringself-cleanoperation.
Keepchildrenawayfromtheovenduringself-cleaning.
Failuretofollowtheseinstructionsmaycauseburns.
■ Beforeoperatingtheself-cleancycle,removepans,
shiny metal oven racks and other utensils from the
oven. Only porcelain-coated oven racks may be left in
the oven.
■ Beforeoperatingtheself-cleancycle,wipegreaseand
foodsoilsfromtheoven.Excessiveamountofgrease
may ignite leading to smoke damage to your home.
■ Iftheself-cleaningmodemalfunctions,turntheovenoff
anddisconnectthepowersupply.Haveitservicedbya
qualified technician.
■ Donotuseovencleaners.Nocommercialovencleaner
or oven liner protective coating of any kind should be
used in or around any part of the oven.
■ Donotcleanthedoorgasket.Thedoorgasketis
essentialforagoodseal.Careshouldbetakennotto
rub,damageormovethegasket.
■ IMPORTANT:Thehealthofsomebirdsisextremely
sensitive to the fumes given off during the self-cleaning
cycleofanyrange.Movebirdstoanotherwell-
ventilated room.
KEEP FLAMMABLE MATERIALS AWAY FROM THE RANGE
Failure to do so may result in fire or personal injury.
SELF-CLEANING OVEN SAFETY INSTRUCTIONS
(on some models)
WARNING
WARNING
■ Donotusewaterongreasefires.Neverpickupaflaming
pan. Turn the controls off. Smother a flaming pan on a
surfaceburnerbycoveringthepancompletelywitha
well-fittinglid,cookiesheetorflattray.Ifnecessary,usea
multi-purposedrychemicalorfoam-typefireextinguisher.
■ Ifthereisafireintheovenduringbaking,smotherthe
fire by closing the oven door and turning the oven off or
by using a multi-purpose dry chemical or foam type fire
extinguisher.
■ Ifthereisafireintheovenduringself-clean,turnthe
ovenoffandwaitforthefiretogoout.Donotforce
thedooropen.Introductionoffreshairatself-clean
temperatures may lead to a burst of flame from the oven.
IN THE EVENT OF A FIRE, TAKE THE FOLLOWING
STEPS TO PREVENT INJURY AND FIRE SPREADING
WARNING
WARNING
COOKTOP SAFETY INSTRUCTIONS
■ Neverleavethesurfaceburnersunattendedatmedium
orhighheatsettings.Foods,especiallyoilyfoods,may
ignite resulting in fire that could spread to surrounding
cabinets.
■ Neverleaveoilunattendedwhilefrying.Ifallowedto
heatbeyonditssmokingpoint,oilmayigniteresulting
infirethatmayspreadtosurroundingcabinets.Usea
deepfatthermometerwheneverpossibletomonitoroil
temperature.
■ Toavoidoilspilloverandfire,useaminimumamount
ofoilwhenshallowpan-fryingandavoidcookingfrozen
foodswithexcessiveamountsofice.
■ Useproperpansizeandavoidpansthatareunstable
oreasilytipped.Selectcookwarethatismatchedtothe
sizeoftheburner.Burnerflamesshouldbeadjustedso
thattheydonotextendbeyondthebottomofthepan.
Excessiveflamemaybehazardous.
4
49-85224-2
Using The Cooktop
How to Light a Surface Burner
WARNING
Burners should be operated only
when covered by cookware. Burner flames not covered
by cookware present a risk of fire or clothing ignition.
Never let flames extend beyond the sides of the
cookware. Failure to comply may result in serious injury.
Make sure all burners are in their correct locations and
fully assembled before attempting to operate any burner.
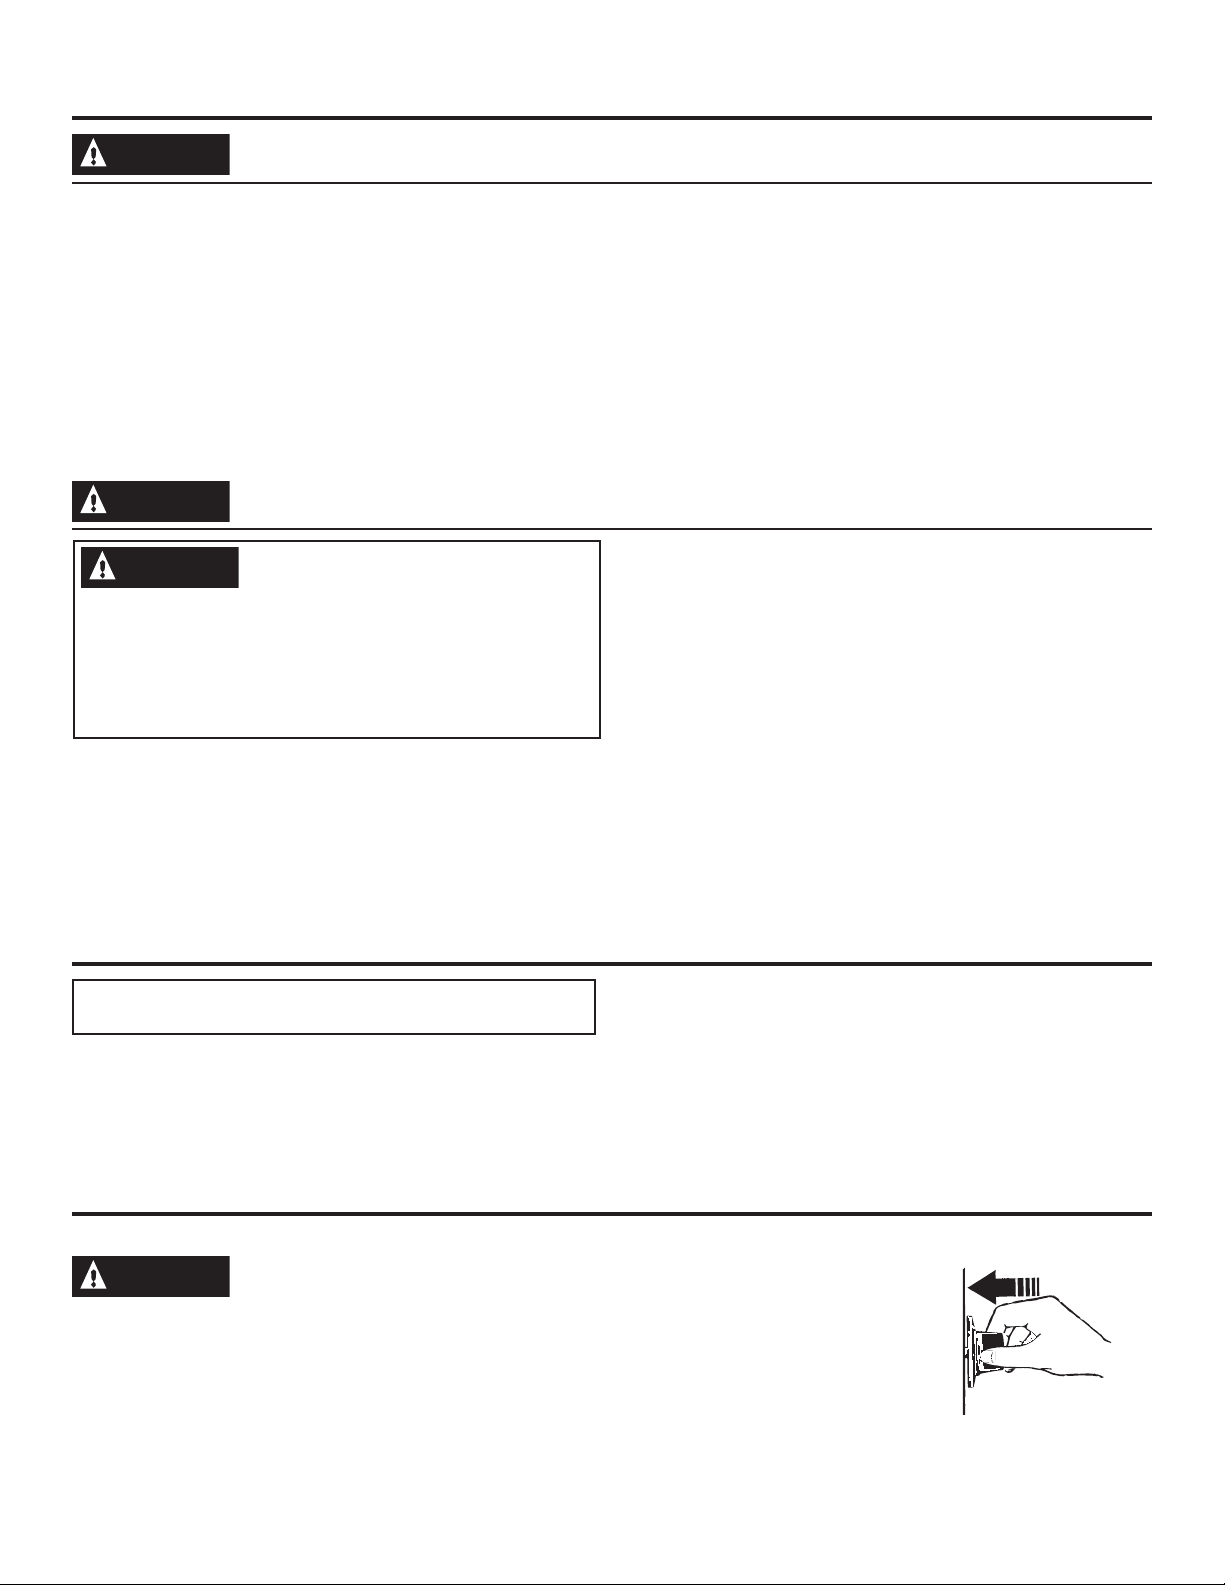
Selectaburnerandfinditscontrolknob.Pushtheknobin
andturnittotheLITEposition.
Youwillhearaclickingnoise—the
sound of the electric spark igniting
theburner.Whenoneburneris
turnedtoLITE,allburnerswill
spark.Sparkingwillcontinueas
longastheknobremainsatLITE.
Oncegasisignited,turntheknob
to adjust the flame size.
Push the control knob in and
turn it to the LITE position.
IMPORTANT SAFETY INFORMATION
READ AND SAVE THESE INSTRUCTIONS
Using Your New Appliance
NOTE:Removeallprotectivepackingbeforeoperating
the oven.
Thefullowner'smanualforyourproductincludes
additional information and cooking guides. Access the
manual by searching for your appliance model number at
www.GEAppliances.com.
In Case of a Power Failure
Intheeventofapowerfailure,theovenisinoperableand
noattemptshouldbemadetooperateit.However,the
surfaceburnersmaybelitwithamatch.Usingextreme
caution,holdalitmatchneartheportsbeneaththesurface
burnercap,thenslowlyturntheknobtotheLITEposition.
Oncelit,surfaceburnerswillcontinuetooperatenormally.
WARNING
OVEN SAFETY INSTRUCTIONS
WARNING
NEVER cover any slots, holes, or
passages in the oven bottom or cover an entire rack
with materials such as aluminum foil or oven liners.
Doing so blocks air flow through the oven and may
cause carbon monoxide poisoning. Never place foil
or oven liners on the oven bottom. They can trap heat
causing risk of smoke or fire.
■ Standawayfromtherangewhenopeningtheoven
door.Hotairorsteamwhichescapescancauseburns
tohands,faceand/oreyes.
■ Neverplacecookingutensils,pizzaorbakingstones,or
any type of foil or liner on the oven floor. These items
cantrapheatormelt,resultingindamagetotheproduct
andriskofshock,smokeorfire.
■ Placeovenracksindesiredlocationwhileoveniscool.
Ifrackmustbemovedwhileovenishot,becarefulto
avoid touching hot surfaces.
■ Donotleaveitemssuchaspaper,cookingutensilsor
foodintheovenwhennotinuse.Itemsstoredinan
oven can ignite.
■ Donotleaveitemsonthecooktopneartheovenvent.
Itemsmayoverheatresultinginariskoffireorburns.
■ Neverbroilwithdooropen.Open-doorbroilingisnot
permitted due to overheating of control knobs.
WARNING
COOKTOP SAFETY INSTRUCTIONS (Cont.)
■ AlwaysusetheLITEpositionwhenignitingthetop
burners and make sure the burners have ignited.
■ Whenusingglass/ceramiccookware,makesureitis
suitableforcooktopservice;othersmaybreakbecause
of sudden change in temperature.
■ Tominimizethepossibilityofburns,ignitionof
flammablematerialsandspillage,thehandleofa
containershouldbeturnedtowardthecenterofthe
rangewithoutextendingovernearbyburners.
■ Donotuseawokwitharoundmetalsupportring.The
ring may trap heat and block air to the burner resulting
inacarbonmonoxidehazard.
■ Donotattempttoliftthecooktop.Doingsomaydamage
the gas tubing to the surface burners resulting in a gas
leak and risk of fire.
■ WhendisablingLockControl(onsomemodels),make
surethesurfacecontrolsaresettotheOFFposition.
Thiswillpreventunintendedgasflowfromtheburners.
■ Donotusealuminumfoiltocoverthegratesorline
any part of the cooktop. Doing so may result in carbon
monoxidepoisoning,overheatingofthecooktop
surfaces,orapotentialfirehazard.
49-85224-2
5
Oven Controls
For complete information about the oven controls, see the full owner's manual at www.GEAppliances.com.
Start: Mustbepressedtostartanycooking,cleaning,or
timed function.
Clock: Setstheovenclocktime.Pressboththe + and
- pads and hold for 3 seconds or press the Set Clock pad
(onsomemodels).Usethe+ and - pads to program the
clock.PressStart to save the time.
Cook Time: Countsdowncookingtimeandturnsoffthe
ovenwhenthecookingtimeiscomplete.PresstheCook
Timepad,usethenumberpadstoprogramacookingtime
inhoursandminutes,thenpressStart. This can only be
usedwithTraditionalBakeandConvectionBake.
Timer: Worksasacountdowntimer.PresstheTimer
pad and the + and - pads to program the time in hours and
minutes.PresstheStartpad.Theovenwillcontinueto
operatewhenthetimercountdowniscomplete.Toturnthe
timeroff,presstheTimer pad.
Delay Time: Delayswhentheovenwillturnon.Use
thistosetatimewhenyouwanttheoventostart.Press
the Delay Time pad,andusethe+ and - pads to program
thetimeofdayfortheoventoturnon.Pressthedesired
cookingmodeandtemperature,thenpressStart. A cook
time may also be programmed if desired. This can only be
usedwithTraditionalBake,ConvectionBake,andSelf-
Clean(onsomemodels).
Using The Cooktop (Cont.)
Cleaning The Cooktop
How to Use Your Griddle (on some models)
For complete griddle information, see the full owner's manual at www.GEAppliances.com.
WARNING
Fire Hazard
■ Use care when cooking greasy foods. Spilled grease
can result in fire.
■ Neverplaceanyitemsonthegriddlewhenitisnot
in use. Heat from surrounding burners can heat the
griddle and can result in fire.
■ Placeandremovethegriddleonlywhenallgrates
and griddle are cool and all surface burners are
turned OFF.
Beforefirstuse,rinsewithhotwateranddrythoroughly.
Preparesurfacewithvegetableoilorcookingspray.The
griddle can only be used over the center oval burner.
Removethecentergrate(ifpresent)andreplacewithgriddle.
Do not overheat the griddle. Leaving the griddle burner
onatHIforanextendedamountoftimewithoutfoodcan
damage the nonstick coating.
Avoidusingmetalutensilswithsharppointsorroughsharp
edgeswhichmightdamagethegriddlesurface.
For complete information about cleaning the cooktop, see the full owner’s manual at www.GEAppliances.com.
Removesurfaceburnersforcleaningasshownbelow.
Washburnercapsandburnerheadsinhotsoapywaterand
rinsewithcleanwater.Theportsintheburnerheadsmust
bekeptcleanatalltimesforaneven,unhamperedflame.
Cloggedordirtyburnerportswillnotallowburnertooperate
properly.Beforeputtingburnersbackontherange,shake
outanyexcesswaterandallowthemtodrythoroughly.
CAUTION
Do not operate the cooktop without all
burner parts and grates in place.
Any spill on or around an electrode must be carefully
cleaned.Takecaretonothitanelectrodewithanything
hard or it could be damaged.
Theelectrodeofthesparkigniterisexposedwhenthe
burnerheadisremoved.Whenoneburneristurnedto
LITE,alltheburnersspark.Donotattempttodisassemble
orcleanaroundanyburnerwhileanotherburnerison.
Damage to the product may occur.
Removal of Surface Burners for Cleaning
TurnallcontrolsOFF.Allowcooktoptocoolbefore
removinggratesandburnerparts.Whenremovingthe
burnercapsandheads,remembertheirsizeandlocation.
Replacetheminthesamelocationaftercleaning.
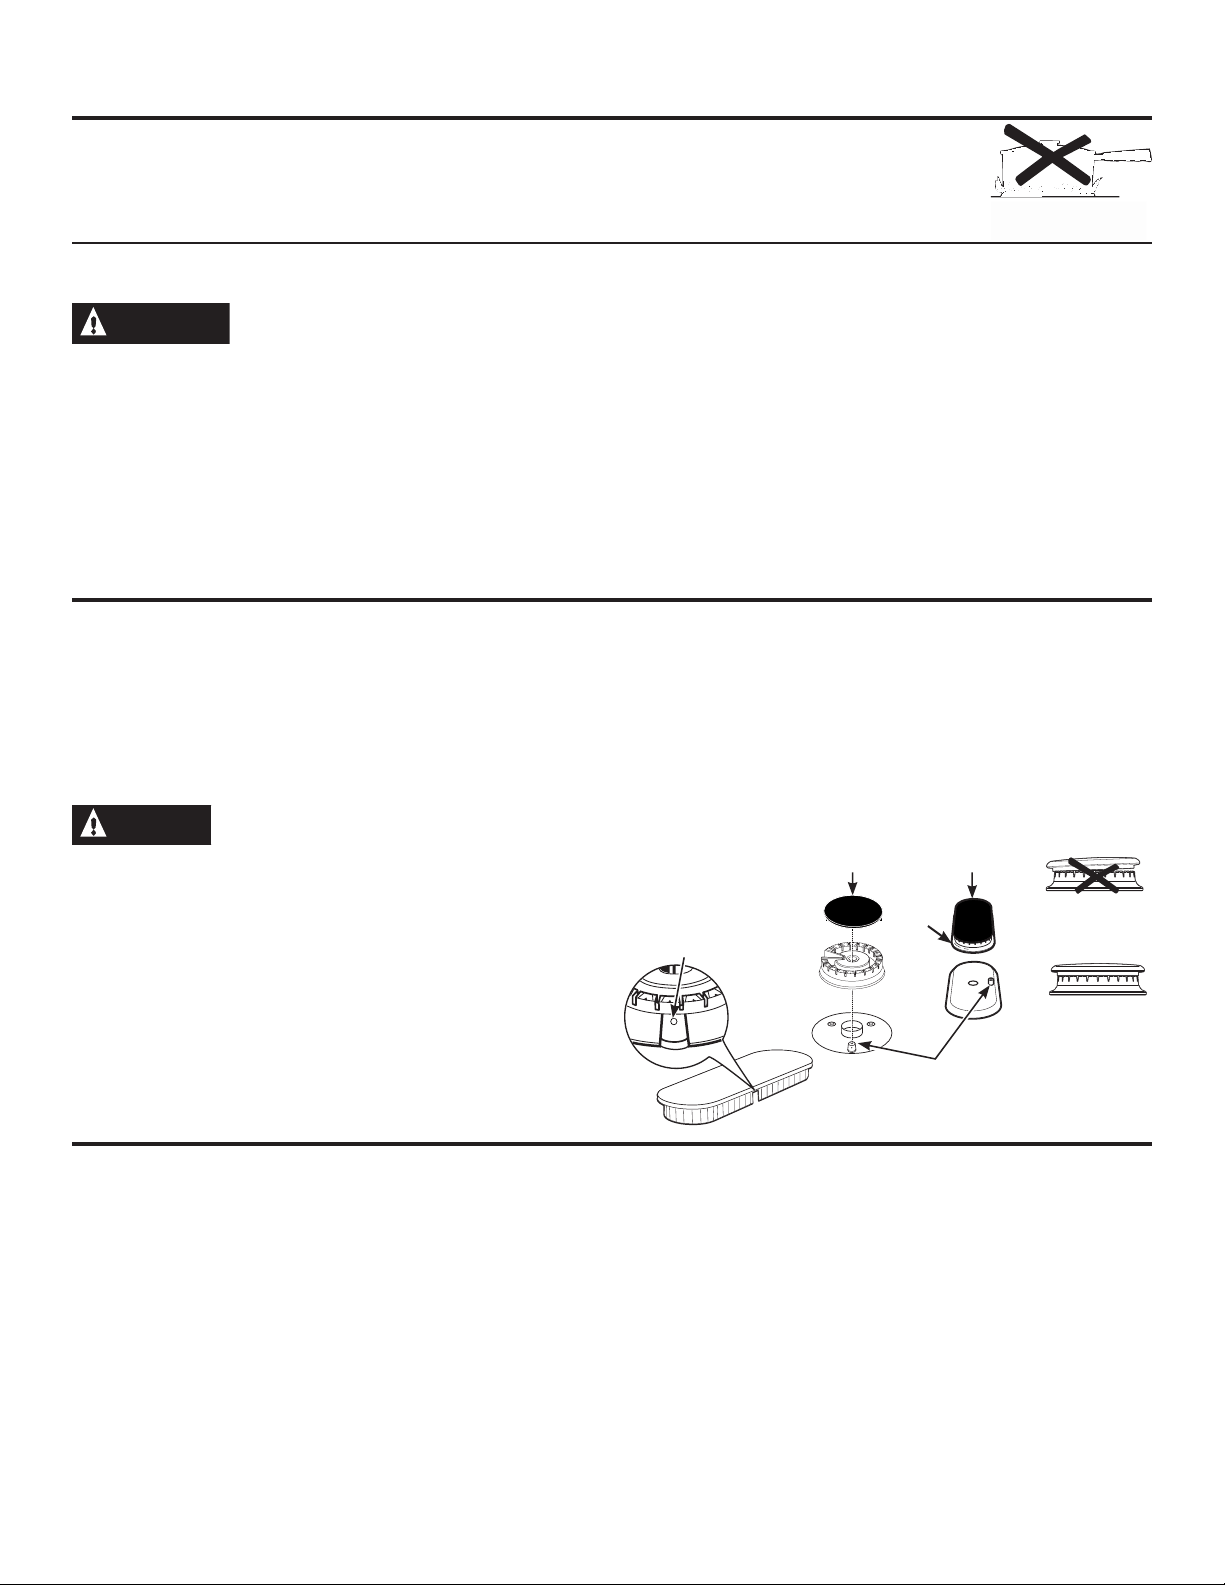
How to Select Flame Size
Watchtheflame,nottheknob,asyouadjustheat.When
rapidheatingisdesired,theflamesizeonaburnershould
matchthesizeofthecookwareyouareusing.Flames
largerthanthebottomofthecookware
willnotheatfasterandmaybe
hazardous.
These flames are too
large for the pot
Burner cap is
NOT properly seated.
Burner cap is
properly seated.
Round Burner Cap
(Removable)
Oval Burner Cap
(Non-Removable)
Electrode
Do not attempt
to remove oval
burner cap from
burner head.
Round hole in burner
head must be kept clear
Oval
Burner
Head
6
49-85224-2
Cooking Modes and Recommendations
Follow these general recommendations for better results. For a complete cooking guide with recommended
cooking modes and food positions, see the full owner’s manual at www.GEAppliances.com.
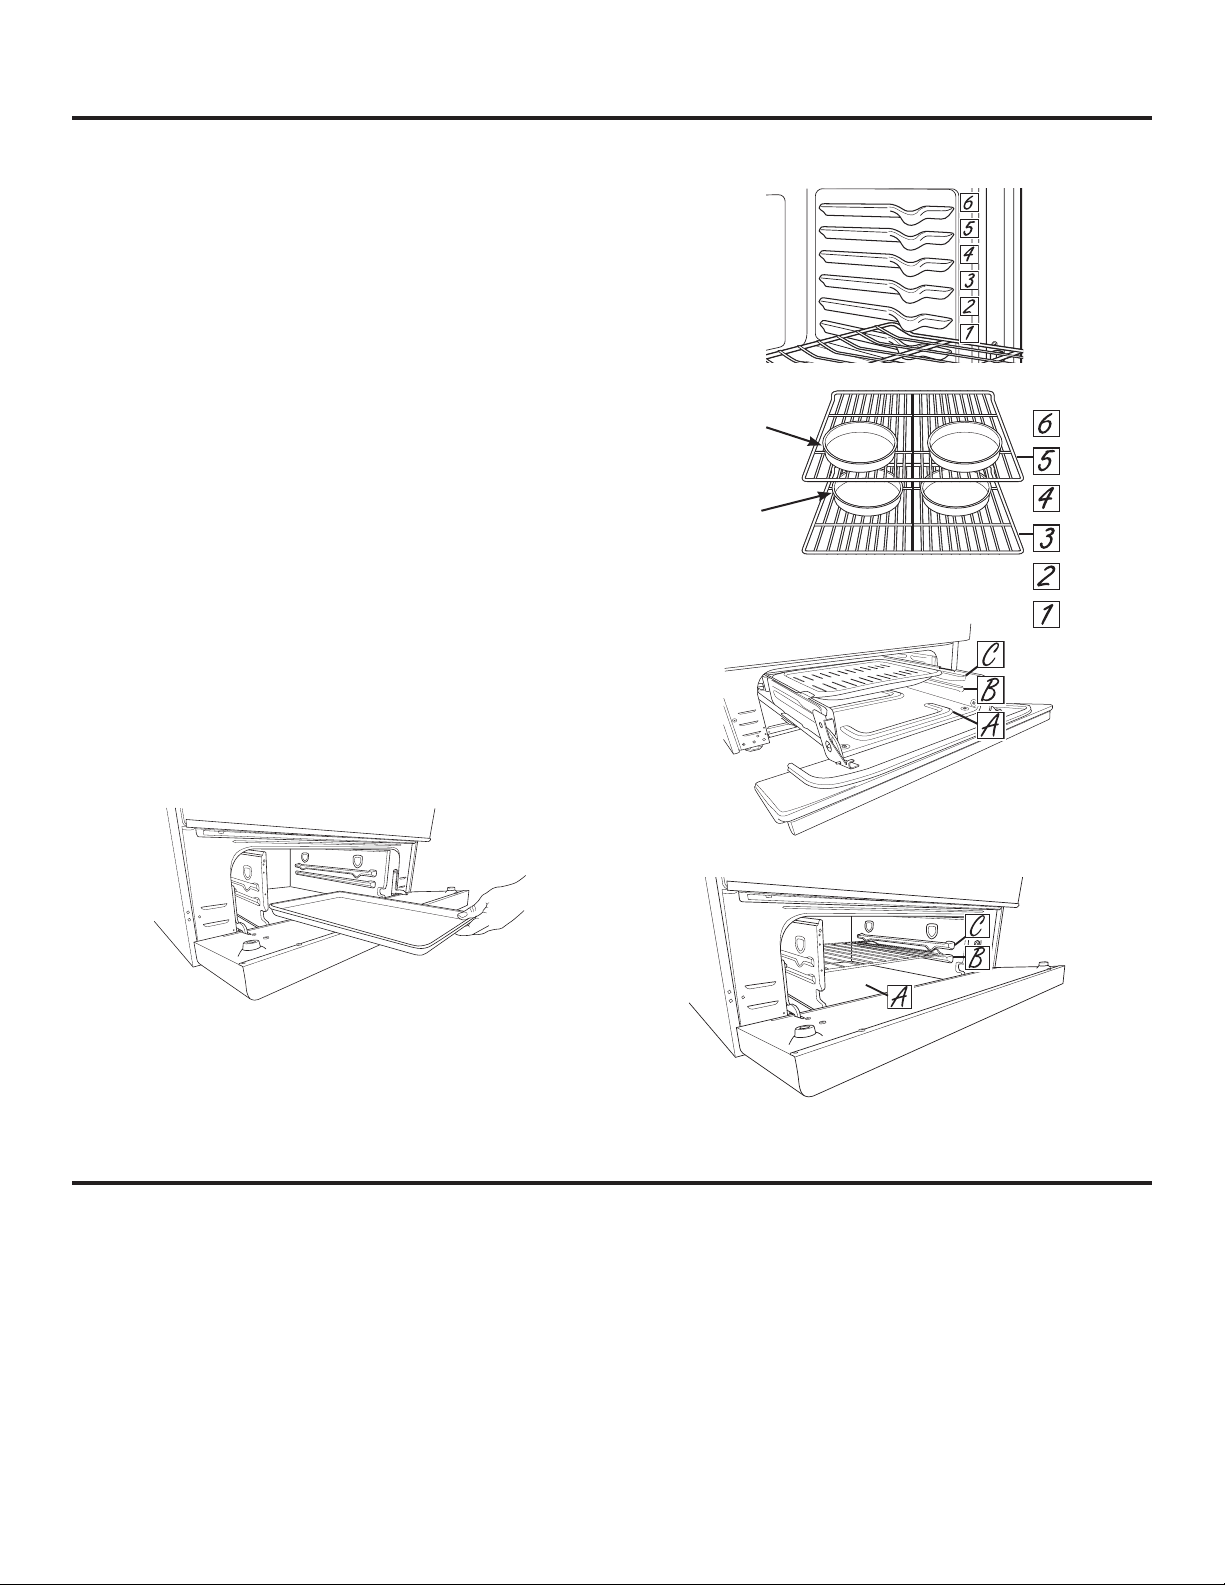
Bake:Placefoodinapproximatelythecenterofthe
oven.Whenbakingonasinglerackuseposition3or4.
Whenbakingonmultipleracksusepositions3and5.If
bakingonmultipleracksintraditionalbakemode,switch
food location partially through cooking for more even
results.Whenbakingmultipleitems,ensurethereisspace
betweenitems.
Convection Bake (some models):Usethis
modeforbakingonmultipleracks.Usepositions3and5.
YourovenisequippedwithAutoRecipeConversion,so
itisnotnecessarytoadjustthetemperaturewhenusing
convection bake.
Broil:Alwaysbroilwiththedoorclosed.Forbetter
searing use the rack position that places food closest to the
broilheater.MovefooddownoruseBroilLomodeformore
doneness/lesssearing.Somemodelshaveabroildrawer
withthreebroilingpositions.InpositionsBandC,thebroil
pan(somemodels)orrack(somemodels)restsonthe
supports.Inthebottomposition(A),cookwaresitsdirectly
onthedrawerbottom.Takecarenottotouchtheinnerdoor
whenplacingandremovingfoodonthedrawerbottom.
NOTE:Removeunusedracksfromovenand/ordrawerfor
fasterpreheat,improvedefficiency,andoptimalperformance.
Front
Placement
Rear
Placement
Rack positions
Drop-down Slide-out Broil Drawer (some models)
Drop-down Broil Drawer (some models)
When placing cookware on the rack or drawer bottom, use front-to-back
orientation for easier placement and better coverage.
Special Features
For other special features such as Sabbath mode, see the full owner's manual at www.GEAppliances.com.
There are several different special features on your range. To change the settings of these special features:
■ PresstheBake and Broil pads at the same time and hold for three seconds.
■ “SF”willappearinthedisplay.
■ Selectthefeatureyouwanttochange.Seefullowner'smanualfordetailsonhowtoselectdifferentfeatures.
■ Whenthechangehasbeenmade,presstheStart key to save the change and return to the time of day.
Adjust the Oven Temperature
Thisfeatureallowstheovenbakingtemperaturetobe
adjustedupto35ºFhotterordownto35ºFcooler.Use
this feature if you believe your oven temperature is too hot
ortoocoldandwishtochangeit.Thisadjustmentaffects
everycookingmodeexceptbroil.
Afterenteringthespecialfeaturesmenu,presstheBake
pad to enter the temperature adjustment mode. A number
between35and-35willdisplay.Usethe+/- pads to set
thedesiredtemperatureadjustment.PresstheStart pad to
save the temperature adjustment.
49-85224-2
7
Cleaning the Oven
For complete information about cleaning the oven, see the full owner’s manual at www.GEAppliances.com.
Besureallcontrolsareoffandallsurfacesarecoolbeforecleaninganypartoftherange.
Manual Cleaning
Donotuseovencleaners,strongliquidcleansers,steel
wool,orscouringpadsontheinterioroftheoven.For
soilsontheovenbottomandotherenameledsurfaces,
useagentleabrasivecontainingoxalicacid,suchas
BarKeepersFriend
®
,withanon-scratchsponge.Take
care not to apply any abrasive cleaners or sponges to the
doorglass,asitwillscratchthereflectivecoating.The
oven interior and door glass may be cleaned using a soft
clothwithamildsoapandwater,orvinegarandwater
solution.Aftercleaning,rinsewithcleanwateranddrywith
a soft cloth.
Self Clean Mode (on some models)
ReadtheSelf-CleaningOvenSafetyInstructionsatthe
beginningofthismanualbeforeusingSelfCleanMode.
Removeallitemsfromtheoven.Closeandlatchthedoor.
Iftheovenistoohot,youwillnotbeabletoslidethelatch.
PresstheSelf Cleanpad.Usethe+ and - pads to enter
anytimebetween3and5hoursandpressStart.Fora
moderatelysoiledoven,runa3hourself-cleancycle.For
aheavilysoiledoven,runa5hourself-cleancycleThe
ovenwillturnoffwhentheself-cleancycleiscomplete.
The door cannot be unlatched until the oven has cooled
belowtheunlockingtemperature.Aftertheovenhas
cooleddown,wipeashoutoftheoven.
Steam Clean Mode (on some models)
TheSteamCleanfeatureisforcleaninglightsoils.
TousetheSteamCleanfeaturewipegreaseandsoils
fromtheoven.Pouronecupofwaterintothebottomof
theoven.Closeandlatchthedoor(somemodels).Press
the Steam Clean pad then press Start.Youcannotopen
thedoorduringthe30minutesteamclean.Whenthe
cyclecompletes,unlatchand/oropenthedoor,soakup
remainingwater,andwipeawaymoisture-softenedsoils
fromtheovenwallsanddoor.SeeinstructionsinManual
Cleaningforanyremainingsoils.
Aluminum Foil and Oven Liners
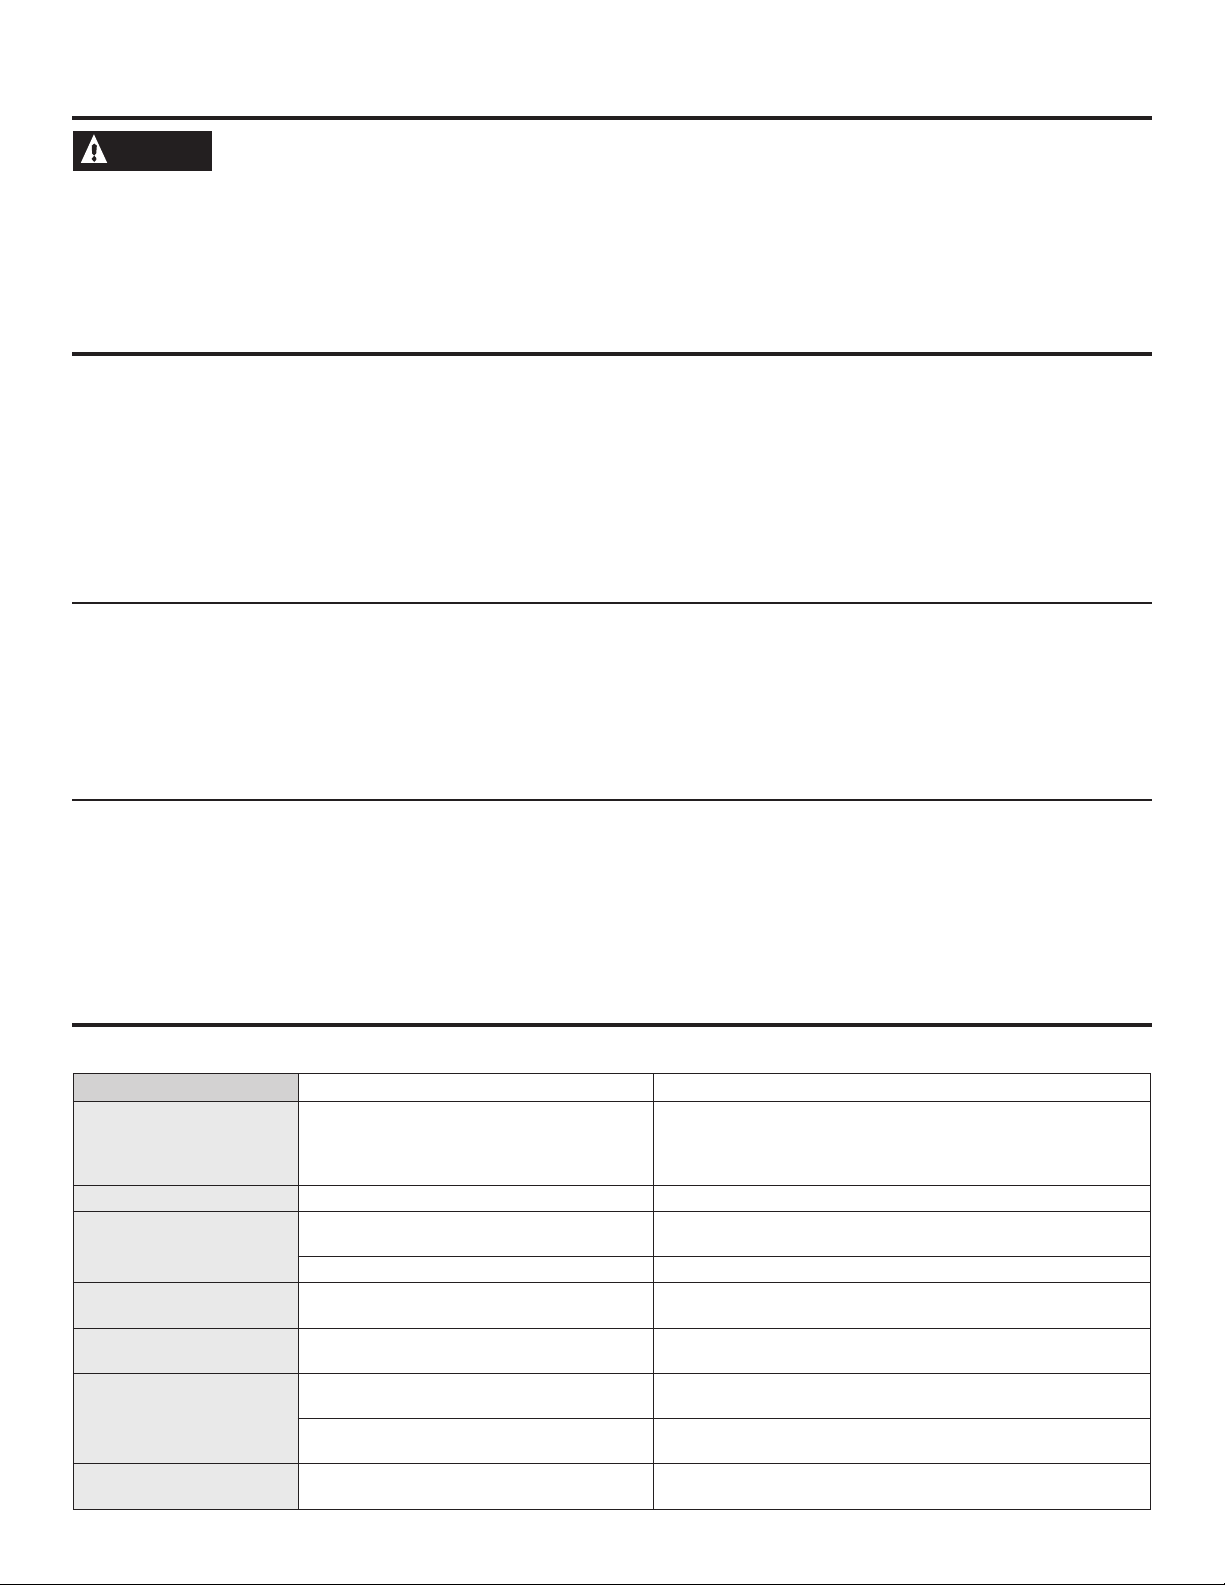
Problem Possible Cause What To Do
My new oven doesn't
cook like my old one. Is
something wrong with the
temperature settings?
Your new oven has a different cooking
system from your old oven and therefore
may cook differently than your old oven.
RefertotheCookingGuideinthefullowner'smanualfor
recommendations.Ifyouthinkyournewovenistoohotortoo
cold,youcanadjustthetemperaturetomeetyourpreferences.
SeetheSpecialFeaturessection.
Oven light does not work Light bulb is loose or defective. Tightenorreplacebulb.Seefullowner'smanual.
Oven will not self-clean The temperature is too high to set a self-
clean operation.
Allowoventocool.
Oven controls improperly set. SeetheCleaningtheOvensection.
Excessive smoking during
clean cycle
Excessive soil or grease. PresstheCancel/Offpad.Wipeuptheexcesssoilandresetthe
clean cycle.
Oven door will not open
Temperature inside the oven has not
dropped below the unlocking temperature.
PresstheCancel/Offpad.Allowtheoventocoolbelowthe
unlocking temperature.
Top burners do not burn
evenly
Improper burner assembly. Makesuretheburnercapsareseatedcorrectly.SeetheCleaning
theCooktopsection.
Burner slots on the side of the burner may
be clogged.
Removetheburnersforcleaning.SeetheCleaningtheCooktop
section.
Oven temperature too hot
or too cold
Oven temperature needs adjustment. SeetheSpecialFeaturessection.
Troubleshooting
For additional troubleshooting tips, see the full owner’s manual at www.GEAppliances.com.
CAUTION
Do not use any type of foil or oven liner to cover the oven bottom. These items can block airflow
or melt, resulting in damage to the product and risk of carbon monoxide poisoning, smoke or fire. Damage from
improper use of these items is not covered by the product warranty.
Foilmaybeusedtocatchspillsbyplacingasheetonalowerrack,severalinchesbelowthefood.Donotusemorefoil
thannecessary,andneverentirelycoveranovenrackwithaluminumfoil.Keepfoilatleast1-1/2”fromovenwallsto
allowproperheatcirculation.

8
49-85224-2
Stapleyourreceipthere.Proofoftheoriginalpurchase
dateisneededtoobtainserviceunderthewarranty.
Thank You! ... for your purchase of a GE Brand appliance.
GE Gas Range Warranty
GEAppliances.com
AllwarrantyserviceisprovidedbyourFactoryServiceCenters,oranauthorizedCustomerCare
®
technician.
Toscheduleserviceonline,visitusatwww.geappliances.com/service_and_support/,orcall800.GE.CARES
(800.432.2737).Pleasehaveserialnumberandmodelnumberavailablewhencallingforservice.
Servicingyourappliancemayrequiretheuseoftheonboarddataportfordiagnostics.ThisgivesaGEfactory
servicetechniciantheabilitytoquicklydiagnoseanyissueswithyourapplianceandhelpsGEimproveitsproducts
byprovidingGEwithinformationonyourappliance.IfyoudonotwantyourappliancedatatobesenttoGE,please
adviseyourtechniciannottosubmitthedatatoGEatthetimeofservice.
Fortheperiodofoneyearfromthedateoftheoriginalpurchase,GEwillprovideanypartoftherangewhichfailsdue
toadefectinmaterialsorworkmanship.Duringthislimitedone-yearwarranty,GEwillalsoprovide,freeofcharge,all
labor and in-home service to replace the defective part.
What GE will not cover:
■ Servicetripstoyourhometoteachyouhowtouse
the product.
■ Improperinstallation,deliveryormaintenance.
■ Failureoftheproductifitisabused,misused,
modified or used for other than the intended purpose
or used commercially.
■ Replacementofhousefusesorresettingofcircuit
breakers.
■ Damagetotheproductcausedbyaccident,fire,
floodsoractsofGod.
■ Damagetofinish,suchassurfacerust,tarnish,orsmall
blemishesnotreportedwithin48hoursofdelivery.
■ Incidentalorconsequentialdamagecausedby
possibledefectswiththisappliance.
■ Damage caused after delivery.
■ Productnotaccessibletoproviderequiredservice.
■ Servicetorepairorreplacelightbulbs,exceptforLED
lamps.
EXCLUSION OF IMPLIED WARRANTIES
YoursoleandexclusiveremedyisproductrepairasprovidedinthisLimitedWarranty.Anyimpliedwarranties,
includingtheimpliedwarrantiesofmerchantabilityorfitnessforaparticularpurpose,arelimitedtooneyearorthe
shortestperiodallowedbylaw.
Thiswarrantyisextendedtotheoriginalpurchaserandanysucceedingownerforproductspurchasedforhomeuse
withintheUSA.IftheproductislocatedinanareawhereservicebyaGEAuthorizedServicerisnotavailable,you
mayberesponsibleforatripchargeoryoumayberequiredtobringtheproducttoanAuthorizedGEServicelocation
forservice.InAlaska,thewarrantyexcludesthecostofshippingorservicecallstoyourhome.
Somestatesdonotallowtheexclusionorlimitationofincidentalorconsequentialdamages.Thiswarrantygivesyou
specificlegalrights,andyoumayalsohaveotherrightswhichvaryfromstatetostate.Toknowwhatyourlegalrights
are,consultyourlocalorstateconsumeraffairsofficeoryourstate’sAttorneyGeneral.
Warrantor: General Electric Company. Louisville, KY 40225
Extended Warranties:PurchaseaGEextendedwarrantyandlearnaboutspecialdiscountsthatareavailablewhile
yourwarrantyisstillineffect.Youcanpurchaseitonlineanytime
www.geappliances.com/service_and_support/shop-for-extended-service-plans.htm
orcall800.626.2224duringnormalbusinesshours.GEConsumerHomeServiceswillstillbethereafteryour
warrantyexpires.
Register Your Appliance: Registeryournewapplianceonlineatyourconvenience!
www.geappliances.com/service_and_support/register/
Timelyproductregistrationwillallowforenhancedcommunicationandpromptserviceunderthetermsofyourwarranty,
shouldtheneedarise.Youmayalsomailinthepre-printedregistrationcardincludedinthepackingmaterial.