Loading ...
Loading ...
Loading ...
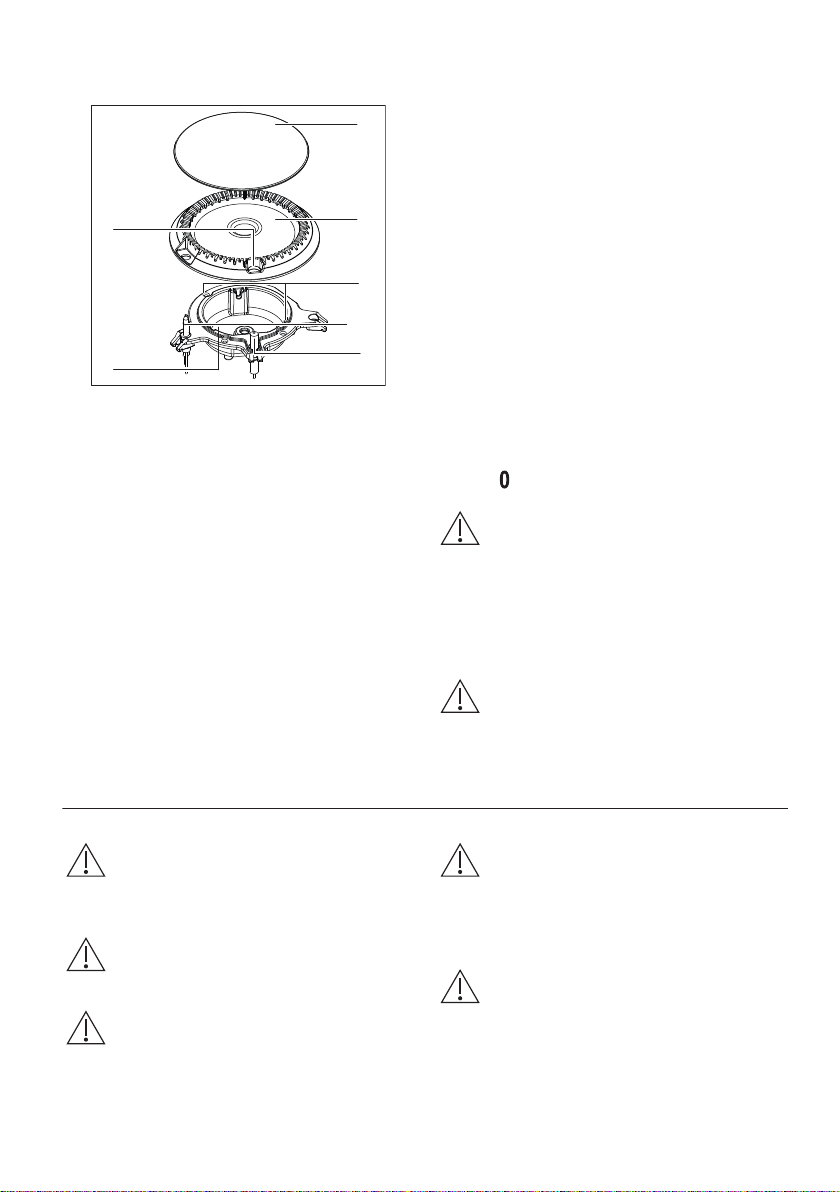
BURNER OVERVIEW
A
B
C
G
F
E
D
A. Burner cap
B. Burner crown
C. Slots
D. Thermocouple
E. Ignition candle
F. Burner body
G. Hole for the ignition candle
REPLACING BURNER PARTS
1. Put carefully the burner crown on the burner
body. Let the crown fall freely onto the body.
Do not use force.
Make sure that the hole in the crown is above
the ignition candle.
Make sure that the location pegs are in the
slots in the burner body.
Make sure that you can move the crown a small
distance from side to side.
2. Put the burner cap centrally on top of the
crown.
Make sure that the cap is correctly installed,
with the enamel side up and you can move the
cap from side to side and front to back.
3. Light the burner.
If the burner does not ignite, adjust the crown and
cap again.
TURNING THE BURNER OFF
To put the flame out, turn the knob to the off
position .
WARNING! Always turn the flame
down or switch it off before you
remove the pans from the burner.
LID SAFETY DEVICE
Lid has safety device, which cuts off the gas supply
for the hob. Closing the lid activates the safety
device.
WARNING! Always use the knob for
the hob to switch off a burner. Do not
use the lid as a cut-off device.
HOB - HINTS AND TIPS
WARNING! Refer to Safety chapters.
COOKWARE
WARNING! Do not put unstable or
damaged pots on the burner to
prevent spills and injuries.
CAUTION! Make sure that pot
handles are not above the front edge
of the cooktop.
CAUTION! Make sure that the pots
are placed centrally on the burner in
order to get the maximum stability and
a lower gas consumption.
DIAMETERS OF COOKWARE
WARNING! Use cookware with
diameters applicable to the size of
burners.
9
Loading ...
Loading ...
Loading ...