Loading ...
Loading ...
Loading ...
14
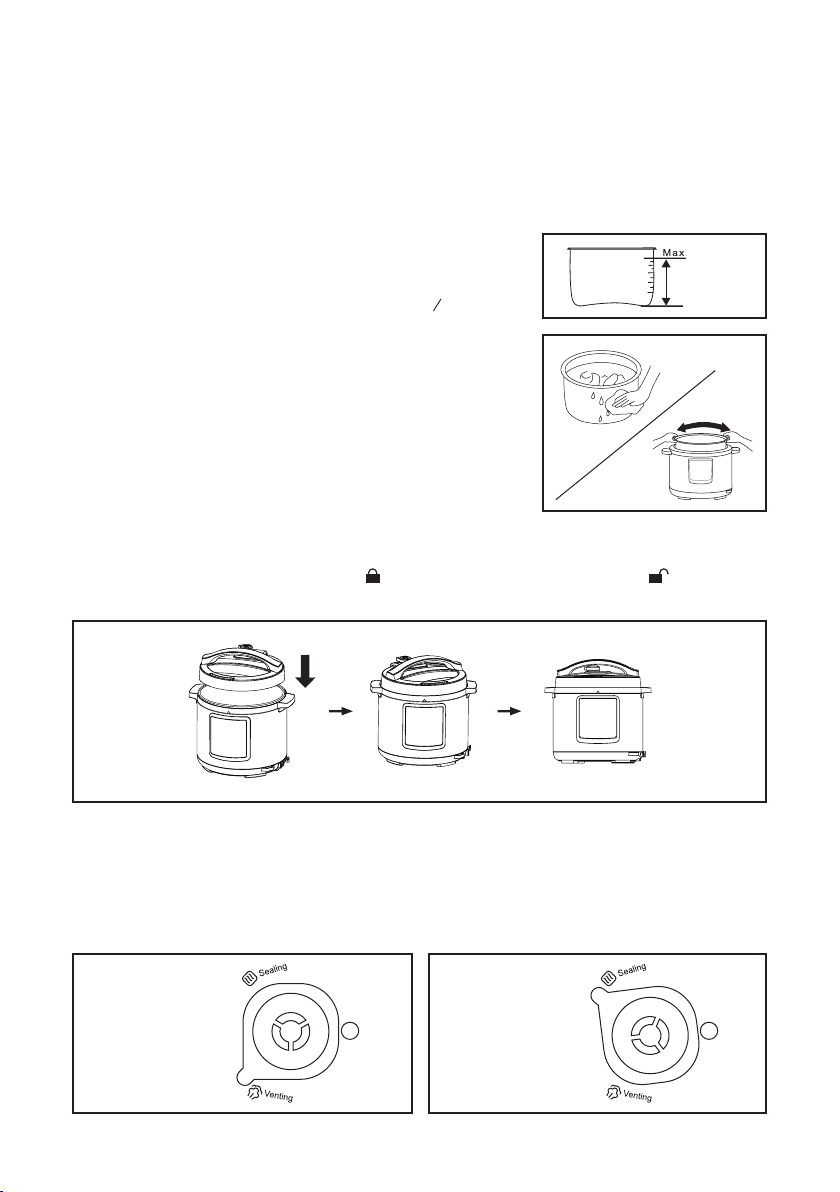
Figure 8
Figure 9
COOKING PREPARATION
1� Open the lid cover in a counter clockwise rotation until the arrow on the lid is in line with the arrow on the
base� Then lift the cover�
2� Ensure that all the parts on the lid are mounted properly including the float valve, exhaust valve, rubber
gasket, and anti-block shield� Check the float valve and exhaust valve for any obstructions� The rubber gasket
should be firmly inside its holding rack and the float valve should be able to move up and down easily�
3� Take the stainless steel inner pot out of the base and fill with the
food and liquid you want to cook� The total amount of food and
liquid should NEVER exceed the maximum level marked on the inner
pot� It is recommended to not fill the inner pot over
2
3
full� Some
foods that expand when they are cooked like rice, beans, or dried
vegetables, should not fill more than ½ of the inner pot� Over filling
may cause the vent pipes to clog which develops excess pressure
that could lead to spillage, damaging the unit, or personal injury�
(Refer to Figure 8�)
4� Remove any foreign objects from the multicooker and wipe the
inner pot and inside of the multicooker with a dry cloth� Place the
inner pot inside the multicooker and rotate slightly to ensure it has
good contact with the heating element� (Refer to Figure 9�)
5� If your desired cooking preset requires, place the lid on the multicooker (see the Preset Guidelines below)�
Hold the handle and rotate the handle 30° clockwise until it locks into place, making a sound, and aligning
the arrows on the lid and base so it is the position� If the lid is not shut properly, the symbol will
light up under the Magic Chef name� (Refer to Figure 10�)
Figure 12Figure 11
6� For presets requiring a lid, position the exhaust valve in the correct position� When the silver float valve is up,
there is pressure inside the cooker� When it is down, there is no pressure inside the cooker� The exhaust valve can
be in two positions� The “Sealing” position maintains airtight cooking conditions and is used for most presets� The
“Venting” position allows steam to be constantly released� This position can also be used for a quick release to
allow the pressure to escape immediately, which can be helpful once cooking is complete so you don’t have to
wait for the pressure to release� See below for information on the exhaust valve position� (Refer to Figure 11 and 12�)
Exhaust valve
in venting position:
Exhaust valve
in sealing position:
Figure 10
Loading ...
Loading ...
Loading ...